🧶 Beautiful ✨ Detailed 💝 Adorable

Cuddly Nessie Monster Amigurumi Pattern

Cuddly Nessie Monster Amigurumi Pattern
4.9★Rating
8-10 HoursTime Needed
2.6KMade This
✂️

Advanced Level

Designed for experienced crocheters, these patterns involve intricate designs and complex techniques to challenge and inspire.

⏱️

All-Day Adventure

Requires 8-10 hours, ideal for a full day of immersive crocheting.

🐰

Whimsical Buddy

Playful characters full of personality, designed to spark imagination and become cherished playtime favorites.

About This Cuddly Nessie Monster Amigurumi Pattern

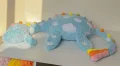
Cuddly Nessie Monster Amigurumi Pattern crochet pattern - detailed view

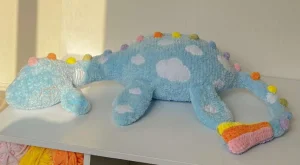
Surprise a little one with the ultimate nursery companion or keep her for yourself as a cozy reading buddy—she looks absolutely magical perched on a bed or sofa and gets compliments every single time.

Why You'll Love This Cuddly Nessie Monster Amigurumi Pattern

I honestly fell in love with the brushing technique used here; it transforms the yarn into something so soft it feels like a real cloud. Plus, seeing all those rainbow horns lined up is just so satisfying for any color lover!

Cuddly Nessie Monster Amigurumi Pattern step 1 Cuddly Nessie Monster Amigurumi Pattern step 2 Cuddly Nessie Monster Amigurumi Pattern step 3 Cuddly Nessie Monster Amigurumi Pattern step 4

Switch Things Up

This project was such a labor of love for me. When I first started working with this incredibly fluffy yarn, I'll admit I was a little intimidated—it is so hard to see your stitches! But once I realized that I could 'feel' my way through the rows and use thread markers to guide the shaping, everything clicked.

I really wanted to create something that felt like a hug in physical form. The addition of the felt clouds was a bit of an experiment, but it totally transformed the vibe of the monster into something dreamlike. If you find your fingers getting a bit sore from all the sewing (18 horns is no joke!), definitely take a break. I like to spread the assembly over a few days so I can really enjoy the process of seeing her personality emerge.

One little tip: if you want a 'Sunset Nessie,' try using shades of orange and pink for the body instead of blue! It looks stunning with the rainbow accents. I can't wait to see your versions.

Common Mistakes & How to Fix Them

✗ When working Row 8, it is very easy to lose track of the four separate thread markers—make sure they stay aligned so the muzzle shape does not twist.✗ If you stuff the body too tightly at Row 82, the felt clouds will not sit flat against the surface and might look puckered when you sew them on.✗ Do not skip the stretching steps between rows 22 and 41; if the neck is not stretched as you go, it might end up too stiff or will not have that graceful curve.✗ When embroidering the eyes, cutting the fluffy yarn too close to the base can accidentally snip your stitches—always keep your scissors angled away from the fabric.

Cuddly Nessie Monster Amigurumi Pattern

You are going to love bringing this gentle giant to life! Nessie isn't just a toy; she is a soft, cloud-covered friend that is perfect for big hugs and nursery decor. We will be working with super fluffy yarn to get that signature texture, and I will walk you through every single row to make sure your monster turns out just as cuddly as you imagined.

Advanced 8-10 Hours

Materials Needed for Cuddly Nessie Monster Amigurumi Pattern

— Main Fabric

  • 01
    4 to 5 skeins of super fluffy yarn in your choice of base color like Himalaya Koala or YarnArt Fable Fur
  • 02
    Small amounts of plush yarn in six rainbow shades including pink, orange, yellow, green, blue, and purple for the horns and tail
  • 03
    White cotton thread for attaching the felt clouds
  • 04
    Cotton thread in six rainbow colors for the eye embroidery and tail assembly

— Tools Required

  • 01
    4.5mm crochet hook for the main construction
  • 02
    2.5mm crochet hook for weaving in ends and detail work
  • 03
    High-quality polyester hollow fiber stuffing
  • 04
    Sharp fabric scissors for cutting felt and trimming yarn
  • 05
    A4 sheets of white felt for the cloud details
  • 06
    Sewing pins and knitting needles for positioning pieces
  • 07
    Washable fabric marker for tracing cloud shapes
  • 08
    Tapestry needle and a smaller sewing needle
  • 09
    A clean toothbrush for brushing out the fur
  • 10
    Cardboard for creating cloud templates

Progress Tracker

0% Complete

— 1. Head, Neck, Body & Tail :

Info :

This entire section is crocheted as one continuous piece. Use a contrasting thread as a marker to track your rounds.

Row 1 :

Start with a mr or ch 2 and work 8 sc into the first stitch (8)

Row 2 :

8 x inc (16)

Row 3 :

8 x (1 sc, 1 inc) (24)

Row 4 :

24 sc (24)

Row 5 :

4 x (5 sc, 1 inc) (28)

Row 6-7 :

28 sc (28)

Info :

Prepare 4 extra thread markers for the next row to define the muzzle shape.

Row 8 :

Mark start, 3 x (1 sc, 1 inc), place 2nd marker, 8 sc, place 3rd marker, 3 x (1 inc, 1 sc), place 4th marker, 8 inc (42)

Row 9 :

42 sc (42)

Row 10 :

Mark start, 3 x (1 inc, 2 sc), 2nd marker, 8 sc, 3rd marker, 3 x (2 sc, 1 inc), 4th marker, 1 inc, 6 sc, 2 inc, 6 sc, 1 inc (52)

Row 11-16 :

52 sc (52)

Row 17 :

3 x (1 dec, 2 sc), 8 sc, 3 x (2 sc, 1 dec), 1 dec, 6 sc, 2 dec, 6 sc, 1 dec (42)

Row 18 :

6 x (5 sc, 1 dec) (36)

Row 19 :

2 sc, 1 dec, 5 x (4 sc, 1 dec), 2 sc (30)

Row 20 :

4 sc, 1 dec, 2 x (8 sc, 1 dec), 4 sc (27)

Row 21 :

3 x (7 sc, 1 dec) (24)

Info :

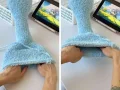
Stretch the fabric slightly and begin adding stuffing, ensuring even distribution.

Row 22-26 :

24 sc (24)

Info :

Keep stretching the neck and filling the head fully as you progress.

Row 27-31 :

24 sc (24)

Row 32-36 :

24 sc (24)

Row 37-41 :

24 sc (24)

Row 42 :

4 x (5 sc, 1 inc) (28)

Row 43 :

28 sc (28)

Row 44 :

4 x (6 sc, 1 inc) (32)

Info :

The next row shifts the beginning of the round to maintain proper symmetry.

Row 45 :

5 sc, move marker to this new start, 1 inc, 3 sc, 1 inc, place 2nd marker, 10 sc, place 3rd marker, 1 inc, 3 sc, 1 inc, place 4th marker, 1 inc, 10 sc, 1 inc (38)

Row 46 :

30 sc, 2 inc, 6 sc (40)

Row 47 :

1 inc, 22 sc, 1 inc, 7 sc, 2 inc, 7 sc (44)

Row 48 :

1 inc, 5 sc, 2 inc, 10 sc, 2 inc, 5 sc, 2 inc, 2 sc, 1 inc, 2 sc, 1 inc, 4 sc, 1 inc, 2 sc, 1 inc, 2 sc, 1 inc (56)

Row 49 :

56 sc (56)

Row 50 :

1 inc, 7 sc, 2 inc, 12 sc, 2 inc, 7 sc, 2 inc, 22 sc, 1 inc (64)

Row 51-54 :

64 sc (64)

Row 55 :

1 inc, 9 sc, 2 inc, 14 sc, 2 inc, 9 sc, 1 inc, 26 sc (70)

Row 56-65 :

70 sc (70)

Info :

Stretch the body fabric thoroughly, paying extra attention to the neck junction.

Row 66 :

1 inc, 11 sc, 1 inc, 18 sc, 1 inc, 11 sc, 2 inc, 24 sc, 1 inc (76)

Row 67-72 :

76 sc (76)

Row 73 :

1 dec, 11 sc, 2 dec, 14 sc, 2 dec, 11 sc, 1 dec, 28 sc (70)

Row 74 :

70 sc (70)

Row 75 :

1 dec, 9 sc, 1 dec, 16 sc, 1 dec, 9 sc, 2 dec, 24 sc, 1 dec (64)

Row 76 :

64 sc (64)

Row 77 :

1 dec, 7 sc, 1 dec, 16 sc, 1 dec, 7 sc, 1 dec, 26 sc (60)

Row 78 :

60 sc (60)

Row 79 :

1 dec, 5 sc, 1 dec, 12 sc, 1 dec, 5 sc, 2 dec, 26 sc, 1 dec (54)

Row 80 :

9 x (4 sc, 1 dec) (45)

Row 81 :

1 dec, 3 sc, 1 dec, 11 sc, 1 dec, 3 sc, 1 dec, 9 sc, 1 dec, 9 sc (40)

Row 82 :

3 x (1 dec, 1 sc), 7 sc, 3 x (1 sc, 1 dec), 15 sc (34)

Info :

Stuff the body firmly but do not overfill. Use a tapestry needle to smooth the fiber from the outside.

Row 83 :

24 sc, 4 dec, 2 sc (30)

Row 84 :

4 sc, 1 dec, 16 sc, 3 dec, 2 sc (26)

Row 85 :

1 dec, 18 sc, 1 dec, 4 sc (24)

Row 86 :

24 sc (24)

Row 87 :

2 dec, 10 sc, 2 dec, 6 sc (20)

Row 88 :

18 sc, 1 dec (19)

Row 89 :

17 sc, 1 dec (18)

Row 90 :

16 sc, 1 dec (17)

Row 91 :

15 sc, 1 dec (16)

Row 92-95 :

16 sc (16)

Row 96-99 :

16 sc (16)

Row 100 :

14 sc, 1 dec (15)

Row 101 :

15 sc (15)

Row 102 :

13 sc, 1 dec (14)

Row 103-107 :

14 sc (14)

Row 108-112 :

14 sc (14)

Row 113 :

12 sc, 1 dec (13)

Row 114 :

13 sc (13)

Row 115 :

11 sc, 1 dec (12)

Row 116-117 :

12 sc (12)

Row 118-121 :

12 sc (12)

Row 122 :

2 x (4 sc, 1 dec) (10)

Row 123 :

10 sc (10)

Row 124 :

2 x (3 sc, 1 dec) (8)

Row 125 :

8 sc (8)

Info :

Cut yarn leaving a long tail, pull through, close the hole, and weave in ends.

— 2. Fins :

Info :

Create 4 identical fins. These pieces are not stuffed.

Row 1 :

6 sc in mr (6)

Row 2 :

3 x (1 sc, 1 inc) (9)

Row 3 :

3 x (2 sc, 1 inc) (12)

Row 4 :

3 x (3 sc, 1 inc) (15)

Row 5 :

3 x (4 sc, 1 inc) (18)

Row 6 :

3 x (5 sc, 1 inc) (21)

Row 7 :

3 x (6 sc, 1 inc) (24)

Row 8 :

3 x (7 sc, 1 inc) (27)

Row 9 :

3 x (8 sc, 1 inc) (30)

Row 10-15 :

30 sc (30)

Row 16 :

3 dec, 24 sc (27)

Row 17 :

1 dec, 25 sc (26)

Row 18 :

1 dec, 24 sc (25)

Row 19 :

1 dec, 23 sc (24)

Row 20 :

2 x (10 sc, 1 dec) (22)

Row 21 :

22 sc (22)

Row 22 :

1 sc, then fold flat and work 11 sc through both layers to close. Leave tail for sewing.

— 3. Left Ear :

Row 1 :

ch 12, starting in 2nd ch: 10 sc, 4 sc in last ch, rotate to work on opposite side: 10 sc (24)

Row 2 :

1 inc, 5 sc, 4 x (1 inc, 1 sc), 10 sc (29)

Row 3 :

1 sc, 1 inc, 8 sc, 6 inc, 13 sc (36)

Row 4 :

2 sc, 1 inc, 33 sc (37)

Info :

Finish and leave a long tail for attachment.

— 4. Right Ear :

Row 1 :

ch 12, starting in 2nd ch: 10 sc, 4 sc in last ch, rotate to work on opposite side: 10 sc (24)

Row 2 :

10 sc, 4 x (1 sc, 1 inc), 5 sc, 1 inc (29)

Row 3 :

13 sc, 6 inc, 8 sc, 1 inc, 1 sc (36)

Row 4 :

33 sc, 1 inc, 2 sc (37)

Info :

Finish and leave a long tail for attachment.

— 5. Rainbow Horns :

Info :

Make 18 horns total: 3 pieces in each of the 6 rainbow colors.

Row 1 :

6 sc in mr (6)

Row 2 :

3 x (1 sc, 1 inc) (9)

Row 3 :

9 sc (9)

Info :

Turn inside out to tighten the center, then flip back. Stuff lightly and hide yarn ends inside.

— 6. Rainbow Tail Detail :

Info :

Work in back-and-forth rows using the 6 rainbow colors. Start with pink.

Row 1 :

ch 21, start in 2nd ch: 5 sc, 5 hdc, 5 dc, 5 tr, ch 1, turn. Across flo: 20 sc. Change to orange, ch 1, turn.

Row 2 :

Across blo: 5 sc, 5 hdc, 5 dc, 5 tr, ch 1, turn. Across flo: 20 sc. Change to yellow, ch 1, turn.

Row 3 :

Across blo: 5 sc, 5 hdc, 5 dc, 5 tr, ch 1, turn. Across flo: 20 sc. Change to green, ch 1, turn.

Row 4 :

Across blo: 5 sc, 5 hdc, 5 dc, 5 tr, ch 1, turn. Across flo: 20 sc. Change to blue, ch 1, turn.

Row 5 :

Across blo: 5 sc, 5 hdc, 5 dc, 5 tr, ch 1, turn. Across flo: 20 sc. Change to purple and finish off.

Assembly Instructions

  • Use knitting needles to pin the four fins evenly onto the body, checking from every angle to ensure they are perfectly symmetrical before sewing.
  • Attach the ears to the head by sewing in a full circle—front, top, back, and bottom—to make sure they stand up properly.
  • Line up the 18 rainbow horns along the spine, spacing them about 3cm apart in a repeating color sequence from head to tail.
  • Sew the rainbow tail detail onto the very tip of the tail using cotton thread, adding a tiny bit of stuffing if you want extra volume.
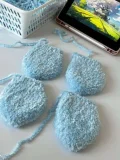
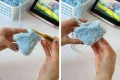
  • Pin your felt clouds across the body in a random, natural-looking pattern and secure them using small, neat stitches with white thread.
  • Embroider the rainbow eyes onto the face, first trimming away a little of the fluffy yarn to create a smooth surface for your stitches.

Important Notes

  • 💡Using contrasting thread as markers is a lifesaver when working with fuzzy yarn where traditional stitches are hard to see.
  • 💡Don't be afraid to really stretch the piece as you go—it helps the fluffy fibers settle and gives the monster its final shape.
  • 💡When stuffing the body, use your hands or even your fists to press the filling into the sides for a smooth, rounded look.
  • 💡Brushing your finished monster with a toothbrush is the secret to that professional fluffiness.
  • 💡If you're using a different yarn weight, remember to adjust your hook size so the stuffing doesn't peek through the stitches.

You've done it! Your very own Nessie is ready for her first adventure. I hope you enjoyed the process of watching her grow from a tiny muzzle into this massive, cloud-covered beauty. There's something so therapeutic about working through those long rows and then seeing all the colors come together. Take a moment to give her a big squeeze—you’ve earned it! I'd love to see the colors you chose for your rainbow details. Happy crafting! 🧶✨💙
You ask,

we answer.

FAQs

Can I use safety eyes instead of embroidering them?

Absolutely! If you prefer safety eyes, I’d recommend 12mm or 14mm sizes, but make sure to install them around Row 10 before you get too far into the neck.

How do I keep track of my stitches in this fuzzy yarn?

It is all about feeling the gaps with your fingers rather than looking for 'Vs'. Using the thread markers mentioned in the pattern is also non-negotiable for keeping your place!

Is the brushing step really necessary?

It is optional, but it makes a huge difference! Brushing pulls the fibers out of the stitches, hiding the seams and making the whole project look like a solid piece of fur.

The neck seems a bit floppy, did I do something wrong?

The neck is quite long, so it needs firm stuffing. Try adding more fiber and using a knitting needle to push it all the way up into the head junction.