About This Dead Crewmate Amigurumi Pattern
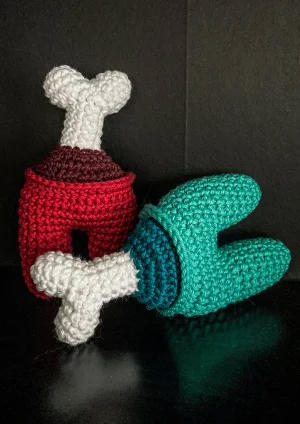
This little guy makes the ultimate gift for the gamer in your life. It is small enough to sit perfectly on a computer monitor or shelf, adding a handmade touch to any gaming setup.
Ideal for those with basic crocheting experience, featuring slightly more advanced stitches and techniques to expand your skills.
Fits nicely into a free afternoon — 2 to 5 hours of focused, enjoyable crocheting.
Playful characters full of personality, designed to spark imagination and become cherished playtime favorites.
This little guy makes the ultimate gift for the gamer in your life. It is small enough to sit perfectly on a computer monitor or shelf, adding a handmade touch to any gaming setup.
I honestly had the best time figuring out the bone assembly for this one! There is something so satisfying about the way the two 'bone bumps' join together to form the stem. It's a great project for using up those half-skeins of yarn you have lying around, and the result is just so cute in a weirdly dark way.
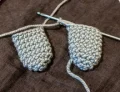
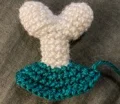
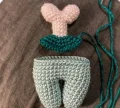
I still remember the first time I saw one of these little guys on my screen—I knew I had to figure out how to make a 3D version! There is something so satisfying about the way the bone stem fits into the 'meat' base. When I was testing this, I found that using a slightly smaller hook than usual really helps keep those stitches tight so the stuffing doesn't peek through, especially on the white bone parts.
If you want to get really creative, try making the 'meat' section in different shades of pink or dark red to see what looks best with your main body color. I actually made a teal one with a dark navy center and it looked amazing! Don't be afraid to play around with the tension on the legs too; you want them firm enough to stand up on their own without wobbling. It is such a quick project that you can easily finish one while catching up on your favorite show. I can't wait to see which colors you choose for your crew!
Ever felt like your desk was missing a little bit of mystery? This quirky little crewmate is the perfect project for when you want something quick, fun, and a little bit cheeky. I love how the iconic bone detail pops against the bright body colors—it's such a conversation starter! You'll find this works up so fast that you might end up making a whole rainbow of fallen friends.
Using your main body color, work 5 sc into a MR (5)
Work 1 inc into every st around (10)
Repeat [1 sc, 1 inc] 5 times (15)
Work 1 sc in each st around (15)
For the first leg, sl st and fasten off. For the second leg, do not cut the yarn as you will continue straight into the body.
ch 3 and join to the first leg. Work 15 sc around the first leg, 3 sc across the chain, 15 sc around the second leg, and 3 sc across the other side of the chain (36)
Work 1 sc in each st around (36)
Fasten off your yarn and leave a tail for later if you prefer, though we will mostly be sewing with the bone base tail.
Using white yarn, work 6 sc into a MR (6)
Work 1 inc into every st around (12)
Work 1 sc in each st around (12)
Fasten off the first bump with a sl st. Keep the yarn attached on the second bump.
Join the two bumps together by crocheting 1 sc in every st around both pieces (24)
Work 12 dec around (12)
Work 1 sc in each st around (12)
Switch to your secondary 'meat' color (Aubergine or Dark Red).
Repeat [1 sc, 1 inc] 6 times (18)
Repeat [1 sc, 1 inc, 1 sc] 6 times (24)
Repeat [3 sc, 1 inc] 6 times (30)
Repeat [2 sc, 1 inc, 2 sc] 6 times (36)
Finish with a sl st and leave a long tail for sewing the pieces together.
I really hope you enjoyed making this little guy as much as I did! There's something so satisfying about seeing that little bone pop out of the top for the first time. Whether he's a gift for a friend or a new addition to your own desk, he's sure to bring a bit of 'sus' energy to the room. Don't forget to experiment with different colors—it's so fun to see them all lined up together. Keep those hooks moving and happy crafting! 🧶✨
Since this is the 'dead' version of the character, it doesn't actually have eyes or a visor! However, if you wanted to make a living version, you'd need to add a small oval visor to the front before stuffing.
Check your stitch counts in Round 15 of the base and Round 15 of the body. Both should have exactly 36 stitches. If your tension was looser on the base, it might feel bigger—try using a slightly tighter grip for that section.
I recommend a standard worsted weight cotton or acrylic. Cotton gives a really nice stitch definition which looks great on the bone, but acrylic is a bit more forgiving if you need to hide any small gaps.
As long as the 'right' sides of your crochet are facing out on both legs, the join will look fine. Just make sure the legs are parallel so your crewmate doesn't look like he's walking in two different directions!
