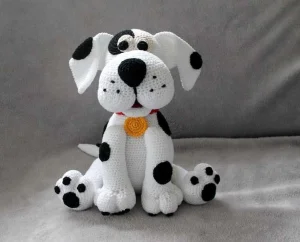
Meet Dotty — a chubby, spotty little Dalmatian who sits up with the most irresistible puppy eyes you've ever seen on a crocheted dog. This pattern walks you through every single piece, from her expressive double-bubble snout to the tiny black paw dots that make her look so real. You'll love how each section comes together to create something that genuinely looks like it belongs on a shelf in a children's book illustrator's studio. Whether you're making Dotty as a gift or keeping her for yourself (no judgment there), this is one of those projects where you'll find yourself sneaking in an extra round just to see how she's coming along. The included bone and little food bowl make her a complete set — a full little world you made with your own hands.
Progress Tracker
0% Complete
— 1. Body & Head (worked in one piece, white, crocheted in rounds) :
Info :
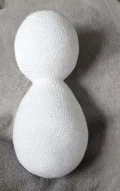
The body and head are worked together as one continuous piece in white. Begin at the base of the body and work upward through the body, then continue into the head without breaking yarn. Stuff the body before beginning the head section.
Round 1 :
Start with mc 6. (6)
Round 2 :
Work 1 inc in each st around, 6 times. (12)
Round 3 :
* 1 sc, 1 inc *, repeat 6 times. (18)
Round 4 :
* 2 sc, 1 inc *, repeat 6 times. (24)
Round 5 :
* 3 sc, 1 inc *, repeat 6 times. (30)
Round 6 :
* 4 sc, 1 inc *, repeat 6 times. (36)
Round 7 :
* 5 sc, 1 inc *, repeat 6 times. (42)
Round 8 :
* 6 sc, 1 inc *, repeat 6 times. (48)
Round 9 :
* 7 sc, 1 inc *, repeat 6 times. (54)
Round 10 :
* 8 sc, 1 inc *, repeat 6 times. (60)
Round 11 :
* 9 sc, 1 inc *, repeat 6 times. (66)
Round 12 :
* 10 sc, 1 inc *, repeat 6 times. (72)
Round 13 :
* 11 sc, 1 inc *, repeat 6 times. (78)
Round 15 :
* 12 sc, 1 inc *, repeat 6 times. (84)
Round 18 :
* 13 sc, 1 inc *, repeat 6 times. (90)
Round 19 :
90 sc. Repeat this round a total of 11 times (rounds 19 through 29 inclusive are all 90 sc). (90)
Round 20 :
* 28 sc, 1 dec *, repeat 3 times. (87)
Round 21 :
* 27 sc, 1 dec *, repeat 3 times. (84)
Round 22 :
* 26 sc, 1 dec *, repeat 3 times. (81)
Round 23 :
* 25 sc, 1 dec *, repeat 3 times. (78)
Round 24 :
* 24 sc, 1 dec *, repeat 3 times. (75)
Round 25 :
* 23 sc, 1 dec *, repeat 3 times. (72)
Round 26 :
* 22 sc, 1 dec *, repeat 3 times. (69)
Round 27 :
* 21 sc, 1 dec *, repeat 3 times. (66)
Round 28 :
* 20 sc, 1 dec *, repeat 3 times. (63)
Round 29 :
* 19 sc, 1 dec *, repeat 3 times. (60)
Round 30 :
* 18 sc, 1 dec *, repeat 3 times. (57)
Round 31 :
* 17 sc, 1 dec *, repeat 3 times. (54)
Round 32 :
* 16 sc, 1 dec *, repeat 3 times. (51)
Round 33 :
* 15 sc, 1 dec *, repeat 3 times. (48)
Round 34 :
* 14 sc, 1 dec *, repeat 3 times. (45)
Round 35 :
* 13 sc, 1 dec *, repeat 3 times. (42)
Round 36 :
* 12 sc, 1 dec *, repeat 3 times. (39)
Round 37 :
* 11 sc, 1 dec *, repeat 3 times. (36)
Round 38 :
* 10 sc, 1 dec *, repeat 3 times. (33)
Round 39 :
* 9 sc, 1 dec *, repeat 3 times. (30)
Round 40 :
* 8 sc, 1 dec *, repeat 3 times. (27)
Round 41 :
* 7 sc, 1 dec *, repeat 3 times — this is the narrowest point between body and head, stuff the body firmly before continuing. (24)
Info :
Head begins here. Continue working upward from round 41 without breaking yarn.
Round 42 :
* 3 sc, 1 inc *, repeat 6 times. (30)
Round 43 :
* 4 sc, 1 inc *, repeat 6 times. (36)
Round 44 :
* 5 sc, 1 inc *, repeat 6 times. (42)
Round 45 :
* 6 sc, 1 inc *, repeat 6 times. (48)
Round 46 :
* 7 sc, 1 inc *, repeat 6 times. (54)
Round 47 :
* 8 sc, 1 inc *, repeat 6 times. (60)
Round 49 :
* 9 sc, 1 inc *, repeat 6 times. (66)
Round 50 :
* 10 sc, 1 inc *, repeat 6 times. (72)
Round 51 :
72 sc. Repeat this round a total of 9 times (rounds 51 through 59 inclusive are all 72 sc). (72)
Round 52 :
* 22 sc, 1 dec *, repeat 3 times. (69)
Round 53 :
* 21 sc, 1 dec *, repeat 3 times. (66)
Round 54 :
* 20 sc, 1 dec *, repeat 3 times. (63)
Round 55 :
* 19 sc, 1 dec *, repeat 3 times. (60)
Round 56 :
* 18 sc, 1 dec *, repeat 3 times. (57)
Round 57 :
* 17 sc, 1 dec *, repeat 3 times. (54)
Round 58 :
* 16 sc, 1 dec *, repeat 3 times. (51)
Round 59 :
* 15 sc, 1 dec *, repeat 3 times. (48)
Round 60 :
* 14 sc, 1 dec *, repeat 3 times. (45)
Round 61 :
* 13 sc, 1 dec *, repeat 3 times. (42)
Round 62 :
* 12 sc, 1 dec *, repeat 3 times. (39)
Round 63 :
* 11 sc, 1 dec *, repeat 3 times. (36)
Round 64 :
* 10 sc, 1 dec *, repeat 3 times. (33)
Round 65 :
* 9 sc, 1 dec *, repeat 3 times. (30)
Round 66 :
* 8 sc, 1 dec *, repeat 3 times. (27)
Round 67 :
* 7 sc, 1 dec *, repeat 3 times. (24)
Round 68 :
* 2 sc, 1 dec *, repeat 6 times — add remaining stuffing to the head now. (18)
Round 69 :
* 1 sc, 1 dec *, repeat 6 times. (12)
Round 70 :
* 1 dec *, repeat 6 times — close and fasten off. (6)
— 2. Snout Upper Part (white, begin in rows then continue in rounds) :
Info :
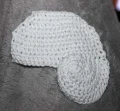
The snout is built in two phases. First, crochet a flat oval base in rows. Then, two semicircular bulges are added by re-joining yarn at stitch 7 on each side and building outward. Finally, join everything into rounds to complete and shape the snout.
Row 2 :
12 sc across. (12)
Row 3 :
1 inc, 10 sc, 1 inc. (14)
Row 4 :
1 inc, 12 sc, 1 inc. (16)
Row 5 :
1 inc, 14 sc, 1 inc. (18)
Row 6 :
1 inc, 16 sc, 1 inc. (20)
Row 7 :
1 inc, 18 sc, 1 inc. (22)
Row 8 :
22 sc. Repeat this row a total of 4 times. (22)
Info :
Now begin the first semicircle. Re-join yarn at stitch 7 counting from one side of the flat oval base. Work 3 sc into stitch 7, then 1 dc into the next stitch and turn. This forms the start of the first rounded bulge on the snout. Continue the following rows to build this semicircle, ending each with a sl st to close the curve.
Snout Row 10 :
3 sc into stitch 7, 1 dc into the following stitch, turn.
Snout Row 11 :
* 1 inc *, 3 times, dc. (6)
Snout Row 12 :
* 1 sc, 1 inc *, 3 times, sl st. (9)
Snout Row 13 :
* 2 sc, 1 inc *, 3 times, sl st. (12)
Snout Row 14 :
12 sc, sl st. (12)
Snout Row 15 :
* 3 sc, 1 inc *, 3 times, sl st. (15)
Snout Row 16 :
15 sc, sl st. (15)
Snout Row 17 :
* 4 sc, 1 inc *, 3 times, sl st. (18)
Snout Row 18 :
18 sc, sl st. (18)
Snout Row 19 :
* 5 sc, 1 inc *, 3 times, sl st. (21)
Info :
Re-join yarn at stitch 7 on the opposite side of the base oval and repeat rows 10–19 exactly to create the second matching semicircle on the other side of the snout.
Info :
Once both semicircles are complete, re-join yarn on the right side just after the second semicircle and begin working in continuous rounds around the entire snout. Work 36 sc around the upper flat portion and 42 sc around both semicircles for a total of 78 stitches.
Round 21 :
Work 36 sc across the upper section and 42 sc around the two bulge sections, joining into one continuous round. (78)
Round 22 :
78 sc. Repeat this round a total of 3 times. (78)
Round 23 :
36 sc, then * 3 sc, 1 dec * 4 times, 2 sc, then * 3 sc, 1 dec * 4 times. (70)
Round 24 :
36 sc, then * 2 sc, 1 dec * 4 times, 2 sc, then * 2 sc, 1 dec * 4 times. (62)
Round 25 :
* 4 sc, 1 dec * 6 times, then * 1 dec * 6 times, 2 sc, then * 1 dec * 6 times. (44)
Info :
Stuff the snout lightly, then sew it onto the head approximately 8 rounds up from the bottom of the head (the 'heels' or base of the head).
— 3. Eye Backing Dot (black, crocheted in rounds — make 1) :
Round 2 :
* 1 sc inc, 1 hdc inc *, repeat 4 times. (16)
Round 3 :
* 1 sc, 1 sc inc, 1 hdc, 1 hdc inc *, repeat 4 times. (24)
Round 4 :
* 2 sc, 1 inc *, repeat 8 times. (32)
Round 5 :
* 3 sc, 1 inc *, repeat 8 times. (40)
Info :
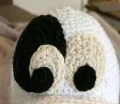
Sew this black dot to the left side of the head, just above the snout. The small left eye will be layered on top of it, and its pupil goes on the bottom of that eye. The large right eye sits directly beside it with its own pupil placed at the bottom.
— 4. Small Left Eye (natural off-white, crocheted in rounds — make 1) :
Round 2 :
* 1 sc inc *, 4 times, then * 1 hdc inc *, 2 times. (12)
Round 3 :
* 1 sc, 1 sc inc *, 4 times, then * 1 hdc, 1 hdc inc *, 2 times. (18)
— 5. Large Right Eye (natural off-white, crocheted in rounds — make 1) :
Round 2 :
* 1 sc inc *, 4 times, then * 1 hdc inc *, 2 times. (12)
Round 3 :
* 1 sc, 1 sc inc *, 4 times, then * 1 hdc, 1 hdc inc *, 2 times. (18)
Round 4 :
* 2 sc, 1 sc inc *, 4 times, then * 2 hdc, 1 hdc inc *, 2 times. (24)
— 6. Pupils (black, crocheted in rounds — make 2) :
Round 2 :
* 1 inc *, repeat 4 times. (8)
Info :
Make two pupils. Sew one pupil to the bottom of the small left eye, and the other to the bottom of the large right eye.
— 7. Nose (black, crocheted in rounds) :
Round 2 :
* 1 inc *, repeat 6 times. (12)
Round 3 :
* 2 sc, 2 inc *, repeat 3 times. (18)
Round 4 :
3 sc, 2 inc, * 4 sc, 2 inc *, 2 times, 1 sc. (24)
Round 5 :
4 sc, 2 inc, * 6 sc, 2 inc *, 2 times, 2 sc. (30)
Round 7 :
5 sc, 2 dec, * 6 sc, 2 dec *, 2 times, 1 sc. (24)
Round 8 :
* 2 sc, 1 dec *, repeat 6 times. (18)
Round 9 :
* 1 sc, 1 dec *, repeat 6 times — stuff now. (12)
Round 10 :
* 1 dec *, repeat 6 times — close and leave a long yarn tail. (6)
Info :
Position the nose at the center of the snout with one corner pointing downward. Use the long yarn tail to stitch around the snout twice at the point where the two semicircles meet to define that division. Then use the remaining tail to knot whisker-stubbles onto the snout — three knots per side.
— 8. Snout Bottom Part (white, crocheted in rounds) :
Round 2 :
* 1 inc *, repeat 5 times. (10)
Round 3 :
* 1 sc, 1 inc *, repeat 5 times. (15)
Round 4 :
* 2 sc, 1 inc *, repeat 5 times. (20)
Round 5 :
* 3 sc, 1 inc *, repeat 5 times. (25)
Round 6 :
25 sc. Repeat this round a total of 7 times. (25)
Info :
Add only a small amount of stuffing, pushing it toward the outer edges so the center stays flat. Then sew around the edge about 1 cm (0.4 inches) in from the edge to hold the stuffing in place. Attach this piece to the underside of the upper snout section, fixing the left and right edges only about 1.5 cm (0.6 inches) — the rest should remain free and open.
— 9. Tongue (dark purple, crocheted in rows, turn with a ch) :
Row 2 :
3 sc, then 4 sc into the last ch stitch, continue crocheting along the backside of the chain, 3 sc, turn. (10)
Row 3 :
4 sc, 2 inc, 4 sc. (12)
Row 4 :
5 sc, 2 inc, 5 sc. (14)
Info :
Sew the tongue onto the underside of the snout bottom piece. Be careful that the purple yarn tail doesn't show through the white fabric on the outside of this piece.
— 10. Ears (white, crocheted in rounds — make 2) :
Round 2 :
3 inc, 3 sc. (9)
Round 3 :
2 sc, 3 inc, 4 sc. (12)
Round 4 :
4 sc, 3 inc, 5 sc. (15)
Round 5 :
6 sc, 1 inc, 8 sc. (16)
Round 6 :
5 sc, 3 inc, 8 sc. (19)
Round 7 :
6 sc, 3 inc, 10 sc. (22)
Round 8 :
8 sc, 1 inc, 13 sc. (23)
Round 9 :
9 sc, 1 inc, 13 sc. (24)
Round 11 :
10 sc, 1 inc, 13 sc. (25)
Round 13 :
11 sc, 1 inc, 13 sc. (26)
Round 15 :
11 sc, 1 inc, 14 sc. (27)
Round 17 :
12 sc, 1 inc, 14 sc. (28)
Round 19 :
13 sc, 1 inc, 14 sc. (29)
Round 22 :
14 sc, 1 inc, 14 sc. (30)
Round 23 :
30 sc. Repeat this round a total of 11 times. (30)
Info :
Sew the ears to the top of the head, starting approximately 8 rounds out from the center of the head, with the point of each ear facing downward. Once attached, fold the corners at a slight angle and hold them in place with 2 or 3 small stitches to create the natural floppy look.
— 11. Paws & Legs (white, crocheted in rounds — make 4) :
Round 2 :
* 1 inc *, repeat 6 times. (12)
Round 3 :
* 1 sc, 1 inc *, repeat 6 times. (18)
Round 4 :
* 2 sc, 1 inc *, repeat 6 times. (24)
Round 5 :
* 3 sc, 1 inc *, repeat 6 times. (30)
Round 6 :
* 4 sc, 1 inc *, repeat 6 times. (36)
Round 7 :
* 5 sc, 1 inc *, repeat 6 times. (42)
Round 8 :
42 sc. Repeat this round a total of 4 times. (42)
Round 9 :
* 2 hdc, 2 hdc dec *, repeat 6 times, 18 sc. (36)
Round 10 :
* 1 hdc, 2 hdc dec *, repeat 6 times, 18 sc. (30)
Round 11 :
* 2 hdc dec *, repeat 6 times, 18 sc. (24)
Round 12 :
24 sc. Repeat this round a total of 5 times. (24)
Round 13 :
1 dec, 22 sc. (23)
Round 14 :
23 sc. Repeat this round a total of 5 times. (23)
Round 15 :
1 dec, 21 sc. (22)
Round 16 :
22 sc. Repeat this round a total of 7 times. (22)
Round 17 :
1 dec, 20 sc. (21)
Round 18 :
* 5 sc, 1 dec *, repeat 3 times. (18)
Round 19 :
* 1 sc, 1 dec *, repeat 6 times — stuff now. (12)
Round 20 :
* 1 dec *, repeat 6 times — close and fasten off. (6)
Info :
To create 3 toes on each paw, thread a long white yarn strand through the paw twice so it divides the paw pad into three even sections. The front legs can be sewn along their full length or just fixed at the upper end about two finger-widths below the ankle. The back legs are sewn one on each side of the body, with the back paws resting against the front paws so Dotty sits upright.
— 12. Large Paw Dot (black, crocheted in rounds — make 1 per paw, 4 total) :
Round 2 :
* 1 inc *, repeat 6 times. (12)
Round 3 :
* 1 sc, 1 inc *, repeat 6 times. (18)
Info :
Sew one large black dot to the underside of each paw as shown in the reference photo.
— 13. Small Paw Dots (black, crocheted in rounds — make 3 per paw, 12 total) :
Info :
Make 3 small dots per paw (12 total). Sew them onto the underside of each paw alongside the large dot, arranged as shown in the reference photo.
— 14. Tail (white, crocheted in rounds) :
Round 2 :
1 inc, 3 sc. (5)
Round 3 :
1 inc, 4 sc. (6)
Round 4 :
1 inc, 5 sc. (7)
Round 5 :
1 inc, 6 sc. (8)
Round 6 :
1 inc, 7 sc. (9)
Round 7 :
1 inc, 8 sc. (10)
Round 9 :
1 inc, 9 sc. (11)
Round 11 :
1 inc, 10 sc. (12)
Round 13 :
1 inc, 11 sc. (13)
Round 15 :
1 inc, 12 sc. (14)
Round 17 :
1 inc, 13 sc. (15)
Round 18 :
15 sc. Repeat this round a total of 19 times. (15)
Round 19 :
* 1 sc, 1 dec *, repeat 5 times — stuff now. (10)
Round 20 :
* 1 dec *, repeat 5 times — close and fasten off. (5)
Info :
Attach the tail to the center back of the body, roughly 16 rounds up from the bottom middle of the body.
— 15. Large Body Spots (black, crocheted in rounds — make 3) :
Round 2 :
* 1 inc *, repeat 6 times. (12)
Round 3 :
* 1 sc, 1 inc *, repeat 6 times. (18)
Round 4 :
* 2 sc, 1 inc *, repeat 6 times. (24)
Round 5 :
* 3 sc, 1 inc *, repeat 6 times. (30)
Info :
Make 3 large spots. Scatter them across the body, legs, ears, back of the head, and tail in a balanced arrangement.
— 16. Small Body Spots (black, crocheted in rounds — make 5) :
Round 2 :
* 1 inc *, repeat 6 times. (12)
Round 3 :
* 1 sc, 1 inc *, repeat 6 times. (18)
Info :
Make 5 small spots and distribute them evenly across the body alongside the large spots. Mix sizes across the dog for a natural Dalmatian look.
— 17. Collar (red, crocheted in rows, turn with a ch) :
Row 2 :
4 sc. Continue repeating this row until the collar strip measures approximately 19 cm (about 8 inches) in length.
Info :
Center the yellow pendant on the collar strip, then wrap the collar around Dotty's neck and close it securely.
— 18. Pendant (yellow, crocheted in rounds) :
Round 2 :
* 1 inc *, repeat 6 times. (12)
Round 3 :
* 1 sc, 1 inc *, repeat 6 times. (18)
Round 4 :
* 2 sc, 1 inc *, repeat 6 times. (24)
— 19. Bone Prop (natural/nude, crocheted in rounds) :
Info :
Begin by making two identical knob pieces. After completing both through round 3, place them side by side and join them by crocheting a single round around both pieces together, giving you 30 stitches total. Then continue in rounds for the shaft and finish with two separate closing knobs at the other end.
Round 1 :
mc 5. (5) — make this piece twice
Round 2 :
* 1 inc *, repeat 5 times. (10)
Round 3 :
* 1 sc, 1 inc *, repeat 5 times. (15)
Info :
Place both knob pieces side by side and crochet a joining round around both, resulting in 30 stitches total. Now continue working the shaft of the bone in rounds.
Round 4 :
* 3 sc, 1 dec *, repeat 6 times. (24)
Round 5 :
* 2 sc, 1 dec *, repeat 6 times. (18)
Round 6 :
18 sc. Repeat this round a total of 21 times. (18)
Round 7 :
* 2 sc, 1 inc *, repeat 6 times. (24)
Round 8 :
* 3 sc, 1 inc *, repeat 6 times — stuff the bone now. (30)
Info :
Now divide the 30 stitches into two groups of 15 to form the two end knobs. Close one half with 15 sc, ensuring the middle of the division sits directly above the lower shaft ends. Leave the other 15 stitches on hold.
Round 9 :
15 sc (first end knob). (15)
Round 11 :
* 1 sc, 1 dec *, repeat 5 times. (10)
Round 12 :
* 1 dec *, repeat 5 times — close the first knob. (5)
Info :
Repeat rounds 9–12 with the remaining 15 stitches to form the second end knob. Make sure the bone is fully stuffed before closing the final end.
— 20. Food Bowl / Potty (blue super bulky yarn held double, hook size G/8, crocheted in rounds) :
Round 2 :
* 1 inc *, repeat 6 times. (12)
Round 3 :
* 1 sc, 1 inc *, repeat 6 times. (18)
Round 4 :
* 2 sc, 1 inc *, repeat 6 times. (24)
Round 5 :
* 3 sc, 1 inc *, repeat 6 times. (30)
Round 6 :
* 4 sc, 1 inc *, repeat 6 times. (36)
Round 7 :
36 sc. Repeat this round a total of 3 times. (36)
Round 8 :
* 10 sc, 1 dec *, repeat 3 times. (33)
Dotty has this way of sitting on a shelf and making everyone who walks past do a double-take. She's cheerful and a little goofy — the mismatched eyes, the stubby whiskers, the open-mouthed grin — and she comes with her own tiny bone and food bowl, which makes her feel like a complete little world you built stitch by stitch. 🐶 This is the kind of project that earns a permanent spot in your finished-makes collection, or becomes the most thoughtful gift you've ever given a dog lover. Keep going, you've got this! 🧶✨