About This Kawaii Pop-Tart Pillow Crochet Pattern
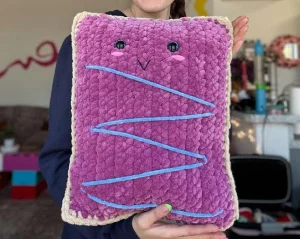
This makes a seriously fun handmade gift — perfect for the nostalgic snack lover in your life, a dorm room, a kid's bedroom, or honestly just your own couch.
Perfect for those just starting their crocheting journey, with clear instructions and simple techniques
Fits nicely into a free afternoon — 2 to 5 hours of focused, enjoyable crocheting.
Playful characters full of personality, designed to spark imagination and become cherished playtime favorites.
This makes a seriously fun handmade gift — perfect for the nostalgic snack lover in your life, a dorm room, a kid's bedroom, or honestly just your own couch.
I love this one because it's just pure joy to make. There's no shaping, no counting increases — you chain, you sc, you go. I finished my first panel while watching a single episode of TV. The joining step where you sc through both layers to create that crust border? Genuinely one of the most satisfying things I've crocheted. And then you add those big eyes and suddenly it has a whole personality. Every single person who has seen mine sitting on my couch has wanted one immediately.
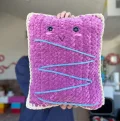
I'll be honest — when I first saw this pattern, I thought it was just a fun novelty. A Pop-Tart. With a face. Sure, why not. But then I actually sat down and made it, and something about the whole process was just... deeply enjoyable in a way I didn't expect.
The repetition of single crochet across all those rows is almost meditative with chunky yarn. Your hook moves fast, the fabric grows quickly, and before you know it you've got two big squishy panels sitting in your lap looking extremely pleased with themselves. There's no shaping anxiety, no counting increases while trying to watch TV — just row after satisfying row.
The moment that really got me was the joining step. Working that sc border through both layers at once, watching the tan crust frame appear around the berry panel — it transforms two flat rectangles into something that immediately reads as a Pop-Tart. It's such a clever construction for how simple it actually is.
If you want to customize yours, the color options are genuinely fun to think about. A chocolate brown top with a pink drizzle would look incredible. Strawberry red with white icing. A blueberry version in deep navy. You could make a whole breakfast set if you really wanted to commit to the bit.
For the drizzle, my one tip is to thread your needle with a longer piece of yarn than you think you need — running out mid-zigzag and having to rejoin is a little fiddly with this thick yarn. Cut yourself a generous length upfront and work slowly.
This is the kind of project I'll keep coming back to for quick gifts. It works up so fast that you could realistically make two in a single weekend, and I have yet to meet a single person who didn't immediately want to squeeze it.
If you've ever wanted to cuddle a pastry, this is your moment. This squishy, oversized Pop-Tart pillow is one of those projects that makes everyone in the room stop and ask "wait, did you MAKE that?" — and yes, you absolutely did. The chunky yarn gives it this irresistible plush texture that looks even better in person than in photos. You'll work two flat panels, join them together with a neat border, stuff it up nice and full, then add the most adorable little face. It's the kind of project that's genuinely fun from start to finish.
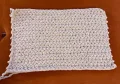
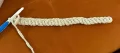
Use your tan super bulky yarn for this entire section. This panel forms the back and crust of the Pop-Tart.
ch 30. This is your foundation chain.
From Row 2 onward, work back along the chain for every row — sc across each row.
sc across all stitches in the row.
Fasten off when Row 22 is complete, leaving a generous yarn tail of several inches before snipping.
Switch to your berry-colored yarn for this section. This is the front frosted panel of the Pop-Tart.
ch 28. This foundation chain is slightly shorter than the base panel — that's intentional.
From Row 2 onward, work back along the chain for every row — sc across each row.
sc across all stitches in the row.
Fasten off when Row 20 is complete, leaving a generous yarn tail of several inches before snipping.
Before joining the panels, attach your safety eyes to the berry panel. Position them centered horizontally between rows 7 and 8. Do this step now — it is much easier before the pieces are joined.
There's something so cheerful about a project that makes people smile the second they see it — and this Pop-Tart pillow does exactly that every single time. 🧶 Whether it ends up living on your couch, in a kid's room, or wrapped up as a gift, it's the kind of handmade thing that people genuinely cherish. You crocheted something delightful, something that literally has a face and feelings, and that is a very good use of an afternoon. Now go show it off — you earned it! ✨
Using a 10 mm hook with the recommended super bulky yarn, the finished pillow comes out quite generously sized — roughly comparable to a large throw pillow. The tan base is worked over 30 chains for 22 rows and the berry top over 28 chains for 20 rows, so the final stuffed piece is quite a substantial cushion, not a small decorative object.
You can, but the finished pillow will come out significantly smaller and the fabric will have a much tighter, less plush feel. The chunky chenille texture of the recommended super bulky yarns is a big part of what makes this look so satisfying. If you do go down in weight, you'd also need to switch to a smaller hook and may want to add extra rows and stitches to compensate for the size difference.
The pattern uses 25 mm safety eyes, which are quite large and give the pillow that bold kawaii look. You can use a different size if you prefer a more subtle or more dramatic face — smaller eyes will look sweet, larger ones look more cartoonish. Place them centered horizontally across the berry panel, positioned right between rows 7 and 8 from the top edge. Attach them before joining the two panels together.
It's embroidered on using a darning needle — no crocheting involved. Once your pillow is fully assembled and closed, you thread the blue yarn onto the darning needle and weave it through the surface of the berry panel in a zigzag or wavy pattern from one side to the other. When you're happy with how it looks, tie off and tuck the tail inside the pillow body.
Yes — if you can chain and single crochet, you have every skill this pattern needs. The only techniques beyond basic stitches are: attaching safety eyes (which just snap through the fabric), the joining sc border (which is just regular sc worked through two layers), and needle embroidery for the drizzle and face details. None of those require any prior experience.
