About This Mushroom Gnome Pendant Amigurumi Pattern
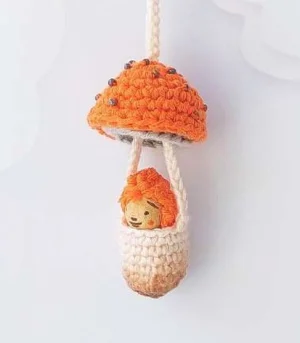
Finished at around 2 inches, this pendant makes a genuinely special handmade gift — the kind a person keeps for years and tells the story of every time someone notices it.
Ideal for those with basic crocheting experience, featuring slightly more advanced stitches and techniques to expand your skills.
Fits nicely into a free afternoon — 2 to 5 hours of focused, enjoyable crocheting.
Small, sweet, and gift-worthy creations that fit perfectly in the palm of your hand with detailed charm.
Finished at around 2 inches, this pendant makes a genuinely special handmade gift — the kind a person keeps for years and tells the story of every time someone notices it.
I keep coming back to this pattern because it scratches this very specific itch — it's small enough to finish in one sitting but detailed enough that you actually feel proud of it when you're done. The moment you flip that cap inner side out and watch the shape click into place is genuinely delightful. And working at this tiny scale with fine cotton feels almost meditative once you get into the rhythm of it. I've made these as last-minute gifts more times than I can count.

I stumbled into making my first mushroom pendant on a whim, honestly. I had a leftover ball of fine cotton from another project and no plan for a Saturday afternoon — and somehow a few hours later I had this ridiculous tiny toadstool sitting on my palm and I was completely smitten.
What nobody warns you about working at this scale is how satisfying it is. Every round takes minutes rather than hours. You can finish the entire stem over a cup of tea. The cap comes together in two clever layers that flip and click into each other in a way that just feels so smart — you'll want to flip it inside out and back again at least three times just because it's so pleasing.
The gnome is the part I was most nervous about. Those flat rows in the middle of a round-worked piece always trip me up when I'm not paying attention. My first attempt I forgot the turning chain entirely and ended up with a very confused-looking rectangle that wasn't folding properly. Second try went perfectly. Now I always put a sticky note on my pattern that just says 'CH 1, TURN' in large letters for rows 6 through 8.
For color, I've made this in classic orange-red for the cap with a cream stem, which is the obvious toadstool choice and it looks gorgeous. But I've also done a pale lilac cap with a dusty green stem for a more whimsical, less literal forest vibe, and it got even more compliments. If you want to get creative, a deep burgundy cap with tiny gold paint dots feels almost Art Nouveau. The color possibilities are genuinely wide open since the construction is the same no matter what you choose.
This makes such a thoughtful handmade gift, too — small enough to pop in an envelope, meaningful enough that the recipient actually keeps it.
This tiny mushroom pendant with its hidden gnome is one of those projects that stops people in their tracks — at craft fairs, on the bus, wherever you wear it. You'll crochet a proper little toadstool cap, a chunky stem with a built-in necklace chain, and the sweetest little gnome body tucked inside. The whole thing finishes at about 2 inches tall, which makes it feel almost impossibly precious once it's done. Your hands will love how quickly it comes together, and your heart will love every single stitch.
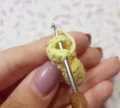
Work in continuous spiral rounds. Place a stitch marker at the end of each round to track the start of the next. Begin with a magic ring or ch 2 and insert hook into the first ch.
sc 6 into ring — try to crochet over the yarn tail to hide it as you go. (6)
inc in each stitch around. (12)
[inc, sc 2] x 4. (16)
sc in each stitch around. (16)
sc in each stitch around. (16)
sc in each stitch around. (16)
sc in each stitch around. (16)
sc in each stitch around (16), then ch 250 (approximately 65 cm — long enough to hang as a necklace; adjust the chain length to your preference), sl st into the 7th sc of the last round (the midpoint of the round). Fasten off and weave in the tail.
Begin with a magic ring or ch 2 and insert hook into the first ch.
sc 6 into ring — work over the tail to hide it as you go. (6)
inc in each stitch around. (12)
[inc, sc 2] x 4. (16)
Working into FL only: [inc, sc 3] x 4. (20)
[inc, sc 4] x 4. (24)
sc in each stitch around. (24)
sc in each stitch around. (24) Fasten off and weave in the tail. If you'd like to sew decorative beads onto the cap top, now is the easiest time to do that before moving on.
Flip the top part of the cap so the inside faces outward before beginning this section.
sc into each BL of the top part's Row 3, all the way around. (16)
sc in each stitch around. (16)
[dc inc, dc 3] x 4. (20) Fasten off and weave in the tail.
Thread the stem chain up through the center hole of the cap — using a larger hook to guide it through makes this much easier.
Begin with a magic ring or ch 2 and insert hook into the first ch.
sc 6 into ring. (6)
[inc, sc] x 3. (9)
sc in each stitch around. (9)
sc in each stitch around. (9)
sc in each stitch around. (9)
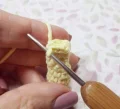
ch 1, turn, sc 6. (6)
ch 1, turn, sc 6. (6)
ch 1, turn, sc 6 (6). Stuff the body now, then fold the side borders inward.
sl st 3 through both folded borders at once to close the top. Fasten off, leaving a long tail for attaching the head. Thread the tail through the wooden bead with a needle and secure it firmly. For a small hair quiff, leave a little yarn tail visible on the outside rather than hiding it. Add facial features using a textile marker or acrylic paint — painting before attaching the head helps avoid getting paint on the surrounding yarn.
Work this piece with the wrong side facing outward (inside out) so the finish appears smooth on the outside when complete.
sc 6 into a magic ring. (6)
sc in each stitch around. (6)
dec 3. (3) Fasten off and tuck the tail inside. Embroider the face with sewing thread — this can also be done after joining to the body if preferred.
The finished mushroom can be decorated in a variety of ways: use pastels to shade and tint the lower stem, dab acrylic paint dots or use a textile marker to add spots to the cap, sew on small decorative beads, or embroider details by hand. You can also crochet tiny flat white circles and stitch them onto the cap for a classic toadstool look.
There is something genuinely magical about finishing a project this small and holding it up to see a proper little toadstool with a gnome tucked underneath. It's the kind of thing that makes people lean in for a closer look, every single time. Whether you're making this for yourself or wrapping it up as a gift, you've just crocheted something that feels straight out of a storybook — and that is worth celebrating. 🍄 Happy crocheting! ✨🧶
Using the recommended fine/DK weight cotton at 100g/200m and a 1.75mm hook, the mushroom pendant comes out at approximately 2 inches tall (4.5 x 4 cm) and the gnome body is around 1.75 inches (3.5 cm). Changing to a thicker yarn and larger hook will scale the whole thing up proportionally.
Yes — the pattern includes a full set of instructions for a crocheted alternative. It's worked inside out in 3 rows using the same yarn and hook, so the smooth side of the stitches faces outward. You can embroider a face on it with sewing thread before or after attaching it to the body.
The pattern recommends using a thicker spare crochet hook to guide the chain up through the center hole. Thread the hook through the cap first, catch the chain, and pull it through carefully. The chain is 250 stitches long, so go slowly to avoid tangling.
The pattern suggests a few options: sewing on small beads (do this before assembling the inner cap), making paint dots with acrylic paint or a textile marker, or crocheting tiny flat white circles and stitching them on. Beads are most durable for a pendant that will be worn regularly.
Only the gnome body is stuffed — do this during Row 8 before folding and closing the top. The mushroom cap has a structured double-layer construction (top part and inner part) that holds its shape without any filling.
Absolutely. The necklace chain is just a very long ch 250 worked at the end of the stem — you can substitute a shorter chain for a keychain loop, or skip the chain entirely and sew the finished mushroom onto a brooch pin or hang it as a Christmas ornament.
