Meet your next cozy crafting obsession! This sweet little plush deer is the ultimate cuddle buddy, and making one is such a soothing way to spend a chilly afternoon. With its oversized head, adorable little antlers, and a festive red scarf, it brings a touch of handmade magic to any room. You will love how quickly this projects comes together using super-soft chenille yarn. Grab your favorite hook, find a comfortable spot, and let's bring this gentle forest friend to life together!
Progress Tracker
0% Complete
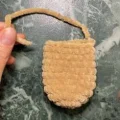
— 1. Legs & Body :
Round 1 :
Using light brown yarn and the 4.0 mm hook, make 6 sc into a magic ring (6)
Round 2 :
Work 2 sc in each st around (12)
Round 3 :
Repeat (1 sc, inc) 6 times around (18)
Round 4 :
Work 1 sc in each st around (18)
Round 5 :
Work 1 sc in each st around (18)
Round 6 :
Work 1 sc in each st around (18)
Round 7 :
Work 1 sc in each st around (18)
Round 8 :
Work 1 sc in each st around (18)
Round 9 :
Work 1 sc in each st around (18)
Round 10 :
Work 1 sc in each st around (18)
Info :
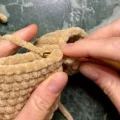
Fasten off the first leg, leaving a yarn tail of about 10 cm. Repeat Rounds 1 to 10 to make the second leg, but do not cut the yarn when finished.
Round 11 :
Continue from the second leg: work 18 sc around the first leg's stitches, then work 18 sc around the second leg's stitches to join them together (36)
Info :
Using the yarn tail from the first leg, work 1 sl st inside the legs to seal the gap between them and prevent any holes.
Round 12 :
Work 1 sc in each st around (36)
Round 13 :
Work 1 sc in each st around (36)
Round 14 :
Work 1 sc in each st around (36)
Round 15 :
Work 1 sc in each st around (36)
Round 16 :
Work 1 sc in each st around (36)
Round 17 :
Work 1 sc in each st around (36)
Round 18 :
Work 1 sc in each st around (36)
Info :
Begin stuffing the legs firmly now before the opening becomes too narrow.
Round 19 :
Repeat (4 sc, dec) 6 times around (30)
Round 20 :
Work 1 sc in each st around (30)
Round 21 :
Repeat (3 sc, dec) 6 times around (24)
Round 22 :
Work 1 sc in each st around (24)
Round 23 :
Repeat (2 sc, dec) 6 times around (18)
Info :
Stuff the body firmly with fiberfill before continuing.
Round 24 :
Repeat (1 sc, dec) 6 times around (12)
Round 25 :
Work 1 sc in each st around (12)
Info :
Fasten off and secure your yarn.
— 2. Head :
Round 1 :
Using light brown yarn and the 4.0 mm hook, make 6 sc into a magic ring (6)
Round 2 :
Work 2 sc in each st around (12)
Round 3 :
Repeat (1 sc, inc) 6 times around (18)
Round 4 :
Repeat (2 sc, inc) 6 times around (24)
Round 5 :
Repeat (3 sc, inc) 6 times around (30)
Round 6 :
Repeat (4 sc, inc) 6 times around (36)
Round 7 :
Repeat (5 sc, inc) 6 times around (42)
Round 8 :
Repeat (6 sc, inc) 6 times around (48)
Round 9 :
Work 1 sc in each st around (48)
Round 10 :
Work 1 sc in each st around (48)
Round 11 :
Work 1 sc in each st around (48)
Round 12 :
Work 1 sc in each st around (48)
Round 13 :
Work 1 sc in each st around (48)
Round 14 :
Work 1 sc in each st around (48)
Round 15 :
Work 1 sc in each st around (48)
Info :
If you are using 16 mm safety eyes, insert them now between Rounds 11 and 12, leaving a space of 7 stitches between them.
Round 16 :
Repeat (6 sc, dec) 6 times around (42)
Round 17 :
Repeat (5 sc, dec) 6 times around (36)
Round 18 :
Repeat (4 sc, dec) 6 times around (30)
Round 19 :
Repeat (3 sc, dec) 6 times around (24)
Round 20 :
Repeat (2 sc, dec) 6 times around (18)
Info :
Stuff the head firmly with fiberfill.
Round 21 :
Repeat (1 sc, dec) 6 times around (12)
Round 22 :
Work 6 dec around (6)
Info :
Fasten off and weave in the yarn tail.
— 3. Arms (Make 2) :
Round 1 :
Using light brown yarn and the 4.0 mm hook, make 6 sc into a magic ring (6)
Round 2 :
Work 2 sc in each st around (12)
Round 3 :
Work 1 sc in each st around (12)
Round 4 :
Work 1 sc in each st around (12)
Round 5 :
Work 1 sc in each st around (12)
Round 6 :
Work 1 sc in each st around (12)
Round 7 :
Work 1 sc in each st around (12)
Round 8 :
Work 1 sc in each st around (12)
Round 9 :
Repeat (4 sc, dec) 2 times around (10)
Info :
Lightly stuff the arm with fiberfill, ensuring the top remains flat and unstuffed.
Round 10 :
Repeat (3 sc, dec) 2 times around (8)
Round 11 :
Repeat (2 sc, dec) 2 times around (6)
Info :
Flatten the top edge of the arm and work 2 sc through both layers to close the opening. Fasten off, cut the yarn, and weave in the ends.
— 4. Muzzle :
Round 1 :
Using white plush yarn and the 4.0 mm hook, make 6 sc into a magic ring (or ch 2 and work 6 sc into the second chain from hook) (6)
Round 2 :
Work 2 sc in each st around (12)
Round 3 :
Repeat (1 sc, inc) 6 times around (18)
Round 4 :
Work 1 sc in each st around (18)
Info :
Fasten off, leaving a long tail for sewing.
— 5. Nose :
Round 1 :
Using dark brown cotton yarn and the 3.0 mm hook, make 6 sc into a magic ring (or ch 2 and work 6 sc into the second chain from hook) (6)
Round 2 :
Work 2 sc in each st around (12)
Round 3 :
Repeat (1 sc, inc) 6 times around (18)
Info :
Fasten off, leaving a long yarn tail for sewing.
— 6. Ears (Make 2) :
Round 1 :
Using light brown yarn and the 4.0 mm hook, make 6 sc into a magic ring (6)
Round 2 :
Work 1 sc in each st around (6)
Round 3 :
Work 2 sc in each st around (12)
Round 4 :
Work 1 sc in each st around (12)
Round 5 :
Repeat (1 sc, inc) 6 times around (18)
Round 6 :
Work 1 sc in each st around (18)
Round 7 :
Repeat (1 sc, dec) 6 times around (12)
Info :
Fasten off, cut the yarn, and weave in your ends.
— 7. Antlers (Make 2) :
Info :
Each antler consists of two parts joined together. Use dark brown plush yarn and the 4.0 mm hook (or double-strand medium weight dark brown yarn if preferred).
First Antler Part :
Work the first part of the antler.
Round 1 :
Make 6 sc into a magic ring (6)
Round 2 :
Work 1 sc in each st around (6)
Info :
Fasten off and cut the yarn.
Second Antler Part :
Work the second part of the antler.
Round 1 :
Make 6 sc into a magic ring (6)
Round 2 :
Work 1 sc in each st around (6)
Round 3 :
Work 1 sc in each st around (6)
Info :
Do not cut the yarn on this second part. We will now join the two parts together.
Joining Parts :
Join the first and second parts together.
Round 4 :
Using the working yarn from the second part, crochet around the first part: work 1 sc, dec, 1 sc, dec. Continue onto the second part: work 1 sc, dec, 1 sc, dec (8)
Round 5 :
Work 1 sc, dec, 2 sc, dec, 1 sc (6)
Info :
Fasten off, cut the yarn, and weave in the ends.
— 8. Tail :
Round 1 :
Using white plush yarn and the 4.0 mm hook, make 6 sc into a magic ring (6)
Round 2 :
Repeat (1 sc, inc) 3 times around (9)
Round 3 :
Work 1 sc in each st around (9)
Info :
Fasten off, cut the yarn, and weave in the ends.
— 9. Square Patch :
Row 1 :
Using white plush yarn and the 4.0 mm hook, ch 5. Starting in the second chain from the hook, work 1 sc in each of the next 4 chains, ch 1, turn (4)
Row 2 :
Work 4 sc, ch 1, turn (4)
Row 3 :
Work 4 sc, ch 1, turn (4)
Info :
Fasten off, leaving a tail for sewing.
— 10. Heart Patch (Alternative) :
Round 1 :
Using pink or red plush yarn and the 4.0 mm hook, make a magic ring. Into the ring, work: 1 sc, 3 dc, 2 sc, 1 hdc, 2 sc, 3 dc, then sl st to the first stitch to close (12)
Info :
Fasten off, leaving a tail for sewing.
— 11. Scarf :
Row 1 :
Using red plush yarn and the 4.0 mm hook, ch 5. Starting in the second chain from the hook, work 1 sc in each of the next 4 chains, ch 1, turn (4)
Row 2-39 :
Work 1 sc in each of the next 4 sts, ch 1, turn (4)
Row 40 :
Work 1 sc in each of the next 4 sts (4)
Info :
Fasten off, cut the yarn, and weave in all loose ends.
And there you have it—your very own sweet woodland deer is ready to snuggle! 🦌✨ I hope you enjoyed every single stitch of this project, from working up that incredibly soft plush yarn to giving your deer its unique personality with the needle sculpting. There is nothing quite like the feeling of finishing a handmade toy, and I am sure this little cutie is going to bring so much warmth and joy wherever it goes. Don't forget to wrap its cozy red scarf tight! Happy crocheting, my friends, and I can't wait to see your finished deer! 🧶❤️