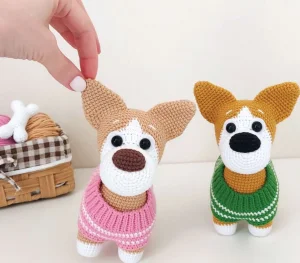
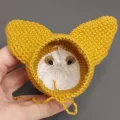
Get ready to create the most adorable little companion with this detailed corgi puppy pattern. You will love watching this pup come to life, from its signature oversized ears to that irresistible 'sploot' posture. Whether you are making a gift for a dog lover or adding to your own collection, this project is packed with charming details like a tiny ribbed sweater and an optional heart-shaped patch on the backside.
Progress Tracker
0% Complete
— 1. Ears (Make 2) :
Round 1 :
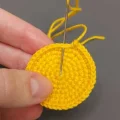
Using your Mustard yarn, create a MR and work 6 sc into it (6)
Round 2 :
Work an inc into every stitch around (12)
Round 3 :
Repeat (5 sc, 1 inc) twice (14)
Round 4 :
Work 1 sc into each stitch around (14)
Round 5 :
Repeat (6 sc, 1 inc) twice (16)
Round 6 :
Repeat (7 sc, 1 inc) twice (18)
Round 7 :
Repeat (8 sc, 1 inc) twice (20)
Round 8 :
Repeat (9 sc, 1 inc) twice (22)
Round 9 :
Repeat (10 sc, 1 inc) twice (24)
Round 10-13 :
Work 8 sc, then 6 hdc, followed by 10 sc (24)
Info :
Fasten off and leave a tail for joining later.
— 2. Head :
Round 1 :
Start with White yarn. Work 6 sc into a MR (6)
Round 2 :
Work an inc into every stitch around (12)
Round 3 :
Repeat (1 sc, 1 inc) 6 times (18)
Round 4 :
Work 1 sc, 1 inc, then repeat (2 sc, 1 inc) 5 times, finishing with 1 sc (24)
Round 5 :
Repeat (3 sc, 1 inc) 6 times (30)
Round 6 :
Work 2 sc, 1 inc, then repeat (4 sc, 1 inc) 5 times, finishing with 2 sc (36)
Round 7 :
Repeat (5 sc, 1 inc) 6 times (42)
Round 8-13 :
Work 1 sc into each stitch around (42)
Round 14 :
Repeat (5 sc, 1 dec) 6 times (36)
Round 15 :
Work 13 sc, then 10 sc into the BLO, followed by 13 sc (36)
Round 16 :
Work 1 sc into each stitch around (36)
Round 17 :
Work 13 sc, then 10 sc by grabbing the remaining front loops from Round 15, followed by 13 sc (36)
Round 18 :
Work 13 sc, then work 10 incDc, followed by 13 sc (46)
Round 19 :
Work 17 sc, then repeat (1 inc, 1 sc) 6 times, finishing with 17 sc (52)
Info :
Switch yarn color to Mustard.
Round 20 :
Work 23 sc in Mustard, switch to White for 6 sc, then back to Mustard for 23 sc (52)
Round 21 :
Mustard: 16 sc, inc, 3 sc, inc, 3 sc. White: 4 sc. Mustard: 3 sc, inc, 3 sc, inc, 16 sc (56)
Round 22 :
Mustard: 7 sc, inc, 13 sc, inc, 5 sc. White: 2 sc. Mustard: 5 sc, inc, 13 sc, inc, 7 sc (60)
Round 23-25 :
Work 1 sc into each stitch around (60)
Round 26 :
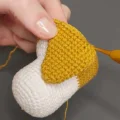
Join the ears: 16 sc, work 12 sc through both the first ear and the head, 5 sc, work 12 sc through both the second ear and the head, 15 sc (60)
Info :
Note: When attaching ears, ensure the Hdc section is at the outer edges. Start the first ear at the 4th Hdc and the second at the 24th sc.
Round 27 :
Work 16 sc, then 12 sc along the outer edge of the first ear, 5 sc, then 12 sc along the outer edge of the second ear, 15 sc (60)
Round 28 :
Work 1 sc into each stitch around (60)
Info :
Prepare your felt circles and insert the safety eyes through them. Place the eyes in Round 18, positioned between the 5th and 6th dc stitches on either side.
Round 29 :
Work 4 sc, 1 dec, then repeat (8 sc, 1 dec) 5 times, finishing with 4 sc (54)
Round 30 :
Work 1 sc into each stitch around (54)
Round 31 :
Repeat (7 sc, 1 dec) 6 times (48)
Round 32 :
Work 1 sc into each stitch around (48)
Round 33 :
Repeat (6 sc, 1 dec) 6 times (42)
Round 34 :
Repeat (5 sc, 1 dec) 6 times (36)
Round 35 :
Repeat (4 sc, 1 dec) 6 times (30)
Info :
Stuff the head firmly, ensuring the muzzle area is well-shaped.
Round 36 :
Repeat (3 sc, 1 dec) 6 times (24)
Round 37 :
Repeat (2 sc, 1 dec) 6 times (18)
Round 38 :
Repeat (1 sc, 1 dec) 6 times (12)
Round 39 :
Work 6 dec around (6)
Info :
Close the remaining hole with a needle, weave in the tail, and hide it inside.
— 3. Nose :
Round 1 :
Using Black yarn, ch 7. Starting in the second ch from hook: 5 sc, 3 sc in the last ch. Rotate and work along the other side: 4 sc, 1 inc (14)
Round 2 :
Work 1 inc, 4 sc, repeat (1 inc) 3 times, 4 sc, repeat (1 inc) 2 times (20)
Round 3 :
Work 1 sc into each stitch around (20)
Info :
Fasten off, stuff lightly, and sew to the center of the muzzle.
— 4. Legs (Make 4) :
Round 1 :
With White yarn, work 7 sc into a MR (7)
Round 2 :
Work an inc into every stitch around (14)
Round 3 :
Repeat (1 sc, 1 inc) 7 times (21)
Round 4 :
Work 21 sc into the BLO (21)
Round 5-7 :
Work 1 sc into each stitch around (21)
Info :
Switch yarn color to Mustard.
Round 8-9 :
Work 1 sc into each stitch around (21)
Info :
Fasten off for the first three legs; do not cut the yarn on the fourth leg.
— 5. Tummy :
Round 1 :
Using White yarn, ch 21. Starting in the second ch from hook: 19 sc, 3 sc in the final ch. Rotate and work along the opposite side: 18 sc, 1 inc (42)
Round 2 :
Work 1 inc, 18 sc, repeat (1 inc) 3 times, 18 sc, repeat (1 inc) 2 times (48)
Round 3 :
Work 1 sc, 1 inc, 18 sc, repeat (1 sc, 1 inc) 3 times, 18 sc, repeat (1 sc, 1 inc) 2 times (54)
Round 4 :
Work 2 sc, 1 inc, 18 sc, repeat (2 sc, 1 inc) 3 times, 18 sc, repeat (2 sc, 1 inc) 2 times (60)
Info :
Note: The original pattern mentions 'sdc' in Round 4, which appears to be a typo for 'sc' based on the context and stitch counts.
— 6. Joining Legs to Tummy :
Round 5 :
Switch to Mustard. Work 5 sc through both the first leg and tummy, 17 sc along tummy, 5 sc through both the second leg and tummy, 3 sc along tummy, 5 sc through both the third leg and tummy, 17 sc along tummy, 5 sc through both the fourth leg and tummy, 3 sc along tummy (60)
— 7. Body :
Info :
Continue in a spiral. To prevent holes, you can add an extra sc at the junction points where legs meet the tummy.
Round 1 :
Work 17 sc around the first leg, 17 sc along tummy, 17 sc around the second leg, 3 sc along tummy, 17 sc around the third leg, 17 sc along tummy, 17 sc around the fourth leg, 3 sc along tummy (108)
Round 2 :
Work 45 sc, 1 inc, 6 sc, 1 inc, 6 sc, 1 inc, 48 sc (111)
Round 3-11 :
Work 1 sc into each stitch around (111)
Info :
Begin stuffing the legs firmly.
Round 12 :
Repeat (14 sc, 1 dec) 6 times, finishing with 15 sc (105)
Round 13-14 :
Work 1 sc into each stitch around (105)
Round 15 :
Work 37 sc, 1 dec, 6 sc, 1 dec, 6 sc, 1 dec, 6 sc, 1 dec, 42 sc (101)
Round 16 :
Work 1 sc into each stitch around (101)
Round 17 :
Work 37 sc, 1 dec, 5 sc, 1 dec, 5 sc, 1 dec, 5 sc, 1 dec, 41 sc (97)
Round 18 :
Work 1 sc into each stitch around (97)
Round 19 :
Work 37 sc, 1 dec, 4 sc, 1 dec, 4 sc, 1 dec, 4 sc, 1 dec, 40 sc (93)
Round 20 :
Work 1 sc into each stitch around (93)
Round 21 :
Work 37 sc, 1 dec, 3 sc, 1 dec, 3 sc, 1 dec, 3 sc, 1 dec, 39 sc (89)
Round 22 :
Work 37 sc, 1 dec, 2 sc, 1 dec, 2 sc, 1 dec, 2 sc, 1 dec, 38 sc (85)
Round 23 :
Work 37 sc, 1 dec, 1 sc, 1 dec, 1 sc, 1 dec, 1 sc, 1 dec, 37 sc (81)
Round 24 :
Work 37 sc, then 4 dec in a row, followed by 36 sc (77)
Round 25 :
Work 17 sc, skip the next 44 stitches to create the back opening, then work 16 sc (33)
— 8. Neck :
Round 26-27 :
Work 1 sc into each of the 33 stitches around (33)
Info :
Fasten off and leave a tail. Stuff the body firmly. Use a separated strand of yarn to sew the back opening closed using a blanket stitch.
— 9. Tail :
Round 1 :
Using White yarn, work 6 sc into a MR (6)
Round 2 :
Repeat (1 sc, 1 inc) 3 times (9)
Round 3 :
Work 3 inc, then 6 sc (12)
Round 4 :
Work 2 sc, then 2 inc, followed by 8 sc (14)
Round 5 :
Work 4 sc, 1 inc, then 9 sc (15)
Info :
Switch yarn color to Mustard.
Round 6 :
Work 5 sc, 1 inc, then 9 sc (16)
Round 7-9 :
Work 1 sc into each stitch around (16)
Round 10 :
Work 5 sc, 1 dec, then 9 sc (15)
Round 11 :
Work 5 sc, 1 dec, then 8 sc (14)
Round 12 :
Work 5 sc, 1 dec, then 7 sc (13)
Round 13 :
Work 5 sc, 1 dec, then 6 sc (12)
Round 14 :
Work 5 sc, 1 dec, then 5 sc (11)
Info :
Fasten off, stuff, and sew to the body between Rounds 19 and 24.
— 10. Sweater :
Info :
Use the 3.0 mm hook and Green yarn. This piece is worked in rows for the collar and then rounds for the body.
Row 2 :
Starting in the second ch from hook, work 8 sl st (8)
Row 3-60 :
Work 8 sl st into the BLO of each stitch, chaining 1 and turning at the end of every row (8)
Info :
Fold the collar in half and join the ends by working 7 sl st through both layers.
Round 1 :
Ch 1 and work 60 sc evenly around the edge of the collar (60)
Round 2 :
Switch to White yarn. Work 60 sc around (60)
Round 3-4 :
Switch to Green yarn. Work 60 sc around (60)
Round 5 :
Switch to White yarn. Work 60 sc around (60)
Round 6-7 :
Switch to Green yarn. Work 60 sc around (60)
Round 8 :
Switch to White yarn. Work 16 sc, ch 10, skip the next 13 stitches, 2 sc, ch 10, skip the next 13 stitches, 16 sc (54)
Round 9 :
Switch to Green yarn. Work 54 sc around (54)
Round 10 :
Work 15 sc, 1 dec, 9 hdc, 1 decHdc, 9 hdc, 1 dec, 15 sc (51)
Round 11 :
Switch to White yarn. Work 15 sc, 1 dec, 8 hdc, 1 decHdc, 7 hdc, 1 dec, 15 sc (48)
Round 12-13 :
Switch to Green yarn. Work 48 sc around (48)
Round 14 :
Switch to White yarn. Work 48 sc around (48)
Round 15-16 :
Switch to Green yarn. Work 48 sc around (48)
— 11. Heart Butt Variation (Body Rounds 2-17) :
Info :
If you want the white heart detail on the back, use these modified instructions for the body rounds. Stitches in bold/underlined in the PDF are worked in White yarn.
Round 2 :
Mustard: 45 sc, inc, 5 sc. White: 1 sc, inc, 1 sc. Mustard: 5 sc, inc, 48 sc (111)
Round 3 :
Mustard: 51 sc. White: 6 sc. Mustard: 54 sc (111)
Round 4 :
Mustard: 50 sc. White: 8 sc. Mustard: 53 sc (111)
Round 5 :
Mustard: 49 sc. White: 10 sc. Mustard: 52 sc (111)
Round 6 :
Mustard: 48 sc. White: 12 sc. Mustard: 51 sc (111)
Round 7 :
Mustard: 47 sc. White: 14 sc. Mustard: 50 sc (111)
Round 8 :
Mustard: 46 sc. White: 16 sc. Mustard: 49 sc (111)
Round 9 :
Mustard: 45 sc. White: 18 sc. Mustard: 48 sc (111)
Round 10-11 :
Mustard: 44 sc. White: 20 sc. Mustard: 47 sc (111)
Round 12 :
Mustard: (14 sc, dec) twice, 12 sc. White: 1 sc, dec, 14 sc, dec, 2 sc. Mustard: 13 sc, dec, 14 sc, dec, 15 sc (105)
Round 13 :
Mustard: 42 sc. White: 19 sc. Mustard: 44 sc (105)
Round 14 :
Mustard: 42 sc. White: 9 sc. Mustard: 1 sc. White: 9 sc. Mustard: 44 sc (105)
Round 15 :
Mustard: 37 sc, dec, 4 sc. White: 3 sc, dec, 2 sc. Mustard: 3 sc. White: 2 sc, dec, 3 sc. Mustard: 4 sc, dec, 39 sc (101)
Round 16 :
Mustard: 43 sc. White: 4 sc. Mustard: 5 sc. White: 4 sc. Mustard: 45 sc (101)
Round 17 :
Mustard: 37 sc, dec, 5 sc, dec, 7 sc, dec, 5 sc, dec, 39 sc (97)
I really hope you enjoy every moment of making your new corgi companion! There is nothing quite like the feeling of finishing the last stitch, sewing on that tiny nose, and seeing a new friend staring back at you. This pup is the perfect size for desk decor or as a thoughtful gift for the dog lover in your life. Don't forget to share your finished photos with our community—I absolutely love seeing your color choices and those adorable heart butts! Happy crocheting, and may your tension always be perfect. 🧶✨