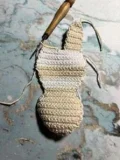
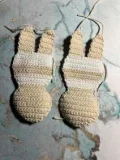
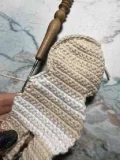
🧶 Beautiful ✨ Detailed 💝 Adorable

Adorable Princess and Castle Bag Amigurumi Pattern

Adorable Princess and Castle Bag Amigurumi Pattern
3.9★Rating
10-12 HoursTime Needed
3.8KMade This
✂️

Advanced Level

Designed for experienced crocheters, these patterns involve intricate designs and complex techniques to challenge and inspire.

⏱️

Slow & Steady

A 10-12 hour project—great for savoring the process over several sessions.

🐰

Whimsical Buddy

Playful characters full of personality, designed to spark imagination and become cherished playtime favorites.

About This Adorable Princess and Castle Bag Amigurumi Pattern

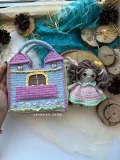
Adorable Princess and Castle Bag Amigurumi Pattern crochet pattern - detailed view

This set is the ultimate handmade gift for a little one’s birthday or a holiday surprise. It's the kind of toy that gets passed down through the family because of all the tiny, thoughtful details and functional design.

Why You'll Love This Adorable Princess and Castle Bag Amigurumi Pattern

I personally fell in love with the jacquard details on the castle walls. It’s a bit of a challenge, but seeing those windows and doors appear in the fabric is so satisfying. Plus, the doll is just the right size for small hands to carry on a day out!

Adorable Princess and Castle Bag Amigurumi Pattern step 1 Adorable Princess and Castle Bag Amigurumi Pattern step 2 Adorable Princess and Castle Bag Amigurumi Pattern step 3 Adorable Princess and Castle Bag Amigurumi Pattern step 4

Switch Things Up

I’ve always believed that the best toys are the ones that tell a story, and this princess and her castle bag do exactly that. When I was designing this, I wanted something that felt like a complete little world you could carry with you. There’s something so special about opening up a bag to find a whole play scene hidden inside!

If you’re new to jacquard crochet, don’t let the castle walls intimidate you. The trick is to keep your tension consistent and not let the yarn you’re carrying get too bunched up. It’s like painting with yarn—each stitch adds a little more detail to the windows and doors. I found that using a slightly smaller hook helped keep the fabric stiff, which is exactly what you want for a bag that needs to hold its structural shape.

I love how the mint green and pink play together, but you could easily swap those for a classic stone gray castle or even a bright purple one. Whatever colors you choose, this project is bound to become a treasured favorite. Happy hooking!

Common Mistakes & How to Fix Them

✗ When joining the doll halves, if you don't stuff the legs firmly before closing the body, she might end up a bit floppy and won't stand well.✗ The jacquard colorwork on the castle front can get tight—be careful not to pull your carried yarn too hard or the wall will pucker and won't lay flat against the plastic inserts.✗ If you skip the plastic inserts for the castle walls, the bag will lose its structural integrity once you add the weight of the handles and the doll inside.✗ Watch your stitch count on the tower peaks; it’s easy to miss a decrease at the very tip, which makes the towers look rounded instead of sharp and pointy.

Adorable Princess and Castle Bag Amigurumi Pattern

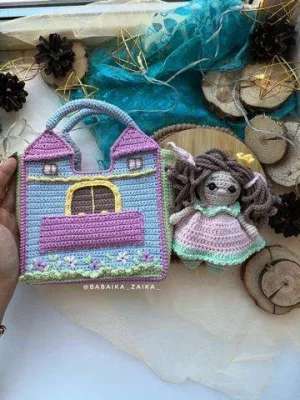
I am so thrilled to share this magical set with you! It’s more than just a doll; it’s a complete little world tucked inside a portable castle-shaped bag. You will love watching the princess come to life, and the bag is such a clever way to keep her safe for adventures on the go. It’s a project filled with heart and perfect for anyone who loves storytelling through their stitches.

Advanced 10-12 Hours

Materials Needed for Adorable Princess and Castle Bag Amigurumi Pattern

— Main Fabric

  • 01
    Sport weight 4-ply yarn in Cream (N05) for the doll skin
  • 02
    Sport weight 4-ply yarn in White (N62) for the doll body details
  • 03
    Sport weight 4-ply yarn in Brown (N71 & N40) for the hair and castle door
  • 04
    Sport weight 4-ply yarn in Pink (N74) for the dress and castle accents
  • 05
    Sport weight 4-ply yarn in Mint Green (N79) for the shoes and dress trim
  • 06
    Sport weight 4-ply yarn in Yellow (N88) for the crown and castle arch
  • 07
    Sport weight 4-ply yarn in Gray (N49) for the castle interior
  • 08
    Sport weight 4-ply yarn in Dark Pink (N78) for the castle roof and pocket
  • 09
    Sport weight 4-ply yarn in Blue (N75) for the castle walls and handles
  • 10
    Sport weight 4-ply yarn in Green (N58) for the castle base and side walls

— Tools Required

  • 01
    1.75 mm crochet hook
  • 02
    8 mm glue-on safety eyes
  • 03
    Black embroidery thread for facial details
  • 04
    Sewing pins for assembly
  • 05
    High-quality fiberfill stuffing
  • 06
    Sharp needle for sewing pieces together
  • 07
    3 small buttons for the dress
  • 08
    Rhinestones for flower centers
  • 09
    Thin plastic (like plastic folders) for bag reinforcement
  • 10
    Super glue for eyes and rhinestones
  • 11
    Pink pastel or blush for the doll's cheeks

Progress Tracker

0% Complete

— 1. Princess Doll - Head & Body (Make 2) :

Info :

Start with Cream yarn. We are working in flat rows.

Row 1 :

ch5, starting in 2nd ch: inc, 2sc, inc, turn (6)

Row 2 :

ch1, inc, 4sc, inc, turn (8)

Row 3 :

ch1, inc, 6sc, inc, turn (10)

Row 4 :

ch1, inc, 8sc, inc, turn (12)

Row 5 :

ch1, inc, 10sc, inc, turn (14)

Row 6 :

ch1, 14sc, turn (14)

Row 7 :

ch1, inc, 12sc, inc, turn (16)

Row 8-11 :

ch1, 16sc, turn (16)

Row 12 :

ch1, dec, 12sc, dec, turn (14)

Row 13 :

ch1, dec, 10sc, dec, turn (12)

Row 14 :

ch1, dec, 8sc, dec, turn (10)

Row 15-16 :

ch1, 10sc, turn (10)

Row 17 :

Switch to White. ch1, inc, 8sc, inc, turn (12)

Row 18 :

ch1, 12sc, turn (12)

Row 19 :

ch1, inc, 10sc, inc, turn (14)

Row 20 :

ch1, 14sc, turn (14)

Row 21 :

Switch to Cream. ch1, 14sc, turn (14)

Row 22 :

ch1, 14sc, turn (14)

Row 23 :

ch1, inc, 12sc, inc, turn (16)

Row 24 :

ch1, 16sc, turn (16)

Row 25 :

Switch to White. ch1, 16sc, turn (16)

Row 26-27 :

ch1, 16sc, turn (16)

Row 28 :

ch1, dec, 12sc, dec, turn (14)

Row 29 :

ch1, 14sc, turn (14)

— 2. Princess Doll - Legs :

Info :

Continuing from the body, we will split the piece to make two legs. Switch to Cream.

Row 30-37 :

ch1, 6sc, turn (6)

Row 38 :

ch1, dec, 2sc, dec, turn (4)

Row 39 :

ch1, 2dec (2)

Info :

Fasten off. Skip 2 stitches on Row 29 and attach Cream yarn to work the second leg exactly as the first (Rows 30-39).

— 3. Arms (Make 2) :

Info :

Work in a continuous spiral with Cream yarn.

Round 1 :

6sc in MR (6)

Round 2 :

(1sc, inc) * 3 (9)

Round 3 :

9sc (9)

Round 4 :

(1sc, dec) * 3 (6)

Round 5-12 :

6sc (6)

Info :

Lightly stuff as you go. Leave a long tail for sewing.

— 4. Hair Wig :

Info :

Work in a spiral with Brown yarn.

Round 1 :

6sc in MR (6)

Round 2 :

BLO 6inc (12)

Round 3 :

(1sc, inc) * 6 (18)

Round 4 :

BLO (2sc, inc) * 6 (24)

Round 5 :

(3sc, inc) * 6 (30)

Round 6 :

BLO 30sc (30)

Round 7 :

(4sc, inc) * 6 (36)

Round 8 :

BLO 36sc (36)

Round 9 :

36sc (36)

Round 10 :

BLO 36sc (36)

Round 11 :

(sl st, ch26, start in 2nd ch: 25sl st) * 18 around the edge of the cap.

Info :

Return to the front loops of Rounds 2, 4, 6, 8, and 10 to add more curly strands using the same (sl st, ch26, 25sl st) pattern.

— 5. Shoes (Make 2) :

Info :

Use Mint Green yarn and work in a spiral.

Round 1 :

6sc in MR (6)

Round 2 :

6inc (12)

Round 3 :

(1sc, inc) * 6 (18)

Round 4-5 :

18sc (18)

Round 6 :

BLO 18sc, sl st (18)

Round 7 :

ch2, 18dc-inc, sl st, turn (36)

Round 8 :

(sl st, hdc) * 18 (36)

Info :

Fasten off. Attach Pink yarn to the front loops of Round 6 and work: sl st, ch1, 18sc, sl st.

— 6. Dress :

Info :

Work in rows with Pink yarn.

Row 1 :

ch31, start in 2nd ch: 30sc, turn (30)

Row 2 :

FLO ch1, 5sc, ch6, skip 6sc, 8sc, ch6, skip 6sc, 5sc, turn (30)

Row 3 :

ch2, 30dc-inc, turn (60)

Row 4-8 :

ch2, 60dc, turn (60)

Row 9 :

Switch to Mint Green. (1dc, dc-inc) * 30 (90)

Row 10 :

ch1, (hdc, sl st) * 45 (90)

Info :

Attach Mint Green to the back loops of Row 2: ch1, 30inc, turn (60). Then ch1, (hdc, sl st) * 30 to create the ruffle.

— 7. Crown & Accessories :

Crown Round 1 :

With Yellow, ch12, join to form a ring, 12sc (12)

Crown Round 2 :

12sc (12)

Crown Round 3 :

(3sc, inc) * 3 (15)

Crown Round 4 :

(sl st, ch1, dc, ch1, sl st) * 5 (15)

Hair Ties :

With Pink, ch51, start in 2nd ch: 50sc. Fasten off (Make 2).

— 8. Castle Wall - Inner Side (Make 4) :

Info :

Work with Gray yarn in rows.

Row 1 :

ch41, start in 2nd ch: 40sc, turn (40)

Row 2-36 :

ch1, 40sc, turn (40)

Row 37 (Tower 1) :

ch1, 14sc, turn (14)

Row 38-41 :

ch1, 14sc, turn (14)

Row 42 :

ch1, inc, 12sc, inc, turn (16)

Row 43 :

ch1, 16sc, turn (16)

Row 44 :

ch1, dec, 12sc, dec, turn (14)

Row 45 :

ch1, dec, 10sc, dec, turn (12)

Row 46 :

ch1, dec, 8sc, dec, turn (10)

Row 47 :

ch1, dec, 6sc, dec, turn (8)

Row 48 :

ch1, dec, 4sc, dec, turn (6)

Row 49 :

ch1, dec, 2sc, dec, turn (4)

Row 50 :

ch1, 2dec, turn (2)

Row 51 :

ch1, dec (1)

Info :

Fasten off. Skip 12 stitches on Row 36 and repeat Rows 37-51 for the second tower.

— 9. Castle Wall - Front Outer Side :

Row 1-2 :

With Green, ch41, start in 2nd ch: 40sc, turn (40)

Row 3 :

Switch to Blue. BLO ch1, 13sc, 14sc Brown, 13sc Blue, turn (40)

Row 4-22 :

ch1, 13sc Blue, 14sc Brown, 13sc Blue, turn (40)

Row 23-32 :

Continue jacquard work adding Pink for window details as per the visual chart (Refer to PDF for exact pink placement).

Row 33-34 :

ch1, 40sc Blue, turn (40)

Row 35 :

BLO ch1, 40sc Blue, turn (40)

Row 36 :

ch1, 40sc Blue, turn (40)

Tower Steps :

Work towers identically to the inner walls using Blue yarn, switching to Dark Pink at Row 43 for the roof.

— 10. Pocket & Side Wall :

Pocket Row 1 :

With Dark Pink, ch31, start in 2nd ch: 30sc, turn (30)

Pocket Row 2-10 :

ch1, 30sc, turn (30)

Pocket Row 11 :

ch1, hdc, (ch2, skip 2, sc in next) * 9, ch1, skip 1, hdc.

Side Wall Row 1 :

With Green, ch127, start in 2nd ch: 126sc, turn (126)

Side Wall Row 2-14 :

ch1, 126sc, turn (126)

— 11. Bag Handles (Make 2) :

Round 1 :

With Blue, 8sc in MR (8)

Round 2-33 :

8sc (8)

Info :

Stuff lightly as you work. Leave a long tail for sewing to the towers.

Assembly Instructions

  • Place the two doll body halves together and join them by crocheting sc around the edge with White yarn, stuffing firmly as you go.
  • Sew the arms to the sides of the body at the shoulder level, approximately between Rounds 16 and 17.
  • Attach the hair wig to the head, embroider the facial features (nose, eyebrows, eyelids), and glue the 8mm eyes into place.
  • For the castle walls, sandwich a piece of cut plastic between an inner gray wall and an outer blue wall, then join them with a border of sc.
  • Connect the front and back walls using the long side wall strip, joining them with Dark Pink yarn using the reverse single crochet (rsc) stitch.
  • Sew the yellow door arch around the brown jacquard section and embroider the window frames and floral details on the front.
  • Attach the handles to the top corners of the towers and glue rhinestones to the centers of your embroidered flowers for a bit of sparkle.

Important Notes

  • 💡I recommend using a 1.75mm hook to keep your stitches tight; this ensures the fiberfill doesn't show through the doll's skin.
  • 💡When working the jacquard color changes on the castle walls, carry the unused yarn along the back to keep the inside of the bag tidy.
  • 💡Cut your plastic inserts about 0.5 cm smaller than the crochet pieces so you have plenty of room to work your joining border.
  • 💡Steam blocking your flat castle walls before assembly will help them lay perfectly straight and make the joining process much easier.
  • 💡For the curly hair, pull the yarn tails firmly when finishing each strand to ensure the curls stay tight and bouncy.
  • 💡Don't forget to embroider the doll's nose using a bit of leftover cream yarn for a subtle, 3D effect.

I hope you enjoy every single stitch of this royal project! Creating a whole playset like this is such a rewarding journey, and seeing the finished castle and princess together is pure magic. This is the kind of gift that sparks endless imagination and will be cherished for years to come. Don't forget to add your own little personal touches, like different flower colors or a tiny bit of sparkle on the crown. Happy crafting, and I can't wait to see your finished creations! 🧶✨👑
You ask,

we answer.

FAQs

Can I use worsted weight yarn instead of sport weight?

You certainly can, but keep in mind that your doll and castle will turn out about 30% larger. You'll also need to adjust your hook size and cut larger plastic inserts for the walls.

What kind of plastic should I use for the castle walls?

Flexible plastic folders or thin placemats work perfectly! They are sturdy enough to hold the bag's shape but thin enough to be cut easily with standard scissors.

Is the jacquard colorwork difficult for a beginner?

It can be a bit tricky! If you're new to it, just take it slow and make sure your tension isn't too tight when carrying the yarn, otherwise the wall might pucker.

How do I make the hair extra curly?

The secret is in the slip stitches! By working sl st into each chain, the strand naturally twists. If you want even tighter curls, you can try putting two slip stitches into every second chain.

Are the eyes safe for very young children?

Since these eyes are glued on, I recommend embroidering the eyes with black thread instead if the toy is intended for a child under three years old.