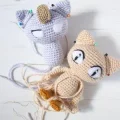
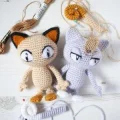
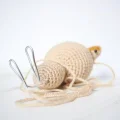
🧶 Beautiful ✨ Detailed 💝 Adorable

Meowth Pokémon Amigurumi Pattern

Meowth Pokémon Amigurumi Pattern
4.6★Rating
5-7 HoursTime Needed
1.8KMade This
✂️

Intermediate Level

Ideal for those with basic crocheting experience, featuring slightly more advanced stitches and techniques to expand your skills.

⏱️

Weekend Treat

Takes 5-7 hours, making it an enjoyable project to finish over a couple of days.

🐰

Whimsical Buddy

Playful characters full of personality, designed to spark imagination and become cherished playtime favorites.

About This Meowth Pokémon Amigurumi Pattern

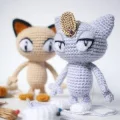
Meowth Pokémon Amigurumi Pattern crochet pattern - detailed view

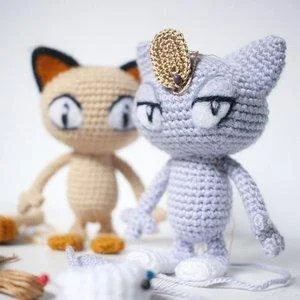
Perfect for anyone who loves gaming or anime, this little guy makes a fantastic desk companion or a thoughtful present. His sturdy design means he can stand tall while showing off those classic feline charms.

Why You'll Love This Meowth Pokémon Amigurumi Pattern

I honestly love how the wire armature gives him so much life! Being able to pose him so he stands on his own is incredibly satisfying. Plus, the way the tail spirals at the end is just the cutest detail — it’s one of those projects where the finishing touches really make you feel like a pro.

Meowth Pokémon Amigurumi Pattern step 1 Meowth Pokémon Amigurumi Pattern step 2 Meowth Pokémon Amigurumi Pattern step 3 Meowth Pokémon Amigurumi Pattern step 4

Switch Things Up

I have to admit, Meowth has always been one of my favorite Pokémon because of his big personality and that iconic "Pay Day" coin! When I first sat down to design this pattern, I really wanted to make sure I captured that slim, mischievous silhouette. One thing I found while making him is that using embroidery floss for the whiskers and the gold plate really makes a difference. It gives him a much more delicate, "official" look than using standard yarn.

If you're new to using wire in your toys, don't be intimidated! It's a total game-changer for stability. I usually fold the ends of the wire over and wrap them in a bit of tape so they don't poke through the stitches. And don't worry if your needle felting isn't perfect on the first try — it's all about building up the layers slowly. I love how every Meowth ends up with a slightly different expression, giving them their own little soul. Happy hooking!

Common Mistakes & How to Fix Them

✗ When starting the oval for the head, it's very easy to miss the first stitch on the back side of the foundation chain — use a marker to ensure your count stays at 12.✗ The fingers are quite small, and if you don't leave a long enough yarn tail for sewing, you'll find it very difficult to attach them securely to the hand.✗ Overstuffing the gold section of the tail will prevent it from holding that beautiful spiral shape; keep the filling light or skip it entirely for that part.✗ If you forget to insert the wire through the legs and into the body before closing up the torso, you won't be able to anchor it properly for a stable, standing pose.

Meowth Pokémon Amigurumi Pattern

Bring a touch of Pokémon magic into your home with this adorable Meowth project! He’s such a fun character to recreate, and you’ll love seeing his cheeky personality develop as you work through the shaping. This pattern is perfect for adding a bit of nostalgia to your shelf or surprising a fellow fan with a truly special handmade gift. I’ve put a lot of heart into ensuring the proportions feel just right, so you can enjoy every moment of the crafting process.

Intermediate 5-7 Hours

Materials Needed for Meowth Pokémon Amigurumi Pattern

— Main Fabric

  • 01
    Stylecraft Special DK in Stone (beige) for the main body parts
  • 02
    Stylecraft Special DK in Gold for the feet and tail tips
  • 03
    Gold embroidery floss (Anchor 1037) for the forehead plate
  • 04
    Stone coloured embroidery floss (DMC 842) for the delicate whiskers

— Tools Required

  • 01
    2mm crochet hook for the main amigurumi body
  • 02
    1.25mm crochet hook for the whiskers and gold plate
  • 03
    Polyester toy stuffing for a soft yet firm finish
  • 04
    25cm of craft wire for the internal leg support
  • 05
    Darning needle for assembly and weaving in ends
  • 06
    Stitch markers and pins for positioning pieces
  • 07
    Needle felting tool and fibers in Black, White, and Gold for the facial details

Progress Tracker

0% Complete

— 1. Head :

Info :

Using Stone yarn and a 2mm hook. We will start by working around a central chain to create an oval.

Round 1 :

ch 4, inc in 2nd ch from hook, inc in next 2 ch. Turn to work along the back of the ch: inc in each of the 3 ch loops (12)

Round 2 :

inc, 3 x dc, 3 x inc, 3 x dc, 2 x inc (18)

Round 3 :

2 x inc, 6 x dc, 3 x inc, 6 x dc, inc (24)

Round 4 :

(dc, inc) twice, 6 x dc, (dc, inc) 3 times, 6 x dc, dc, inc (30)

Round 5 :

(2 x dc, inc) twice, 6 x dc, (2 x dc, inc) 3 times, 6 x dc, 2 x dc, inc (36)

Round 6 :

(3 x dc, inc) twice, 6 x dc, (3 x dc, inc) 3 times, 6 x dc, 3 x dc, inc (42)

Round 7 :

dc in every st (42)

Round 8 :

(4 x dc, inc) twice, 6 x dc, (4 x dc, inc) 3 times, 6 x dc, 4 x dc, inc (48)

Round 9 :

dc in every st (48)

Round 10 :

(5 x dc, inc) twice, 6 x dc, (5 x dc, inc) 3 times, 6 x dc, 5 x dc, inc (54)

Round 11-13 :

dc in every st (54)

Round 14 :

(5 x dc, dec) twice, 6 x dc, (5 x dc, dec) 3 times, 6 x dc, 5 x dc, dec (48)

Round 15 :

dc in every st (48)

Round 16 :

(4 x dc, dec) twice, 6 x dc, (4 x dc, dec) 3 times, 6 x dc, 4 x dc, dec (42)

Info :

Begin adding stuffing to the head now.

Round 17 :

(3 x dc, dec) twice, 6 x dc, (3 x dc, dec) 3 times, 6 x dc, 3 x dc, dec (36)

Round 18 :

(2 x dc, dec) twice, 6 x dc, (2 x dc, dec) 3 times, 6 x dc, 2 x dc, dec (30)

Round 19 :

(dc, dec) twice, 6 x dc, (dc, dec) 3 times, 6 x dc, dc, dec (24)

Round 20 :

2 x dec, 6 x dc, 3 x dec, 6 x dc, dec (18)

Round 21 :

2 x dec, 3 x dc, 3 x dec, 3 x dc, dec (12)

Round 22 :

6 x dec (6)

Info :

Fasten off and hide the yarn tail inside.

— 2. Body :

Round 1 :

4 x dc in MR (4)

Round 2 :

inc in every st (8)

Round 3 :

(2 x inc, 2 x dc) repeat twice (12)

Round 4 :

(dc, 3 x inc, 2 x dc) repeat twice (18)

Round 5 :

(2 x dc, 3 x inc, 4 x dc) repeat twice (24)

Round 6-11 :

dc in every st (24)

Round 12 :

(4 x dc, dec) repeat 4 times (20)

Round 13-14 :

dc in every st (20)

Info :

Fasten off, leave a long tail for sewing, and stuff the body firmly.

— 3. Ears :

Round 1 :

6 x dc in MR (6)

Round 2 :

dc in every st (6)

Round 3 :

inc in every st (12)

Round 4-5 :

dc in every st (12)

Round 6 :

(dc, inc) repeat 6 times (18)

Round 7-8 :

dc in every st (18)

Info :

Fasten off, leave a sewing tail, and lightly stuff.

— 4. Arms :

Round 1 :

6 x dc in MR (6)

Round 2 :

inc in every st (12)

Round 3 :

6 x dec (6)

Round 4-14 :

dc in every st (6)

Info :

Fasten off and leave a long tail for attaching to the body. Make 2 arms.

— 5. Fingers :

Round 1 :

5 x dc in MR (5)

Round 2 :

dc in every st, then sl st into the first st to finish (5)

Info :

Fasten off and leave a sewing tail. Make 6 fingers total (3 for each hand).

— 6. Legs & Feet :

Info :

Start with Gold yarn and a 2mm hook. We are making an oval.

Round 1 :

ch 4, inc in 2nd ch, dc, inc in next 2 ch. On the other side: inc, dc, inc (10)

Round 2 :

(inc, 4 x dc) repeat twice (12)

Round 3 :

dc in every st (12)

Round 4 :

(dec, 4 x dc) repeat twice (10)

Round 5 :

dc in every st (10)

Round 6 :

(dec, 3 x dc) repeat twice (8)

Round 7 :

dc in every st (8)

Info :

Switch to Stone yarn.

Round 8-10 :

dc in every st (8)

Row 11 (rs) :

dc 1, turn (1)

Row 12 (ws) :

ch 1, 4 x dc, turn (4)

Round 13 (rs) :

ch 1, 4 x dc. Now working in rounds: dec across the row edge and the next dc from the previous round, 2 x dc, dec using the next dc and the opposite row edge.

Round 14 :

(2 x dc, dec) repeat twice (6)

Round 15-16 :

dc in every st (6)

Info :

Fasten off, leave a tail for sewing. Make 2 legs. Use wire for stability.

— 7. Tail :

Info :

Start with Gold yarn.

Round 1 :

6 x dc in MR (6)

Round 2 :

(inc, 2 x dc) repeat twice (8)

Round 3-29 :

dc in every st (8)

Info :

Switch to Stone yarn.

Round 30-41 :

dc in every st (8)

Info :

Fasten off and leave a sewing tail.

— 8. Gold Plate :

Info :

Use Gold embroidery floss and the 1.25mm hook. Work around the chain.

Round 1 :

ch 6, (inc, 3 x dc, inc) repeat twice (14)

Round 2 :

(inc, 5 x dc, inc) repeat twice (18)

Round 3 :

(2 x inc, 5 x dc, 2 x inc) repeat twice (26)

Info :

Fasten off and leave a tail for sewing to the face.

— 9. Whiskers :

Row 1 :

Using Stone embroidery floss and 1.25mm hook, ch 12. sl st into the 2nd ch from hook and in each remaining ch across.

Info :

Fasten off and leave a sewing tail. Make 6 whiskers.

Assembly Instructions

  • Stuff the head and body firmly with polyester filling, then sew the head onto the body opening using the long yarn tail.
  • Place the ears on the top corners of the head and stitch them down securely.
  • Attach three fingers to each arm — sew one to the bottom of the hand and one on either side — before sewing the arms to the torso.
  • Insert the 25cm wire through both legs and into the body to provide a sturdy frame, then sew the legs to the base of the body.
  • Sew the gold plate to the center of the forehead and attach three whiskers to each side of the face.
  • Roll the gold portion of the tail into a spiral swirl and sew it to itself to hold the shape, then attach the stone end to the back of the body.
  • Complete the face by needle felting or embroidering the eyes, mouth, and teeth, and adding the black and gold details to the ears.

Important Notes

  • 💡This pattern is written using UK crochet terminology (dc is equivalent to US sc).
  • 💡If you prefer not to needle felt, you can use felt fabric or embroidery for the eyes and ear details.
  • 💡The wire is essential if you want your Meowth to stand upright independently; ensure the ends are tucked safely inside.
  • 💡When working the oval sections, keep your tension consistent to prevent the stuffing from showing through the stitches.
  • 💡I recommend pinning all pieces in place before sewing to ensure the character's proportions look correct.
  • 💡Using scrap yarn as a running stitch marker is a very helpful way to track your rounds in these small pieces.

I can't wait to see your finished Meowth! There’s such a special feeling when you finally sew that last whisker in place and see him looking back at you with those big eyes. Don’t forget to take your time with the assembly; it’s the secret to getting that perfect Pokémon look. Whether he’s joining your own collection or heading off to a new home as a gift, he’s bound to bring a smile to anyone’s face. Happy crafting, and I hope you enjoyed every single stitch of this nostalgic journey! 🧶 ✨
You ask,

we answer.

FAQs

Can I use US crochet terms instead of UK?

Yes, just remember to substitute every 'dc' (double crochet) in this pattern for a 'sc' (single crochet), as this pattern is written in UK English.

What if I don't have a needle felting tool?

No problem! You can achieve a similar look by cutting the eye and ear shapes out of felt sheets and sewing or gluing them on, or by using satin stitch embroidery.

Is the wire really necessary for the legs?

While the doll will still look great without it, the wire is what allows Meowth to stand up on his own. Without it, he will likely be too top-heavy to stand.

Can I use regular yarn for the whiskers?

You can, but they will look much thicker. Using embroidery floss gives them that delicate, sharp look that matches the character's design perfectly.

How do I get the tail to stay in a swirl?

After finishing the tail, roll the gold end into a tight coil and use a needle to sew through the layers of the coil to lock it into place before attaching it to the body.