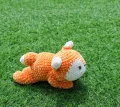
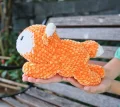
🧶 Beautiful ✨ Detailed 💝 Adorable

Sleepy Little Fox Amigurumi Pattern

Sleepy Little Fox Amigurumi Pattern
4.0★Rating
5-7 HoursTime Needed
3.8KMade This
✂️

Intermediate Level

Ideal for those with basic crocheting experience, featuring slightly more advanced stitches and techniques to expand your skills.

⏱️

Weekend Treat

Takes 5-7 hours, making it an enjoyable project to finish over a couple of days.

🐥

Charming Critter

Delightful animal designs with sweet details that capture the essence of your favorite woodland and farmyard friends.

About This Sleepy Little Fox Amigurumi Pattern

Sleepy Little Fox Amigurumi Pattern crochet pattern - detailed view

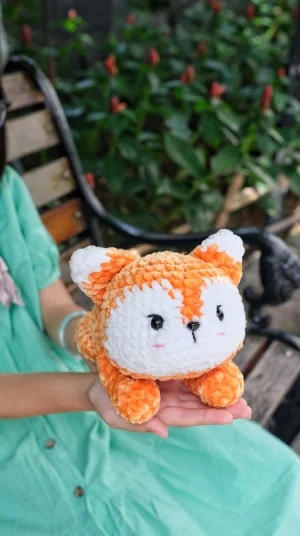
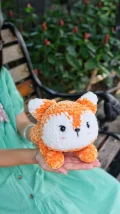
This little fox makes the most heartwarming gift for baby showers or birthdays. His soft, squishy texture and sleepy expression make him an instant favorite for cuddles, and he looks absolutely darling as a nursery decor piece.

Why You'll Love This Sleepy Little Fox Amigurumi Pattern

I honestly adore how much personality this little guy has once those eyelashes are finished! Working with chenille yarn makes the process feel so luxurious, and seeing the face shape come together with the color changes is incredibly satisfying. It's the kind of project that feels like a real accomplishment once you see him lounging on your table.

Sleepy Little Fox Amigurumi Pattern step 1 Sleepy Little Fox Amigurumi Pattern step 2 Sleepy Little Fox Amigurumi Pattern step 3 Sleepy Little Fox Amigurumi Pattern step 4

Switch Things Up

I remember the first time I worked with chenille yarn; it felt like I was crocheting a literal cloud! This little fox is one of those projects that just makes you smile the whole time it's on your hook. The way the white cheeks come together against that vibrant orange really gives him so much personality right from the start.

One thing I’ve learned with these plushy yarns is that it can be a bit tricky to see your stitches, so I always tell my friends to feel for the 'bumps' with their fingers if they get lost. For this specific pattern, don't be afraid to really sculpt those eye sockets. It’s that little bit of tension that transforms him from a simple stuffed shape into a sleepy little character with a soul. I usually put on a cozy podcast and spend a quiet evening just doing the assembly—it’s so rewarding to see him finally 'wake up' as you sew the tail on. I hope you enjoy making your new forest buddy as much as I did!

Common Mistakes & How to Fix Them

✗ When you're switching between orange and white on the face, keep your floats loose; if they're too tight, the head will look puckered and uneven.✗ It is easy to misjudge the eye socket depth—make sure to pull the yarn firmly when creating the indentations so the safety eyes sit deep enough to look sleepy.✗ Placing the legs at Round 6 of the body is crucial for balance; if they are too far back, your fox might tip forward when you set him down.✗ Overstuffing the ears can make them stand up too stiffly—leave them empty as the pattern suggests so they can fold naturally against the head.

Sleepy Little Fox Amigurumi Pattern

If you’re looking for a project that’s as cuddly as it is cute, you are going to love making this sleepy little fox. He is designed to be the perfect lounging companion, with a soft texture that makes him impossible not to squeeze. I’ve put together these steps to help you navigate those sweet facial details and the plush yarn so you can create your own forest friend. Whether he’s sitting on your desk or tucked into a gift basket, he brings a little bit of cozy magic wherever he goes.

Intermediate 5-7 Hours

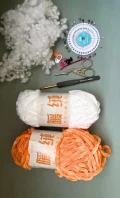
Materials Needed for Sleepy Little Fox Amigurumi Pattern

— Main Fabric

  • 01
    Chenille or velvet yarn in a vibrant Orange (about 120 meters or 1.2 skeins).
  • 02
    Soft White chenille yarn for the accents (roughly 40 meters or half a skein).

— Tools Required

  • 01
    A 4mm crochet hook to keep those stitches nice and tight.
  • 02
    One pair of 14mm safety eyes for that adorable expression.
  • 03
    An 8mm safety nose (or black yarn if you prefer to embroider it).
  • 04
    Polyester fiberfill to give your fox its squishy shape.
  • 05
    Tapestry needles in both black and white for sewing and details.
  • 06
    Straight pins to help hold the pieces in place before you sew.
  • 07
    A reliable stitch marker to track your spiral rounds.
  • 08
    Sharp scissors for trimming your yarn ends.

Progress Tracker

0% Complete

— 1. Head :

Round 1 :

Using Orange yarn, create a MR and work 8 sc into it. (8)

Round 2 :

Work 1 inc in every st around. (16)

Round 3 :

Repeat (1 sc, 1 inc) 8 times. (24)

Round 4 :

Work 1 sc, 1 inc, then repeat (2 sc, 1 inc) 7 times, finishing with 1 sc. (32)

Round 5 :

Repeat (3 sc, 1 inc) 8 times. (40)

Round 6 :

Work 1 sc in each st around. (40)

Round 7 :

In Orange: 9 sc, 1 inc, 3 sc. Switch to White: 5 sc. Switch to Orange: 1 sc, 1 inc, 1 sc. Switch to White: 5 sc. Switch to Orange: 3 sc, 1 inc, 9 sc, 1 inc. (44)

Round 8 :

In Orange: 13 sc. Switch to White: 7 sc. Switch to Orange: 2 sc. Switch to White: 7 sc. Switch to Orange: 15 sc. (44)

Round 9 :

In Orange: 12 sc. Switch to White: 8 sc. Switch to Orange: 2 sc. Switch to White: 8 sc. Switch to Orange: 14 sc. (44)

Round 10 :

In Orange: 5 sc, 1 inc, 5 sc. Switch to White: 5 sc, 1 inc, 3 sc. Switch to Orange: 2 sc. Switch to White: 3 sc, 1 inc, 5 sc. Switch to Orange: 5 sc, 1 inc, 7 sc. (48)

Round 11 :

In Orange: 12 sc. Switch to White: 22 sc. Switch to Orange: 14 sc. (48)

Round 12 :

In Orange: 11 sc. Switch to White: 24 sc. Switch to Orange: 13 sc. (48)

Round 13 :

In Orange: 12 sc. Switch to White: 22 sc. Switch to Orange: 14 sc. (48)

Round 14 :

In Orange: 13 sc. Switch to White: 20 sc. Switch to Orange: 15 sc. (48)

Round 15 :

In Orange: (4 sc, 1 dec) twice, 2 sc. Switch to White: 2 sc, 1 dec, (4 sc, 1 dec) twice, 2 sc. Switch to Orange: 2 sc, 1 dec, (4 sc, 1 dec) twice. (40)

Round 16 :

In Orange: (3 sc, 1 dec) 3 times. Switch to White: (3 sc, 1 dec) twice. Switch to Orange: (3 sc, 1 dec) 3 times. (32)

Info :

Place the safety eyes between Rounds 10 and 11, leaving a space of 7 stitches between them. Position the safety nose centered between the eyes. Cut the White yarn and continue with Orange only.

Round 17 :

Work 16 dec around. (16)

Info :

Begin stuffing the head firmly with fiberfill.

Round 18 :

Work 8 dec, then 1 sl st. (8)

Info :

Fasten off and leave a long tail. Close the hole by weaving through the front loops and pulling tight.

— 2. Body :

Round 1 :

Using Orange yarn, work 8 sc into a MR. (8)

Round 2 :

Work 1 inc in every st around. (16)

Round 3 :

Repeat (1 sc, 1 inc) 8 times. (24)

Round 4 :

Repeat (1 sc, 1 inc, 1 sc) 8 times. (32)

Round 5 :

Repeat (3 sc, 1 inc) 8 times. (40)

Round 6-10 :

Work 1 sc in each st around for these five rounds. (40)

Round 11 :

Repeat (3 sc, 1 dec) 8 times. (32)

Round 12-14 :

Work 1 sc in each st around for these three rounds. (32)

Round 15 :

Repeat (14 sc, 1 dec) twice. (30)

Round 16 :

Work 30 sc, then finish with a sl st. (30)

Info :

Fasten off leaving a long tail for assembly. Fill the body firmly with stuffing.

— 3. Arms & Legs :

Info :

Make 4 identical pieces using Orange yarn.

Round 1 :

Work 6 sc into a MR. (6)

Round 2 :

Work 1 inc in every st around. (12)

Round 3-12 :

Repeat the pattern (4 sc, 1 inc, 5 sc, 1 dec) for all ten rounds. (12)

Info :

Fill the limbs firmly with fiberfill.

Round 13 :

Flatten the opening and work 6 sc through both layers to seal it, then finish with a sl st. (6)

Info :

Fasten off and leave a tail for sewing.

— 4. Ears :

Info :

Make 2 pieces, starting with White yarn.

Round 1 :

Work 6 sc into a MR. (6)

Round 2 :

Repeat (1 sc, 1 inc) 3 times. (9)

Round 3 :

Work 1 sc in each st around. (9)

Info :

Switch to Orange yarn and cut the White yarn.

Round 4 :

Work 1 sc, 1 inc, then repeat (2 sc, 1 inc) twice, finishing with 1 sc. (12)

Round 5 :

Repeat (3 sc, 1 inc) 3 times. (15)

Info :

Do not stuff the ears.

Round 6 :

Flatten the ear and work 7 sc through both layers to close, then finish with a sl st. (7)

Info :

Fasten off and leave a tail for sewing.

— 5. Tail :

Round 1 :

Using White yarn, work 6 sc into a MR. (6)

Round 2 :

Repeat (1 sc, 1 inc) 3 times. (9)

Round 3 :

Repeat (2 sc, 1 inc) 3 times. (12)

Info :

Switch to Orange yarn and cut the White yarn.

Round 4 :

Repeat (3 sc, 1 inc) 3 times. (15)

Round 5 :

Repeat (4 sc, 1 inc) 3 times. (18)

Round 6 :

Repeat (4 sc, 1 dec) 3 times. (15)

Round 7 :

Repeat (3 sc, 1 dec) 3 times. (12)

Round 8 :

Work 6 dec, then finish with a sl st. (6)

Info :

Lightly stuff the tail and leave a long tail for sewing.

Assembly Instructions

  • Position the ears between Rounds 4 and 8 of the head, ensuring they are spaced about 8 stitches apart.
  • Use black yarn to create the eye sockets by pulling the yarn through the head to indent the area where the safety eyes sit.
  • Embroider delicate eyelashes using black and white yarn around the safety eyes to give him that sleepy expression.
  • Secure the body to the base of the head, sewing stitch-by-stitch to keep the connection sturdy and centered.
  • Attach the two legs at Round 6 of the body, leaving a gap of 10 stitches between them so he sits flat.
  • Sew the arms onto the sides of the body between Rounds 12 and 15, positioning them about 10 to 14 stitches apart.
  • Finish by attaching the tail to the back of the body, making sure it’s centered between the legs.

Important Notes

  • 💡This project is worked in a continuous spiral, so don't join your rounds unless the instructions specifically say so.
  • 💡Always use a stitch marker at the beginning of each round to avoid losing your place in the plush yarn.
  • 💡When working with chenille yarn, try not to pull too hard on the magic ring or it may snap; slow and steady is best.
  • 💡Read through the entire pattern once before you start to get a feel for the color changes on the face.
  • 💡Stuff your pieces firmly as you go, especially the head and body, to ensure the fox maintains its shape over time.

I’m so excited for you to meet your new little fox! There’s something so special about bringing a character to life with just a hook and some yarn. Don’t worry if your stitches aren’t perfectly visible in the plush yarn—just trust the process and enjoy the squishy feel of the fabric. Once you finish those tiny eyelashes and sew on the tail, you’ll have a forest friend that’s ready for a lifetime of hugs. Happy crocheting, and I can’t wait to see your finished buddy! 🧶🦊✨
You ask,

we answer.

FAQs

Can I use a different type of yarn for this fox?

Absolutely! While this was designed for chenille yarn to get that chunky look, you can use worsted weight cotton or acrylic. Just keep in mind your fox will be smaller, and you should use a smaller hook (like 2.5mm or 3mm) to keep the stuffing from showing.

How do I make the eye sockets look deep enough?

The secret is in the tension. Use a long piece of black yarn and go in through the bottom of the head, out near the eye, back in a stitch over, and down again. Pull firmly before tying a knot at the base—this creates that lovely 'sunken' look for the eyes.

I'm having trouble seeing my stitches in the orange chenille yarn, any tips?

Chenille can be tricky! Try working under a very bright light or using your fingers to feel for the 'v' or the gap between stitches. Using a contrasting colored stitch marker for the first stitch of every round is also a lifesaver.

Is it okay to use safety eyes if this is for a baby?

Safety eyes are generally secure, but for infants, it is always safer to embroider the eyes using black yarn. This eliminates any choking hazard while still keeping that cute, sleepy expression.