About This Tiny Koala Amigurumi Pattern
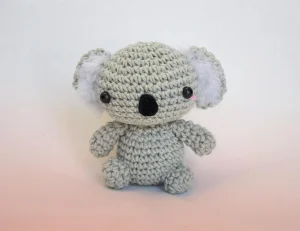
Perfect for gifting to animal lovers or adding to your own collection, this little guy looks adorable perched on a windowsill or sitting right next to your computer while you work.
Ideal for those with basic crocheting experience, featuring slightly more advanced stitches and techniques to expand your skills.
Fits nicely into a free afternoon — 2 to 5 hours of focused, enjoyable crocheting.
A mini friend to carry anywhere, providing comfort and companionship in a perfectly portable size.
Perfect for gifting to animal lovers or adding to your own collection, this little guy looks adorable perched on a windowsill or sitting right next to your computer while you work.
I honestly could not stop smiling while making those fluffy ears! Using a pet brush on acrylic yarn is such a clever way to add texture without needing fancy specialty yarns. It is a really relaxing project that does not require a huge time commitment but yields such a professional-looking result every time.
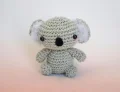
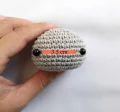
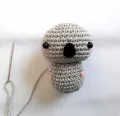
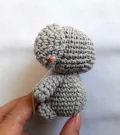
I have always had a soft spot for koalas, but finding a pattern that captured that specific fluffy ear look without being overly complicated was tough. That is why I started experimenting with the brushing technique you see here! It is a total game-changer. I remember the first time I tried it; I was so nervous I would ruin the whole piece, but it actually hides a lot of imperfections in the stitchwork.
If you want to customize your little guy, try using a light blue or even a soft mint yarn instead of gray—it gives him such a whimsical, nursery-ready vibe. I also found that adding a tiny crochet leaf or a bit of green felt in his hand makes him look like he is snacking on eucalyptus, which is just too cute for words.
One little tip from my workbench: when you are sewing the head to the body, add that last bit of stuffing right before you close the seam. It helps prevent floppy neck syndrome, which is the last thing our sturdy little koala needs!
Meet your new favorite desk buddy! This little koala is just the right size to tuck into a pocket or sit on your shelf. I have designed him to be super squishy, and that brushed-out yarn technique on the ears gives him so much personality. You will love how quickly he comes together with just a few basic stitches and some scrap yarn from your stash.
Start by making 6 sc into a magic ring (6)
Work 1 inc into every stitch from the previous round (12)
Repeat a pattern of 1 sc followed by 1 inc a total of 6 times (18)
Repeat a pattern of 1 sc in the next 2 st followed by 1 inc a total of 6 times (24)
Repeat a pattern of 1 sc in the next 3 st followed by 1 inc a total of 6 times (30)
Repeat a pattern of 1 sc in the next 5 st followed by 1 inc a total of 5 times (35)
Work 1 sc into every stitch around for these five rounds (35)
Place your 5 mm safety eyes between Round 8 and Round 9.
Repeat a pattern of 1 sc in the next 3 st followed by 1 dec a total of 7 times (28)
Repeat a pattern of 1 sc in the next 2 st followed by 1 dec a total of 7 times (21)
Repeat a pattern of 1 sc followed by 1 dec a total of 7 times (14)
Fasten off your work and stuff the head firmly with fiberfill.
Begin with 6 sc inside a magic ring (6)
Work 1 inc in each of the 6 stitches around (12)
Repeat a pattern of 1 sc and then 1 inc 6 times (18)
Repeat a pattern of 1 sc in the next 5 st and then 1 inc 3 times (21)
Work 1 sc into every stitch for these six rounds (21)
Repeat a pattern of 1 sc in the next 2 st and then 1 dec 5 times, then work 1 sc in the final stitch (16)
Repeat a pattern of 1 sc and then 1 dec 5 times, then work 1 sc in the final stitch (11)
Fasten off, leave a long tail for sewing, and stuff the body with fiberfill.
Create a magic ring and work 6 sc into it (6)
Work 1 sc in every stitch around for these five rounds (6)
Fasten off, leave a sewing tail, and lightly stuff the hand.
Start a magic ring and work 8 sc into it (8)
Work 1 sc in every stitch around for these two rounds (8)
Fasten off, leave a sewing tail, and stuff the leg carefully.
Work 6 sc into a magic ring (6)
Work 1 inc in every stitch around (12)
Repeat a pattern of 1 sc and 1 inc 6 times (18)
Repeat a pattern of 1 sc in the next 2 st and 1 dec 4 times, then work 1 sc in the last 2 stitches (14)
Work 1 sc in every stitch around (14)
Fasten off and leave a tail for assembly. Do not add stuffing to the ears.
I hope you have as much fun bringing this little koala to life as I did! There is something so satisfying about that final step where the ears go from plain yarn to fluffy clouds. He is the perfect size for a quick weekend project or a thoughtful handmade gift for a friend who needs a little pick-me-up. Don't forget to give him a good squeeze once he is all finished—he is surprisingly soft! Happy stitching, and I can't wait to see your finished koalas. 🧶 ✨
You definitely can, but you will likely need a larger hook and your koala will turn out much bigger. The brushed ear technique also works best with acrylic yarn, so keep a bit of that on hand even if you change the body yarn.
A clean, stiff-bristled toothbrush or even a fine-tooth comb can work in a pinch, though it might take a little longer to get that super shaggy look.
This usually happens if the legs are sewn too far forward. Try pinning them slightly further back toward the bottom-center of the body to create a better tripod base for him to sit on.
I like to cut a small paper template first to make sure the size looks right on the face, then pin that to the felt and cut around it with very sharp fabric scissors.
