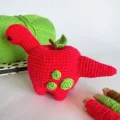
🧢 Beautiful ✨ Detailed πŸ’ Adorable

Appletosaurus Dinosaur Amigurumi Pattern

Appletosaurus Dinosaur Amigurumi Pattern
4.2β˜…Rating
3-5 HoursTime Needed
1.9KMade This
βœ‚οΈ

Intermediate Level

Ideal for those with basic crocheting experience, featuring slightly more advanced stitches and techniques to expand your skills.

⏱️

Quick Craft

Fits nicely into a free afternoon β€” 2 to 5 hours of focused, enjoyable crocheting.

πŸ₯

Charming Critter

Delightful animal designs with sweet details that capture the essence of your favorite woodland and farmyard friends.

About This Appletosaurus Dinosaur Amigurumi Pattern

Appletosaurus Dinosaur Amigurumi Pattern crochet pattern - detailed view

This adorable toy makes a wonderful back-to-school gift for a favorite teacher, a playful addition to a nursery shelf, or a quick craft fair bestseller that shoppers will absolutely adore.

Why You'll Love This Appletosaurus Dinosaur Amigurumi Pattern

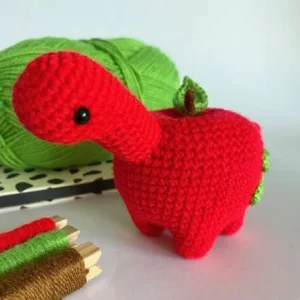
I absolutely adore how this design uses a clever sculpting technique to pull the top center down, creating that perfect, realistic apple dip! Joining the legs directly to the body as you go is also such a time-saverβ€”it means less sewing later and a super sturdy finished toy.

Appletosaurus Dinosaur Amigurumi Pattern step 1 Appletosaurus Dinosaur Amigurumi Pattern step 2 Appletosaurus Dinosaur Amigurumi Pattern step 3 Appletosaurus Dinosaur Amigurumi Pattern step 4

Switch Things Up

I have always been completely charmed by food-animal mashups, and this little Appletosaurus has stolen my heart! When I first sat down to design a dinosaur pattern, I wanted something that felt fresh, playful, and incredibly satisfying to construct. Combining the plump, organic shape of a fresh apple with the adorable silhouette of a long-necked dinosaur felt like absolute magic.

If you want to put your own creative spin on this project, think about the different apple varieties out there! You could easily crochet the main body in a bright, crisp lime green for a Granny Smith look, or use a variegated yellow and red yarn to mimic a sweet Gala apple. You could even add some tiny embroidered pink cheeks just below the safety eyes to give your dinosaur an extra dose of adorable personality.

My favorite part of the process is always the sculpting step at the end. It feels like real magic when you pull that yarn tail tight and watch the flat top collapse into a perfect apple dip!

Common Mistakes & How to Fix Them

βœ— When joining the legs in Round 5, it is easy to twist them or attach them facing the wrong directionβ€”make sure the flat bottom of each leg is aligned parallel to the body surface before you stitch through both layers.βœ— If you do not pull the sculpting yarn tail firmly enough through the center of the body to the bottom, the top indentation will be too shallow and won't look like a real apple.βœ— Neglecting to stuff the neck section of the head very firmly will result in a droopy, floppy neck that can't support the weight of the dinosaur's head.βœ— When sewing the tail onto the back, if you don't position the three increase stitches from Round 11 facing upwards, the tail will curve downwards instead of perking up playfully.

Appletosaurus Dinosaur Amigurumi Pattern

Meet the Appletosaurus, the sweetest little prehistoric pal you will ever stitch up! This delightful mashup of a juicy red apple and a cute sauropod dinosaur is the perfect weekend project to add some whimsical charm to your shelf. With its adorable stubby legs, leafy stem topper, and cute little spots, you will fall in love with watching this clever design come together. Grab your favorite red and green yarn, and let's make a modern heirloom that is sure to bring a smile to everyone who sees it!

Intermediate 3-5 Hours

Materials Needed for Appletosaurus Dinosaur Amigurumi Pattern

β€” Main Fabric

  • 01
    DK weight yarn in vibrant red (such as Stylecraft Special DK in Matador) for the main body, head, legs, and tail
  • 02
    DK weight yarn in bright green (such as Stylecraft Special DK in Grass Green) for the leaf and spots
  • 03
    DK weight yarn in warm brown (such as Stylecraft Special DK in Gingerbread) for the apple stem

β€” Tools Required

  • 01
    2.5 mm crochet hook
  • 02
    One pair of 6mm safety eyes
  • 03
    Stitch markers to track your rounds
  • 04
    Yarn needle for sewing and sculpting
  • 05
    High-quality polyester fibrefill stuffing

Progress Tracker

0% Complete

β€” 1. Legs (make four) :

Round 1 :

Form a MR and work 6 sc into it (6)

Round 2 :

Work 1 inc in every st around (12)

Round 3 :

Working in BLO, sc in each st around (12)

Round 4 :

sc in each st around (12)

Info :

Fasten off and weave in the ends securely.

β€” 2. Body :

Round 1 :

Create a MR and make 6 sc into it (6)

Round 2 :

Work 1 inc in each st around (12)

Round 3 :

Repeat *1 sc, 1 inc* 6 times around (18)

Round 4 :

Repeat *2 sc, 1 inc* 6 times around (24)

Round 5 :

sc in next 2 sts. Insert hook through any st of the first leg and the next st of the body, work 1 sc. Work 2 more sc through both the leg and body. sc in next 3 sts of the body. Work 3 sc joining the second leg and body. sc in next 3 sts of the body. Work 3 sc joining the third leg and body. sc in next 3 sts of the body. Work 3 sc joining the fourth leg and body. sc in the last st of the body (24)

Round 6 :

sc in next 2 sts. Work 9 sc around the unworked stitches of the first leg. sc in next 3 sts of the body. Work 9 sc around the second leg. sc in next 3 sts of the body. Work 9 sc around the third leg. sc in next 3 sts of the body. Work 9 sc around the fourth leg. sc in the final st of the body (48)

Round 7-11 :

sc in each st around (48)

Round 12 :

Repeat *7 sc, 1 inc* 6 times around (54)

Round 13-20 :

sc in each st around (54)

Round 21 :

Repeat *7 sc, 1 dec* 6 times around (48)

Round 22 :

Repeat *6 sc, 1 dec* 6 times around (42)

Round 23 :

Repeat *5 sc, 1 dec* 6 times around (36)

Info :

Begin stuffing the body firmly with fibrefill, and keep adding more as the opening shrinks.

Round 24 :

Repeat *4 sc, 1 dec* 6 times around (30)

Round 25 :

Repeat *3 sc, 1 dec* 6 times around (24)

Round 26 :

Repeat *2 sc, 1 dec* 6 times around (18)

Info :

Do not add any more stuffing past this point.

Round 27 :

sc in each st around (18)

Round 28 :

Repeat *1 sc, 1 dec* 6 times around (12)

Round 29 :

sc in each st around (12)

Round 30 :

Work 6 dec around (6)

Info :

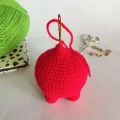
Cut the yarn, leaving a long tail. Use an invisible finish to close the remaining 6 stitches. Insert your yarn needle into the center of the closure, push it straight through the body, and bring it out at the bottom center. Pull the tail firmly to create an indentation at the top of the apple body. Secure the yarn with a few stitches at the bottom (this also lifts the belly slightly), and weave in the ends.

β€” 3. Head :

Round 1 :

Work 6 sc into a MR (6)

Round 2 :

Work 1 inc in each st around (12)

Round 3 :

Repeat *1 sc, 1 inc* 6 times around (18)

Round 4 :

Repeat *2 sc, 1 inc* 6 times around (24)

Round 5-9 :

sc in each st around (24)

Round 10 :

sc in next 6 sts, repeat *1 sc, 1 dec* 4 times, sc in last 6 sts (20)

Round 11 :

sc in next 4 sts, repeat *1 sc, 1 dec* 4 times, sc in last 4 sts (16)

Info :

Place the 6mm safety eyes between Rounds 7 and 8, leaving a space of 10 stitches between them so they sit on opposite sides of the head.

Round 12-18 :

sc in each st around (16)

Info :

Finish the final round with a slst to join. Fasten off, leaving a long tail for sewing.

β€” 4. Tail :

Round 1 :

Work 6 sc into a MR (6)

Round 2 :

Repeat *1 sc, 1 inc* 3 times around (9)

Round 3-4 :

sc in each st around (9)

Round 5 :

Repeat *2 sc, 1 inc* 3 times around (12)

Round 6-7 :

sc in each st around (12)

Round 8 :

Repeat *3 sc, 1 inc* 3 times around (15)

Round 9-10 :

sc in each st around (15)

Round 11 :

sc in next 6 sts, work 1 inc in each of the next 3 sts, sc in last 6 sts (18)

Round 12-13 :

sc in each st around (18)

Info :

Finish the final round with a slst to join. Fasten off, leaving a long tail for sewing.

β€” 5. Leaf :

Round 1 :

ch 8. Starting in the second chain from your hook, work: 1 sc, 1 hdc, 1 dc, 1 dcinc, 1 dc, 1 hdc. In the last chain stitch, work this sequence: 1 sc, ch 2, 1 slst in the second chain from hook, 1 sc. Now, rotate to work along the opposite side of the chain: 1 hdc, 1 dc, 1 dcinc, 1 dc, 1 hdc, 1 sc. Join with a slst to the first stitch (16)

Info :

Fasten off, leaving a long tail for assembly.

β€” 6. Stem :

Row 1 :

ch 10. Starting in the second chain from your hook, work 1 slst in each of the next 9 chains (9)

Info :

Fasten off, leaving a long tail for assembly.

β€” 7. Spots :

Small Spots :

Make two: Work 6 sc into a MR, then join with a slst (6). Fasten off, leaving a long tail.

Medium Spots :

Make two: Work 8 sc into a MR, then join with a slst (8). Fasten off, leaving a long tail.

Large Spots :

Make two: Round 1: Work 6 sc into a MR (6). Round 2: Work 1 inc in each st around, then join with a slst (12). Fasten off, leaving a long tail.

Assembly Instructions

  • Thread your yarn needle with the long tail of the green leaf and sew it securely about halfway up the brown stem, then stitch the bottom of the stem directly into the center of the top body indentation.
  • Stuff the dinosaur's head and neck firmly with fibrefill, then pin the neck over Rounds 18 to 22 of the body, adjusting the placement slightly to ensure the toy balances perfectly on its feet before sewing it down.
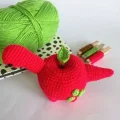
  • Stuff the tail piece firmly, then sew it over Rounds 14 to 19 on the rear of the body, making sure the three increases from Round 11 are positioned on the top side to give the tail its correct upward curve.
  • Arrange the six green spots (two small, two medium, two large) on the rear sides of the body, pinning them in place before sewing them down flat using their yarn tails.

Important Notes

  • πŸ’‘Keep your tension consistent and relatively tight to prevent the polyester stuffing from peeking through the stitches.
  • πŸ’‘Use a stitch marker in the first stitch of each round, as this pattern is worked in a continuous spiral.
  • πŸ’‘When working the leg-joining round, take your time to align the legs evenly so your dinosaur stands flat without wobbling.
  • πŸ’‘The body indentation sculpting step is crucialβ€”make sure to use a strong yarn tail and pull firmly to achieve the classic apple shape.
  • πŸ’‘Weave in all your loose ends securely inside the stuffed body to ensure your toy is durable and safe for handling.

I hope you have the absolute best time bringing your Appletosaurus to life! There is nothing quite like watching a simple ball of yarn transform into such a whimsical, smiling little friend. Whether this cute dino is destined for a teacher's desk, a child's playroom, or your very own creative space, it is sure to spark joy. Don't forget to play around with different shades of red and green to make your apple toy uniquely yours. Happy crocheting, my lovely crafting friends! 🧢✨🍎

You ask,

we answer.

FAQs

Can I use safety eyes if I'm making this toy for a baby?

If this toy is intended for children under three, safety eyes can be a choking hazard. I highly recommend embroidering the eyes with black yarn or embroidery floss instead!

What other yarn weights can I use for this pattern?

You can easily scale this up by using worsted weight or even chunky chenille yarn! Just make sure to use a hook size that is 0.5mm to 1mm smaller than recommended on the yarn label to keep your stitches tight.

Why is my dinosaur not standing up straight on its legs?

This usually happens if the legs are sewn on slightly unevenly or if the body sculpting pull wasn't secured. Make sure the bottom of the body is flattened slightly when you secure the sculpting yarn at the bottom.

Is it difficult to join the legs directly to the body?

Not at all! Just follow the stitch-by-stitch instructions for Round 5 carefully. Pinning the legs in place beforehand can help you visualize exactly where the hook needs to go.