About This Tropical Mini Parrot Amigurumi Pattern
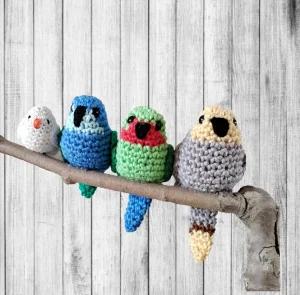
Perfect for brightening up a desk or turning into a cheerful keychain, this mini bird makes a wonderful little 'just because' gift for the bird lovers in your life.
Ideal for those with basic crocheting experience, featuring slightly more advanced stitches and techniques to expand your skills.
Fits nicely into a free afternoon — 2 to 5 hours of focused, enjoyable crocheting.
A mini friend to carry anywhere, providing comfort and companionship in a perfectly portable size.
Perfect for brightening up a desk or turning into a cheerful keychain, this mini bird makes a wonderful little 'just because' gift for the bird lovers in your life.
I love how the color changes on the face give it so much character without being overly complicated. It's one of those projects where you can really play with your stash—go bright and bold or soft and pastel, and they always turn out adorable. Plus, the minimal sewing is a huge win in my book!
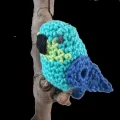
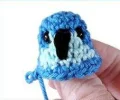
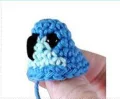
There is something genuinely magical about amigurumi that fits right in the palm of your hand. This mini parrot pattern is one of those projects that I find myself coming back to whenever I need a 'palette cleanser' between bigger blankets or sweaters. It’s fast, it’s fun, and it lets me play with all those vibrant tropical colors that usually just sit in my scrap basket.
When I first made these, I experimented with different tail lengths. If you want a more dramatic look, just add a few extra rounds of sc to the blue section before you start the decreases. It gives them a totally different silhouette! Also, don't feel limited by the 'natural' colors. I’ve made one in neon pink and purple, and it looked like a total party bird.
One little tip from my experience: when you're sewing the wings on, try to angle them slightly back. It gives the bird a more 'perched' and lifelike look. I usually use a bit of hot glue to attach them to a decorative branch once they're done—it makes for such a cute piece of home decor!
I've always had a soft spot for little birds, and these tiny parrots are just the perfect way to use up those leftover cotton scraps. They’re quick, colorful, and honestly, you can’t stop at just one! You'll love seeing their little personalities come to life as you add the beak and eyes. Whether you want a whole flock for a mobile or just a single pocket pal, these sweet birds are a joy to hook up.
Begin with turquoise yarn by making a mc and placing 6 sc inside (6)
Work 2 sc into every stitch around (12)
Repeat a pattern of 3 sc followed by an inc a total of 3 times, switching to green yarn on the final pull-through of the last stitch (15)
Work 4 sc in green, switch to turquoise and work 11 sc, then switch back to green on the very last stitch (15)
Work 4 sc in green, switch to turquoise and work 10 sc, switch back to green and work 1 sc (15)
Work 5 sc in green, switch to turquoise and work 8 sc, switch back to green and finish with 2 sc (15)
Work 6 sc in green, switch to turquoise, then work 3 sc, 1 inc, 1 sc, 1 inc, 1 sc, 1 inc, 1 sc (18)
Using turquoise, work 2 sc, 1 inc, 1 sc, 1 inc, then 13 sc (20)
Work 1 sc into every stitch around (20)
Work 1 sc into every stitch around (20)
Work a sequence of 1 sc followed by an inc 4 times, then 12 sc (24)
Work 2 sc, 1 dec, 2 sc, 1 dec, then make 2 inc in the center of the back, and finish with 14 sc (24)
Work 3 sc, 1 dec, 3 sc, 1 dec, and then 14 sc (22)
Work 2 sc, 1 dec, 2 sc, 1 dec, and then 14 sc (20)
Work 2 sc, 1 dec, 2 sc, 1 dec, and 12 sc (18). At this point, begin adding fiberfill to the body.
Repeat a pattern of 1 sc followed by a dec 6 times (12)
Switch to blue yarn and work a pattern of 2 sc followed by a dec 3 times (9)
Work 1 sc into every stitch around (9)
Work 1 sc into every stitch around (9)
Work 2 sc, 1 dec, 2 sc, 1 dec, and 1 sc (7)
Work 1 sc, 1 dec, 2 sc, and 1 dec (5)
Fasten off your yarn, leaving a tail. Use a needle to weave through the front loops of the last 5 stitches to close the tail neatly.
Using dark blue yarn, start with a mc and work 9 sc into it (9)
Work a pattern of 2 sc followed by an inc 3 times (12)
ch 6, then beginning in the 2nd ch from your hook, work 1 sc, 1 hdc, 1 dc, and 3 tc. Ensure the final tc is worked into the base of the previous round's last sc. Skip 2 stitches on the main circle and slst to secure the wing tip.
Fasten off and leave a long tail for attaching the wings to the body.
I really hope you enjoyed making this little tropical friend! There's something so satisfying about seeing that tiny face come together. These parrots look amazing in a group, so don't be afraid to experiment with different shades of yellow, red, or even variegated yarns for a unique flock. They're the perfect size for keychains or just to perch on a shelf. Happy crocheting, and may your day be as bright as your new feathered buddy! 🧶 ✨
The trick is to change colors on the very last yarn-over of the stitch before the new color starts. This keeps the 'legs' of the stitch one color and the top 'V' the next color.
The tail acts as a bit of a tripod. Make sure the body is stuffed firmly and the tail is angled slightly back when you finish the final rounds.
Absolutely! Just keep in mind your parrot will turn out larger than 3 inches, and you'll need to use a larger hook (like a 3.5mm) and potentially larger safety eyes.
That stands for Treble Crochet. To do this, yarn over twice before inserting your hook into the stitch, then pull through two loops at a time until only one remains.
