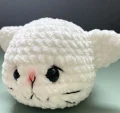
🧢 Beautiful ✨ Detailed πŸ’ Adorable

Little Snowball Kitten Amigurumi Pattern

Little Snowball Kitten Amigurumi Pattern
4.9β˜…Rating
3-5 HoursTime Needed
1.5KMade This
βœ‚οΈ

Intermediate Level

Ideal for those with basic crocheting experience, featuring slightly more advanced stitches and techniques to expand your skills.

⏱️

Quick Craft

Fits nicely into a free afternoon β€” 2 to 5 hours of focused, enjoyable crocheting.

🐰

Whimsical Buddy

Playful characters full of personality, designed to spark imagination and become cherished playtime favorites.

About This Little Snowball Kitten Amigurumi Pattern

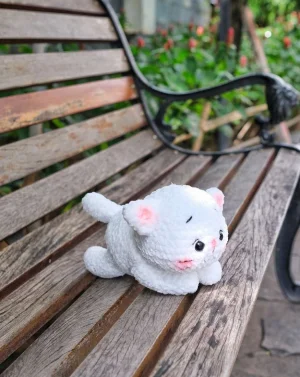
Little Snowball Kitten Amigurumi Pattern crochet pattern - detailed view

Whether you are making a gift for a cat lover or adding to your own plushie collection, this kitten's soft texture and charming pose make it an instant favorite for anyone who sees it.

Why You'll Love This Little Snowball Kitten Amigurumi Pattern

I honestly could not stop squishing this little guy once he was finished! The way the head and body join creates such a natural, lifelike shape. It is one of those projects where you see the personality emerge with every embroidered whisker, and using plush yarn makes the progress feel so fast and satisfying.

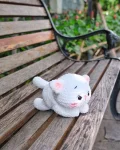
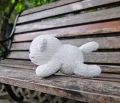
Little Snowball Kitten Amigurumi Pattern step 1 Little Snowball Kitten Amigurumi Pattern step 2 Little Snowball Kitten Amigurumi Pattern step 3 Little Snowball Kitten Amigurumi Pattern step 4

Switch Things Up

I remember the first time I worked with chenille yarn; it felt like trying to crochet a cloud! This little kitten pattern really highlights why that texture is so magical for amigurumi. When I was making mine, I decided to give it a slightly pinker nose using a scrap of embroidery floss, and it completely changed the vibe to something even sweeter.

One thing I have learned with this specific 'loaf' shape is that the stuffing is everything. You want the body to be firm enough to hold that rectangular-ish shape, but the tail needs to stay soft. If you find the white yarn a bit tricky to see, try working under a very bright lampβ€”it makes a world of difference for spotting those fuzzy stitches. I also love the idea of making a whole litter of these in different pastel colors. Imagine a soft grey or even a mint green kitten! It is such a relaxing project to work on while catching up on a podcast or your favorite show. Just take your time with the face embroidery, as that is where the real magic happens.

Common Mistakes & How to Fix Them

βœ— When working Round 9 of the head, the increases create the cheeksβ€”if your stitch count is off here, the face will look lopsided, so double-check those 14 single crochets at the start.βœ— If you stuff the tail too firmly, it will not lie flat against the body; keep the filling light and airy so it can curve naturally.βœ— The eye sockets are created by pulling yarn through the headβ€”do not pull too hard or you will distort the stuffing, but pull enough to give that deep, cute look.βœ— Attaching the legs at Round 6 of the body is crucial for stability; if they are too close together, your kitten might tip over when you set it down.

Little Snowball Kitten Amigurumi Pattern

There is something so incredibly cozy about a chunky, velvet kitten. This pattern is all about capturing that squishy, loafing cat pose we all adore. You will love how the chenille yarn makes every stitch feel like a soft hug, and the finished kitty is the perfect size for cuddling or sitting on a bookshelf. It is a wonderful project for when you want to see a character come to life quickly.

Intermediate 3-5 Hours

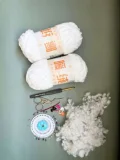
Materials Needed for Little Snowball Kitten Amigurumi Pattern

β€” Main Fabric

  • 01
    Approximately 140 meters (about 1.5 skeins) of plush chenille, velvet, or blanket-style yarn in a crisp white color.

β€” Tools Required

  • 01
    4.0 mm crochet hook
  • 02
    14 mm safety eyes
  • 03
    8 mm safety nose
  • 04
    High-quality polyester fiberfill for stuffing
  • 05
    Tapestry needles suitable for yarn (black and white threads)
  • 06
    Sharp scissors
  • 07
    Sewing pins for positioning pieces
  • 08
    Stitch marker

Progress Tracker

0% Complete

β€” 1. Head :

Round 1 :

Start with a MR and work 8 sc into it (8)

Round 2 :

Work 1 inc into every stitch around (16)

Round 3 :

Repeat the sequence of 1 sc followed by 1 inc 8 times (24)

Round 4 :

Work 1 sc, then 1 inc, then repeat (2 sc, inc) 7 times, ending with 1 sc (32)

Round 5 :

Repeat the sequence of 3 sc followed by 1 inc 8 times (40)

Round 6-8 :

Work 1 sc in each stitch around for three full rounds (40)

Round 9 :

Work 14 sc, then 4 inc, 4 sc, 4 inc, and finish with 14 sc (48)

Round 10-12 :

Work 1 sc in each stitch around for three full rounds (48)

Round 13 :

Work 14 sc, then 4 dec, 4 sc, 4 dec, and finish with 14 sc (40)

Round 14 :

Work 1 sc in each stitch around (40)

Round 15 :

Repeat the sequence of 3 sc followed by 1 dec 8 times (32)

Info :

Place the safety eyes between Rounds 10 and 11, making sure there is a 5-stitch gap between them. Begin adding fiberfill to the head.

Round 16 :

Repeat the sequence of 2 sc followed by 1 dec 8 times (24)

Round 17 :

Work 12 dec around (12)

Info :

Finish stuffing the head firmly so it holds its shape.

Round 18 :

Work 6 dec, then finish with a sl st (6)

Info :

Cut the yarn but leave a long tail. Use a needle to weave the tail through the front loops of the last round, pull tight to close, and hide the end inside.

β€” 2. Tail :

Round 1 :

Start with a MR and work 6 sc into it (6)

Round 2 :

Repeat (2 sc, inc) twice (8)

Round 3 :

Repeat (3 sc, inc) twice (10)

Round 4-10 :

Work 3 sc, 1 inc, 4 sc, and 1 dec for seven full rounds (10)

Info :

Lightly stuff the tail with a bit of fiberfill. Flatten the top opening.

Round 11 :

Work 5 sc through both layers of the flattened opening to close it, then sl st (5)

Info :

Fasten off and leave a tail for attaching to the body.

β€” 3. Body :

Round 1 :

Start with a MR and work 8 sc into it (8)

Round 2 :

Work 1 inc into every stitch around (16)

Round 3 :

Repeat the sequence of 1 sc followed by 1 inc 8 times (24)

Round 4 :

Repeat the sequence of 1 sc, 1 inc, and 1 sc 8 times (32)

Round 5 :

Repeat the sequence of 3 sc followed by 1 inc 8 times (40)

Round 6-10 :

Work 1 sc in each stitch around for five full rounds (40)

Round 11 :

Repeat the sequence of 3 sc followed by 1 dec 8 times (32)

Round 12-14 :

Work 1 sc in each stitch around for three full rounds (32)

Round 15 :

Repeat (14 sc, dec) twice (30)

Round 16 :

Work 30 sc, then finish with a sl st (30)

Info :

Fasten off and leave a long length for sewing. Pack the body firmly with stuffing.

β€” 4. Arms & Legs (Make 4) :

Round 1 :

Start with a MR and work 6 sc into it (6)

Round 2 :

Work 1 inc into every stitch around (12)

Round 3-12 :

Work 4 sc, 1 inc, 5 sc, and 1 dec for ten full rounds (12)

Info :

Stuff the limb firmly with fiberfill and flatten the opening.

Round 13 :

Work 6 sc through both layers to seal the piece, then sl st (6)

Info :

Fasten off and leave a tail for assembly.

β€” 5. Ears (Make 2) :

Round 1 :

Start with a MR and work 6 sc into it (6)

Round 2 :

Work 1 inc into every stitch around (12)

Round 3 :

Repeat (5 sc, inc) twice (14)

Round 4-5 :

Work 1 sc in each stitch around for two full rounds (14)

Info :

Do not add any stuffing to the ears. Flatten the piece.

Round 6 :

Work 7 sc through both layers to close the ear, then sl st (7)

Info :

Fasten off and leave a tail for sewing.

Assembly Instructions

  • Position the ears between Rounds 4 and 8 of the head, leaving a gap of 8 stitches between them before sewing.
  • Embroider the delicate whiskers, nose, and eyelashes using black yarn to give your kitten its unique expression.
  • Secure the head to the body by aligning them on a flat surface and sewing stitch-for-stitch to ensure a sturdy join.
  • Attach the back legs at Round 6 of the body, keeping them 10 stitches apart for a balanced sitting pose.
  • Sew the front arms between Rounds 12 and 15 of the body, matching the 10-stitch distance used for the legs.
  • Finally, fix the tail to the rear of the body, ensuring it is centered and slightly angled for a playful look.

Important Notes

  • πŸ’‘Always use a stitch marker because working in a continuous spiral makes it very easy to lose your place.
  • πŸ’‘When closing the limbs, flatten the opening and crochet through both layers to create a clean edge for sewing.
  • πŸ’‘Invisible decreases are your best friend hereβ€”they keep the stuffing from peeking through the chunky yarn.
  • πŸ’‘If you want a larger or smaller cat, simply swap the yarn weight and hook size to scale the project up or down.
  • πŸ’‘Ensure the head and body are joined very securely, as the weight of the plush yarn can make the neck area heavy.

I hope you have as much fun making this little kitten as I did! There is something so rewarding about seeing those tiny ears and whiskers come together. Once you are finished, give your new friend a little squeezeβ€”it is the best part! I would love to see the different personalities you create with your yarn choices. Whether he is snowy white or a colorful calico, he is sure to be loved. Happy crafting and enjoy your new handmade companion! 🧢 ✨ 🐾

You ask,

we answer.

FAQs

Can I use regular acrylic yarn instead of chenille?

You can, but the finished kitten will be much smaller and won't have the same 'plushie' look. You will likely need to drop your hook size to a 3.25mm or 3.5mm.

How do I make the eye sockets look deep?

After inserting the safety eyes, take a strand of yarn and pull from the back of the head to the eye area and back again, cinching it slightly to create an indent.

My kitten's head is floppy, how do I fix it?

Make sure to stuff both the neck area of the body and the head very firmly. You can also add a few extra hidden stitches around the neck join for more support.

Why does my stitch count feel wrong on the arm rounds?

Rounds 3-12 include both an increase and a decrease in the same round, which keeps the count at 12 but creates a slight curve in the limb.