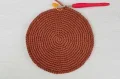
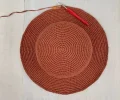
Get ready to soak up the sun with a handmade accessory that is as practical as it is beautiful. This raffia sun hat features a classic wide brim and a breathable texture that makes it perfect for those sweltering summer days. I have designed this pattern to give you that high-end boutique look using simple stitches and gorgeous paper yarn. You will love how the structured brim provides just the right amount of shade while keeping you looking effortlessly chic.
Progress Tracker
0% Complete
— 1. Hat Crown - All Sizes :
Info :
This hat is worked in a continuous spiral. Do not join rounds unless specifically told to do so. Use a stitch marker to keep track of your first stitch.
Round 1 :
Start with a mr and work 8 sc into the center (8)
Round 2 :
Work 1 inc into every stitch around (16)
Round 3 :
Repeat (1 sc, 1 inc) 8 times (24)
Round 4 :
Repeat (1 sc in each of next 2 st, 1 inc) 8 times (32)
Round 5 :
Repeat (1 sc in each of next 3 st, 1 inc) 8 times (40)
Round 6 :
Repeat (1 sc in each of next 4 st, 1 inc) 8 times (48)
Round 7 :
Work 1 sc into every stitch around (48)
Round 8 :
1 sc in each of next 2 st, 1 inc, then repeat (1 sc in each of next 5 st, 1 inc) until only 3 stitches remain, 1 sc in each of the last 3 st (56)
Round 9 :
Repeat (1 sc in each of next 6 st, 1 inc) 8 times (64)
Round 10 :
1 sc in each of next 3 st, 1 inc, then repeat (1 sc in each of next 7 st, 1 inc) until only 4 stitches remain, 1 sc in each of the last 4 st (72)
Round 11 :
Work 1 sc into every stitch around (72)
Round 12 :
Repeat (1 sc in each of next 8 st, 1 inc) 8 times (80)
Round 13 :
1 sc in each of next 4 st, 1 inc, then repeat (1 sc in each of next 9 st, 1 inc) until only 5 stitches remain, 1 sc in each of the last 5 st (88)
Round 14 :
Work 1 sc into every stitch around (88)
— 2. Size Small - Body & Brim :
Round 15-16 :
Work 1 sc into every stitch around (88)
Round 17-34 :
Repeat the previous round of sc for a total of 18 rounds for the bucket section (88)
Round 35 :
Repeat (1 sc in each of next 10 st, 1 inc) around (96)
Round 36 :
1 sc in each of next 5 st, 1 inc, then repeat (1 sc in each of next 11 st, 1 inc) until 6 stitches remain, 1 sc in each of the last 6 st (104)
Round 37 :
Repeat (1 sc in each of next 12 st, 1 inc) around (112)
Round 38 :
1 sc in each of next 6 st, 1 inc, then repeat (1 sc in each of next 13 st, 1 inc) until 7 stitches remain, 1 sc in each of the last 7 st (120)
Round 39 :
Work 1 sc into every stitch around (120)
Round 40 :
Repeat (1 sc in each of next 14 st, 1 inc) around (128)
Round 41 :
1 sc in each of next 7 st, 1 inc, then repeat (1 sc in each of next 15 st, 1 inc) until 8 stitches remain, 1 sc in each of the last 8 st (136)
Round 42 :
Work 1 sc into every stitch around (136)
Round 43 :
Repeat (1 sc in each of next 16 st, 1 inc) around (144)
Round 44 :
1 sc in each of next 8 st, 1 inc, then repeat (1 sc in each of next 17 st, 1 inc) until 9 stitches remain, 1 sc in each of the last 9 st (152)
Round 45 :
Work 1 sc into every stitch around (152)
Round 46 :
Repeat (1 sc in each of next 18 st, 1 inc) around (160)
Round 47 :
1 sc in each of next 9 st, 1 inc, then repeat (1 sc in each of next 19 st, 1 inc) until 10 stitches remain, 1 sc in each of the last 10 st (168)
Round 48 :
Work 1 sc into every stitch around (168)
Round 49 :
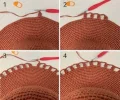
sl st into the first st, beg cl in the same st, ch 3, sk 3 st, then repeat (1 cl in next st, ch 3, sk 3 st) all the way around, ending with a sl st into the top of the beg cl (42 clusters)
Round 50 :
Work 5 sc into every ch-3 sp around (210)
Round 51-52 :
Work 1 sc into every stitch around. Fasten off and weave in all ends (210)
— 3. Size Medium - Body & Brim :
Round 15 :
Repeat (1 sc in each of next 10 st, 1 inc) around (96)
Round 16-17 :
Work 1 sc into every stitch around (96)
Round 18-35 :
Repeat the previous round of sc for a total of 18 rounds for the bucket section (96)
Round 36 :
Repeat (1 sc in each of next 11 st, 1 inc) around (104)
Round 37 :
1 sc in each of next 5 st, 1 inc, then repeat (1 sc in each of next 12 st, 1 inc) until 7 stitches remain, 1 sc in each of the last 7 st (112)
Round 38 :
Repeat (1 sc in each of next 13 st, 1 inc) around (120)
Round 39 :
1 sc in each of next 6 st, 1 inc, then repeat (1 sc in each of next 14 st, 1 inc) until 8 stitches remain, 1 sc in each of the last 8 st (128)
Round 40 :
Work 1 sc into every stitch around (128)
Round 41 :
Repeat (1 sc in each of next 15 st, 1 inc) around (136)
Round 42 :
1 sc in each of next 7 st, 1 inc, then repeat (1 sc in each of next 16 st, 1 inc) until 9 stitches remain, 1 sc in each of the last 9 st (144)
Round 43 :
Work 1 sc into every stitch around (144)
Round 44 :
Repeat (1 sc in each of next 17 st, 1 inc) around (152)
Round 45 :
1 sc in each of next 8 st, 1 inc, then repeat (1 sc in each of next 18 st, 1 inc) until 10 stitches remain, 1 sc in each of the last 10 st (160)
Round 46 :
Work 1 sc into every stitch around (160)
Round 47 :
Repeat (1 sc in each of next 19 st, 1 inc) around (168)
Round 48 :
1 sc in each of next 9 st, 1 inc, then repeat (1 sc in each of next 20 st, 1 inc) until 11 stitches remain, 1 sc in each of the last 11 st (176)
Round 49 :
Work 1 sc into every stitch around (176)
Round 50 :
sl st into the first st, beg cl in the same st, ch 3, sk 3 st, then repeat (1 cl in next st, ch 3, sk 3 st) all the way around, ending with a sl st into the top of the beg cl (44 clusters)
Round 51 :
Work 5 sc into every ch-3 sp around (220)
Round 52-53 :
Work 1 sc into every stitch around. Fasten off and weave in all ends (220)
— 4. Size Large - Body & Brim :
Round 15 :
Repeat (1 sc in each of next 10 st, 1 inc) around (96)
Round 16 :
1 sc in each of next 5 st, 1 inc, then repeat (1 sc in each of next 11 st, 1 inc) until 6 stitches remain, 1 sc in each of the last 6 st (104)
Round 17-18 :
Work 1 sc into every stitch around (104)
Round 19-36 :
Repeat the previous round of sc for a total of 18 rounds for the bucket section (104)
Round 37 :
Repeat (1 sc in each of next 12 st, 1 inc) around (112)
Round 38 :
1 sc in each of next 5 st, 1 inc, then repeat (1 sc in each of next 13 st, 1 inc) until 8 stitches remain, 1 sc in each of the last 8 st (120)
Round 39 :
Repeat (1 sc in each of next 14 st, 1 inc) around (128)
Round 40 :
1 sc in each of next 6 st, 1 inc, then repeat (1 sc in each of next 15 st, 1 inc) until 9 stitches remain, 1 sc in each of the last 9 st (136)
Round 41 :
Work 1 sc into every stitch around (136)
Round 42 :
Repeat (1 sc in each of next 16 st, 1 inc) around (144)
Round 43 :
1 sc in each of next 7 st, 1 inc, then repeat (1 sc in each of next 17 st, 1 inc) until 10 stitches remain, 1 sc in each of the last 10 st (152)
Round 44 :
Work 1 sc into every stitch around (152)
Round 45 :
Repeat (1 sc in each of next 18 st, 1 inc) around (160)
Round 46 :
1 sc in each of next 8 st, 1 inc, then repeat (1 sc in each of next 19 st, 1 inc) until 11 stitches remain, 1 sc in each of the last 11 st (168)
Round 47 :
Work 1 sc into every stitch around (168)
Round 48 :
Repeat (1 sc in each of next 20 st, 1 inc) around (176)
Round 49 :
1 sc in each of next 9 st, 1 inc, then repeat (1 sc in each of next 21 st, 1 inc) until 12 stitches remain, 1 sc in each of the last 12 st (184)
Round 50 :
Work 1 sc into every stitch around (184)
Round 51 :
sl st into the first st, beg cl in the same st, ch 3, sk 3 st, then repeat (1 cl in next st, ch 3, sk 3 st) all the way around, ending with a sl st into the top of the beg cl (46 clusters)
Round 52 :
Work 5 sc into every ch-3 sp around (230)
Round 53-54 :
Work 1 sc into every stitch around. Fasten off and weave in all ends (230)
I really hope you enjoy making this sun hat as much as I do! There is something so rewarding about finishing a project that you can actually wear out and about. Whether you're heading to the beach, working in your garden, or just enjoying a sunny afternoon walk, this hat is going to be your new favorite accessory. Don't forget to take a photo of your finished piece and share it with the community—I love seeing the different colors of raffia you choose! Happy crocheting, and enjoy every single stitch of your new summer staple. 🧶 ✨