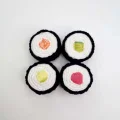
๐Ÿงถ Beautiful โœจ Detailed ๐Ÿ’ Adorable

Complete Crochet Sushi Set Amigurumi Pattern

Complete Crochet Sushi Set Amigurumi Pattern
4.4โ˜…Rating
10-12 HoursTime Needed
2.1KMade This
โœ‚๏ธ

Intermediate Level

Ideal for those with basic crocheting experience, featuring slightly more advanced stitches and techniques to expand your skills.

โฑ๏ธ

Slow & Steady

A 10-12 hour projectโ€”great for savoring the process over several sessions.

๐ŸŽ

Tiny Treasure

Small, sweet, and gift-worthy creations that fit perfectly in the palm of your hand with detailed charm.

About This Complete Crochet Sushi Set Amigurumi Pattern

Complete Crochet Sushi Set Amigurumi Pattern crochet pattern - detailed view

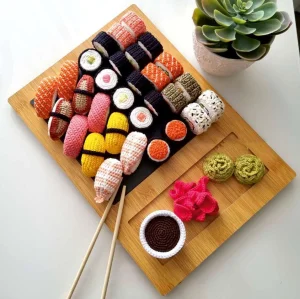
This pattern is a dream for anyone who loves miniature crafts. The finished set looks stunning displayed on a wooden board and makes a thoughtful, interactive gift for the sushi lover in your life.

Why You'll Love This Complete Crochet Sushi Set Amigurumi Pattern

I honestly had so much fun designing this because it feels like building a puzzle. Each piece is quick to finish on its own, which gives you that hit of 'project completion' satisfaction over and over again. Plus, the way the wasabi ruffles up is just so satisfying to watch!

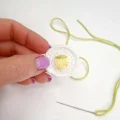
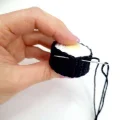
Complete Crochet Sushi Set Amigurumi Pattern step 1 Complete Crochet Sushi Set Amigurumi Pattern step 2 Complete Crochet Sushi Set Amigurumi Pattern step 3 Complete Crochet Sushi Set Amigurumi Pattern step 4

Switch Things Up

Iโ€™ve always been a huge fan of Japanese cuisine, but thereโ€™s something about seeing it in yarn form that just makes my heart melt. When I first sat down to design this set, I wanted it to feel like a real 'omakase' experience right on your coffee table. The best part? No expiration date!

My favorite piece to work on has to be the wasabi. It looks so simple, but the way those ruffles come together using the front loops is just pure crochet magic. If youโ€™re feeling adventurous, donโ€™t be afraid to play with the 'fish' colors. While the pattern calls for specific coral and orange shades, a deep red for tuna or even a pale pink for yellowtail looks incredible.

One little tip from my hook to yours: when youโ€™re embroidering the rice details or the little sesame seeds, keep your tension loose. If you pull too tight, youโ€™ll lose that 'fluffy rice' texture weโ€™re aiming for. This set is a labor of love, but seeing that full platter finished is the ultimate crafterโ€™s high. I can't wait to see your spreads!

Common Mistakes & How to Fix Them

โœ— When joining the two halves of the maki rice base, it is very easy to misalign the stitches. Make sure you match the back loops of the flat circle to the stitches on the walled piece perfectly so your roll doesn't end up lopsided.โœ— The soy sauce bowl requires a plastic insert to stay flat. If you cut the plastic too large, the crochet fabric will stretch and look thin; if it's too small, the bowl will wobble and won't hold its shape.โœ— For the shrimp tail, ensure you don't skip the slip stitches between the two tail fins. If you do, the tail will look like one solid block instead of two distinct, delicate fins.โœ— When embroidering the salmon lines with peach yarn, avoid pulling the yarn too tight. High tension will compress the orange base and make the slice look shriveled instead of like a fresh piece of fish.

Complete Crochet Sushi Set Amigurumi Pattern

Get ready to serve up the most adorable feast you've ever made! This comprehensive guide walks you through creating an entire Japanese-inspired platter, from classic maki rolls to delicate shrimp nigiri. You will love how these tiny pieces come together to create a professional-looking set that is perfect for play kitchens, desk decor, or a unique handmade gift. It is a fantastic way to use up your scrap yarn while practicing fun embroidery techniques that bring each piece of 'fish' to life.

Intermediate 10-12 Hours

Materials Needed for Complete Crochet Sushi Set Amigurumi Pattern

โ€” Main Fabric

  • 01
    Cotton-acrylic blend yarn in warm white (approx. 150g) for the rice bases
  • 02
    Small amounts of black yarn for the nori wraps
  • 03
    Assorted colors for fillings: bright orange, coral, pink coral, light yellow, yellow, olive green, green, beige, cream, terracotta, and brown
  • 04
    Multicolor yarn in orange/white/red mix and yellow/green/black mix for specialty rolls

โ€” Tools Required

  • 01
    2 mm crochet hook for most details
  • 02
    1.75 mm crochet hook specifically for the soy sauce
  • 03
    Polyester fiberfill stuffing
  • 04
    Sharp scissors
  • 05
    Large-eyed yarn needle for assembly and embroidery
  • 06
    Hot glue gun for securing wraps and toppings
  • 07
    A small piece of stiff plastic (like a folder or placemat) for the bowl base

Progress Tracker

0% Complete

โ€” 1. Round Rice Base (Maki) :

Info :

Use warm white yarn. You will need two circles for each roll: one flat and one with side walls.

Round 1 :

Start with 6 sc into an AR (6)

Round 2 :

Work 2 sc into every stitch around (12)

Round 3 :

(1 sc, 1 inc) repeat 6 times (18)

Round 4 :

1 sc, 1 inc, (2 sc, 1 inc) repeat 5 times, 1 sc (24)

Round 5 :

(3 sc, 1 inc) repeat 6 times. Add 1 extra sc after the final increase, then sl st to finish. Cut yarn for the first circle. (31)

Info :

Make a second circle following Rounds 1-5, but do not cut the yarn.

Round 6 :

Work 30 sc into the back loops only (30)

Round 7 :

Work 30 sc through both loops (30)

Round 8 :

Work 30 sc through both loops (30)

Round 9 :

Work 30 sc through both loops (30)

Round 10 :

Work 30 sc through both loops. Finish with a sl st and leave a long tail for sewing (30)

โ€” 2. Nori Wrap (Round) :

Info :

Use black yarn. Work in turning rows.

Row 1 :

ch 7, then starting in the second chain from hook, work 6 sc. ch 1 and turn.

Rows 2-33 :

Work 6 sc in each row, always making a ch 1 at the start to turn. Leave a long tail for finishing.

โ€” 3. Caviar Topping :

Info :

Use bright orange yarn.

Round 1 :

Work 6 sc into an AR (6)

Round 2 :

Work 2 sc into every stitch (12)

Round 3 :

(1 sc, 1 inc) repeat 6 times (18)

Round 4 :

1 sc, 1 inc, (2 sc, 1 inc) repeat 5 times, 1 sc. Finish with a sl st and leave a long tail. (24)

Info :

Using the tail, embroider French knots (3-4 wraps each) across the entire surface to mimic fish eggs.

โ€” 4. Square Rice Base :

Round 1 :

Work 8 sc into an AR (8)

Round 2 :

(3 sc into the next stitch, 1 sc) repeat 4 times (16)

Round 3 :

1 sc, (3 sc into the next stitch, 3 sc) repeat 3 times, 3 sc into the next stitch, 2 sc (24)

Round 4 :

2 sc, (3 sc into the next stitch, 5 sc) repeat 3 times, 3 sc into the next stitch, 3 sc (32)

Round 5 :

3 sc, (3 sc into the next stitch, 7 sc) repeat 3 times, 3 sc into the next stitch, 4 sc. sl st and cut yarn. (40)

Info :

Make a second square following Rounds 1-5, but keep the yarn attached.

Round 6 :

Work 40 sc into the back loops only (40)

Round 7 :

Work 40 sc through both loops (40)

Round 8 :

Work 40 sc through both loops (40)

Round 9 :

Work 40 sc through both loops (40)

Round 10 :

Work 40 sc through both loops. sl st and leave a tail for sewing. (40)

โ€” 5. Nori Wrap (Square) :

Info :

Follow the same instructions as the Round Nori Wrap, but continue until you have 38 rows total.

โ€” 6. Salmon Slice (Philadelphia Roll) :

Round 1 :

Work 3 sc into an AR. Tighten the ring but do not join. Work in turning rows with a ch 1 at the start of each.

Row 2 :

1 inc, 1 sc, 1 inc (5)

Row 3 :

1 inc, 3 sc, 1 inc (7)

Row 4 :

1 inc, 4 sc, 1 dec (7)

Row 5 :

1 dec, 4 sc, 1 inc (7)

Rows 6-23 :

Repeat Row 4 for all even rows and Row 5 for all odd rows until you reach Row 23.

Row 24 :

1 dec, 3 sc, 1 dec (5)

Row 25 :

1 dec, 1 sc, 1 dec (3)

Row 26 :

Work a 3 sc decrease across the remaining stitches. Fasten off.

โ€” 7. Oval Rice Base (Nigiri) :

Info :

Use warm white. You will make two identical halves and sew them together.

Round 1 :

ch 7. Starting in second ch from hook, work 6 sc. Turn and work 6 sc along the underside of the chain (12)

Round 2 :

1 sc, 1 inc, 2 sc, 1 inc, 7 sc (14)

Round 3 :

2 sc, 1 inc, 3 sc, 1 inc, 7 sc (16)

Round 4 :

3 sc, 1 inc, 4 sc, 1 inc, 7 sc (18)

Round 5 :

4 sc, 1 inc, 5 sc, 1 inc, 7 sc (20)

Round 6 :

5 sc, 1 inc, 6 sc, 1 inc, 7 sc (22)

Rounds 7-10 :

Work 4 rounds of 22 sc. Fasten off and sew to the matching half, stuffing as you go.

โ€” 8. Shrimp Topping :

Round 1 :

With white yarn, work 10 sc into an AR (10)

Round 2 :

Work 2 sc into every stitch (20)

Round 3 :

Switch to peach yarn. Work 20 hdc (20)

Round 4 :

Work 20 hdc, inserting the hook between the posts of the previous row rather than the top loops (20)

Round 5 :

Switch to white. Work 20 hdc between posts (20)

Round 6-7 :

Switch to peach. Work 20 hdc between posts for 2 rounds (20)

Round 8 :

Switch to white. Work 20 hdc between posts (20)

Round 9-10 :

Switch to peach. Work 20 hdc between posts for 2 rounds (20)

Round 11 :

Switch to white. Work 20 hdc between posts. Fasten off white. (20)

Round 12 :

With peach, work (1 hdc dec) 10 times (10)

Round 13-14 :

Work 2 rounds of 10 sc (10)

Tail :

ch 5, then work 2 sc, 2 hdc, and a sl st back into the base. Repeat for a second tail fin.

โ€” 9. Tamago (Egg) :

Round 1 :

With yellow, ch 15. Work 5 sc in the first ch, 12 sc, 5 sc in the last ch, 12 sc (34)

Round 2 :

(1 sc, 1 inc, 1 sc, 1 inc, 13 sc) repeat twice (38)

Round 3 :

(2 sc, 1 inc, 2 sc, 1 inc, 15 sc, 1 inc, 2 sc, 1 inc, 13 sc) (42)

Round 4 :

2 sc, 1 inc, 4 sc, 1 inc, 15 sc, 1 inc, 4 sc, 1 inc, 13 sc. sl st around the edge to finish. (46)

โ€” 10. Wasabi :

Round 1 :

With olive green, work 6 sc in an AR (6)

Round 2 :

Work 2 sc in every stitch (12)

Round 3 :

(1 sc, 1 inc) repeat 6 times. sl st but don't cut yarn. (18)

Round 4-5 :

Work 2 rounds of 18 sc through back loops only (18)

Round 6 :

(1 sc, 1 dec) repeat 6 times through back loops (12)

Round 7 :

Work 12 sc through back loops (12)

Round 8 :

Work 6 dec through back loops (6)

Ruffles :

Working back down the cone through the front loops left behind: work 4 dc in every stitch for the first 2 rounds, then 3 dc in every stitch for the remaining rounds.

โ€” 11. Soy Sauce Bowl :

Info :

Make two small circles (Rounds 1-5) in snow white and glue them back-to-back.

Round 1 :

With snow white, work 6 sc in an AR (6)

Round 2 :

Work 2 sc in every stitch (12)

Round 3 :

(1 sc, 1 inc) repeat 6 times (18)

Round 4 :

1 sc, 1 inc, (2 sc, 1 inc) repeat 5 times, 1 sc (24)

Round 5 :

(3 sc, 1 inc) repeat 6 times (30)

Round 6 :

2 sc, 1 inc, (4 sc, 1 inc) repeat 5 times, 2 sc (36)

Round 7 :

(5 sc, 1 inc) repeat 6 times (42)

Round 8 :

3 sc, 1 inc, (6 sc, 1 inc) repeat 5 times, 3 sc (48)

Round 9-12 :

Work 4 rounds of 48 sc (48)

Sauce :

Using a 1.75mm hook and brown yarn, repeat Rounds 1-8. Glue a plastic circle to the back of this piece before sewing it into the bowl.

Assembly Instructions

  • For the Maki rolls, embroider your chosen fillings (avocado, fish, cucumber) onto the center of both rice circles, ensuring they are mirror images of each other.
  • Sew the flat rice circle to the walled rice circle using the back loops of the flat piece and both loops of the wall, stuffing lightly before closing.
  • Wrap the black nori strip around the rice base and secure it with hot glue or small, hidden stitches along the edges.
  • For Nigiri, sew the two white oval halves together and stuff firmly to create a solid 'rice' mound.
  • Attach your toppings (salmon, tuna, or shrimp) to the top of the nigiri rice bases using hot glue or a few securing stitches.
  • If making the Egg or Eel sushi, crochet a very thin black strip (1 row of 26 sc) and wrap it around both the topping and the rice, sewing the ends underneath.
  • Assemble the soy sauce bowl by sewing the brown 'sauce' circle to the white bowl walls, then crochet two final rounds of white sc through the front loops to create a thick rim.

Important Notes

  • ๐Ÿ’กKeep your stitches tight, especially on the rice bases, to ensure the stuffing doesn't peek through the white yarn.
  • ๐Ÿ’กWhen embroidering the fillings, try to use a variety of stitch lengths to give the 'vegetables' and 'fish' a more natural, textured look.
  • ๐Ÿ’กThe plastic insert in the soy sauce bowl is vital for stability; without it, the weight of the sauce will cause the bowl to collapse.
  • ๐Ÿ’กIf you don't have multicolor yarn for the tempura or tobiko, you can twist three strands of thin embroidery floss together to get a similar effect.
  • ๐Ÿ’กUse a stitch marker religiously when working the spiral rounds of the rice bases to avoid losing your place in the increase patterns.

There is something so incredibly satisfying about finishing a project that has so many tiny, beautiful components. By the time you reach the end of this pattern, you won't just have a crochet toy; you'll have a complete piece of fiber art that looks good enough to eat. I really hope you enjoy every stitch of this journey, from the repetitive calm of the rice bases to the creative spark of the embroidery. Whether this is a gift for a food-loving friend or a new addition to your own desk, itโ€™s bound to start conversations and bring a little joy to whoever sees it. Happy hooking! โœจ

You ask,

we answer.

FAQs

Can I use a different yarn weight for this sushi set?

You can, but keep in mind this pattern was designed for a thinner cotton-acrylic blend. If you use a standard worsted weight yarn, your sushi rolls will be significantly larger and might look a bit chunky rather than delicate.

Do I have to use a hot glue gun for assembly?

Not at all! While glue is faster and can help keep the shape of the nori wraps crisp, you can absolutely sew every piece together with a yarn needle for a more traditional, glue-free finish.

How do I make the wasabi look more realistic?

The key is the ruffles! Make sure you are working into the front loops left behind from the cone. If your ruffles aren't 'curly' enough, try adding an extra double crochet into each stitch.

What is the best way to embroider the salmon lines?

Use a simple backstitch with peach or cream yarn. Space the lines about two rows apart and keep them slightly slanted to mimic the natural marbling of a salmon fillet.