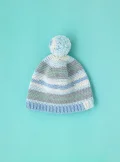
🧢 Beautiful ✨ Detailed πŸ’ Adorable

Bonnie Beanie Crochet Pattern

Bonnie Beanie Crochet Pattern
4.2β˜…Rating
3-5 HoursTime Needed
2.0KMade This
βœ‚οΈ

Intermediate Level

Ideal for those with basic crocheting experience, featuring slightly more advanced stitches and techniques to expand your skills.

⏱️

Quick Craft

Fits nicely into a free afternoon β€” 2 to 5 hours of focused, enjoyable crocheting.

🧣

Snug Essential

Everyday comfort with practical charm, designed for both functionality and style through changing seasons.

About This Bonnie Beanie Crochet Pattern

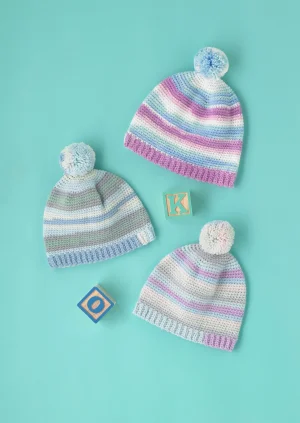
Bonnie Beanie Crochet Pattern crochet pattern - detailed view

This pattern makes a beautiful handmade gift β€” thoughtful enough for someone special, but quick enough to make a few before the baby shower. It's a staple accessory for any nursery wardrobe.

Why You'll Love This Bonnie Beanie Crochet Pattern

I absolutely adore how the perpendicular brim comes together. It looks so much like a knit ribbing, but it's entirely crochet! As a crafter, I find the mindless rounds of the hat body to be the perfect way to unwind after a long day, and seeing those stripes emerge is always a treat.

Bonnie Beanie Crochet Pattern step 1 Bonnie Beanie Crochet Pattern step 2 Bonnie Beanie Crochet Pattern step 3 Bonnie Beanie Crochet Pattern step 4

Switch Things Up

There is something so incredibly soothing about working on a baby project, isn't there? I find that the Bonnie Beanie is one of those 'zen' patterns where you can just settle into the rhythm of the stitches. I personally love using the Baby DK Prints because the color changes happen all on their ownβ€”no weaving in a million ends just to get that striped look!

When I first started making these, I was always a bit nervous about the perpendicular brim. It felt like a lot of turning, but once you see that stretchy ribbing start to form, it’s so satisfying. My biggest tip? Keep your slip stitches on the hat body loose. If you tug them too tight, the edge of the hat won't have enough give to fit comfortably on a wiggly baby's head.

I usually whip a few of these up in different sizes to keep in my gift stash. They are the perfect 'topper' for a baby shower gift, especially when paired with a matching blanket. Whether you go for the blues of Misty Forest or the bright pops of Pastel Party, you're going to love how professional the finished ribbing looks. Happy hooking!

Common Mistakes & How to Fix Them

βœ— When joining the brim edges at the very end, make sure you are working on the wrong side of the hat so the seam remains hidden on the inside.βœ— The slip stitches used to attach the brim to the hat body can easily become too tight, which will restrict the stretch of the hat opening.βœ— If you lose track of your rounds during the straight sc sections of the body, use a scrap piece of yarn as a running stitch marker to count your progress.βœ— When making the pom-pom, ensure you tie the center string as tightly as possible to prevent individual yarn strands from pulling out later.

Bonnie Beanie Crochet Pattern

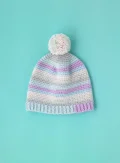
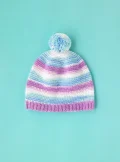
Keep your favorite little one cozy with this charming striped beanie. It's the kind of project that you can easily finish in an afternoon, featuring a wonderfully stretchy ribbed brim and a playful pom-pom on top. You'll love how the self-striping yarn does all the colorwork for you, letting you focus on the rhythm of your stitches.

Intermediate 3-5 Hours

Materials Needed for Bonnie Beanie Crochet Pattern

β€” Main Fabric

  • 01
    Approximately 50g to 100g of Baby DK weight yarn in a self-striping print (1 to 2 balls depending on size)
  • 02
    Sample uses a soft acrylic and nylon blend designed for baby garments

β€” Tools Required

  • 01
    US E/4 (3.5mm) crochet hook for the main hat body
  • 02
    US D/3 (3mm) crochet hook for the ribbed brim
  • 03
    One stitch marker to track the start of your rounds
  • 04
    Large-eye tapestry needle for weaving in ends
  • 05
    Sharp scissors
  • 06
    Pom-pom maker or cardboard template

Progress Tracker

0% Complete

β€” 1. Main Hat β€” Size 0-3 Months :

Round 1 :

Using your 3.5mm hook, ch 1 (doesn't count as a st) and work 6 sc into a MR. Do not join with a ss; you will be working in a continuous spiral.

Round 2 :

Work 2 sc in each st around (12).

Info :

Place your marker in the last st of Round 2 and move it up as you finish every subsequent round to keep your place.

Round 3 :

Repeat the pattern of [2 sc in next st, 1 sc in next st] 6 times (18).

Round 4 :

Repeat the pattern of [2 sc in next st, 1 sc in next 2 sts] 6 times (24).

Round 5 :

Repeat the pattern of [2 sc in next st, 1 sc in next 3 sts] 6 times (30).

Round 6 :

Repeat the pattern of [2 sc in next st, 1 sc in next 4 sts] 6 times (36).

Round 7 :

Repeat the pattern of [2 sc in next st, 1 sc in next 5 sts] 6 times (42).

Round 8 :

Repeat the pattern of [2 sc in next st, 1 sc in next 6 sts] 6 times (48).

Round 9 :

Repeat the pattern of [2 sc in next st, 1 sc in next 7 sts] 6 times (54).

Round 10 :

Repeat the pattern of [2 sc in next st, 1 sc in next 8 sts] 6 times (60).

Round 11 :

Repeat the pattern of [2 sc in next st, 1 sc in next 9 sts] 6 times (66).

Round 12 :

Repeat the pattern of [2 sc in next st, 1 sc in next 10 sts] 6 times (72).

Round 13-32 :

Work 1 sc in every st around (72).

β€” 2. Main Hat β€” Size 3-6 Months :

Round 1-12 :

Follow the instructions for Round 1 through Round 12 as written for the 0-3 month size (72).

Round 13 :

Repeat the pattern of [2 sc in the first st, 1 sc in the next 11 sts] 6 times (78).

Round 14-35 :

Work 1 sc in every st around (78).

β€” 3. Main Hat β€” Size 6-12 Months :

Round 1-12 :

Follow the instructions for Round 1 through Round 12 as written for the 0-3 month size (72).

Round 13 :

Repeat the pattern of [2 sc in the first st, 1 sc in the next 11 sts] 6 times (78).

Round 14 :

Repeat the pattern of [2 sc in the first st, 1 sc in the next 12 sts] 6 times (84).

Round 15-38 :

Work 1 sc in every st around (84).

β€” 4. Main Hat β€” Size 12-18 Months :

Round 1-12 :

Follow the instructions for Round 1 through Round 12 as written for the 0-3 month size (72).

Round 13 :

Repeat the pattern of [2 sc in the first st, 1 sc in the next 11 sts] 6 times (78).

Round 14 :

Repeat the pattern of [2 sc in the first st, 1 sc in the next 12 sts] 6 times (84).

Round 15 :

Repeat the pattern of [2 sc in the first st, 1 sc in the next 13 sts] 6 times (90).

Round 16-40 :

Work 1 sc in every st around (90).

β€” 5. Main Hat β€” Size 18-24 Months :

Round 1-12 :

Follow the instructions for Round 1 through Round 12 as written for the 0-3 month size (72).

Round 13 :

Repeat the pattern of [2 sc in the first st, 1 sc in the next 11 sts] 6 times (78).

Round 14 :

Repeat the pattern of [2 sc in the first st, 1 sc in the next 12 sts] 6 times (84).

Round 15 :

Repeat the pattern of [2 sc in the first st, 1 sc in the next 13 sts] 6 times (90).

Round 16 :

Repeat the pattern of [2 sc in the first st, 1 sc in the next 14 sts] 6 times (96).

Round 17-42 :

Work 1 sc in every st around (96).

β€” 6. The Brim β€” All Sizes :

Info :

Do not cut your yarn. ss into the next st of the final round of the hat body, then turn your work to begin the brim perpendicular to the hat edge. Switch to your 3mm hook.

Setup :

ch 6.

Row 1 :

sc in the 2nd ch from the hook and in each of the next 4 ch. ss into the next st on the hat body and turn. (5 sc, 1 ss)

Row 2 :

Skip the ss you just made. sc in the BLO of the next 5 sts and turn. (5 sc)

Row 3 :

ch 1 (this doesn't count as a st), sc in the BLO of the next 5 sts. ss into the next 2 sts along the hat body edge and turn. (5 sc, 2 ss)

Row 4 :

Skip the 2 ss you just made. sc in the BLO of the next 5 sts and turn. (5 sc)

Info :

Continue repeating Row 3 and Row 4 all the way around the bottom circumference of the hat, ending on a Row 4.

Assembly Instructions

  • Once the brim is complete, turn the hat inside out so you are working on the wrong side.
  • Align the foundation chain of the brim with the final row of stitches.
  • Join the two edges of the brim by working a ss through the FLO of the current row and the BLO of the starting chain.
  • Fasten off your yarn, leaving a tail for weaving.
  • Construct a small pom-pom using the remaining yarn and stitch it firmly to the center of the magic ring at the crown.
  • Use a tapestry needle to weave in all loose ends on the inside of the hat for a clean finish.

Important Notes

  • πŸ’‘It is vital to switch to the smaller 3mm hook for the brim to ensure the ribbing is tight enough to hold the hat in place.
  • πŸ’‘The main body of the hat is worked in continuous rounds; do not join with a slip stitch unless specifically instructed at the start of the brim.
  • πŸ’‘Check your gauge before starting β€” if your stitches are too loose, the hat will be oversized and may not stay on a baby's head.
  • πŸ’‘When working the brim, make sure your slip stitches into the hat body aren't too tight, as this can cause the hat edge to pucker.
  • πŸ’‘If you want a slouchier look, you can add a few extra rounds of sc to the main body before starting the brim.

I can't wait to see the color combinations you choose for your Bonnie Beanie! Whether you're making this for a newborn or a busy toddler, it's a project that brings so much joy with every stitch. Don't forget to share your finished photos with the communityβ€”seeing your work is the best part of my day. This little hat is sure to be a treasured keepsake for years to come. Happy crocheting, and enjoy the process of making something truly special! 🧢✨

You ask,

we answer.

FAQs

Can I use standard worsted weight yarn for this beanie?

You can, but the hat will turn out significantly larger than the measurements listed. This pattern is specifically designed for DK weight yarn to maintain a soft, delicate drape perfect for infants.

The brim seems too short, can I make it wider?

Absolutely! To make a wider brim, simply start with a longer chain (e.g., ch 10 instead of ch 6). Just remember that you'll need to adjust your sc counts for every row of the ribbing to match your new chain length.

How do I know which size to make if I don't have the baby's measurements?

If you are making this as a gift, it's usually safest to size up. Babies grow quickly, and a slightly large hat will eventually fit, whereas a hat that is too small won't get any use at all.

My brim isn't as stretchy as I expected, what happened?

This usually happens if the sc stitches in the brim are worked through both loops instead of the Back Loop Only (BLO). The BLO technique is what creates those ridges and gives the ribbing its elastic quality.