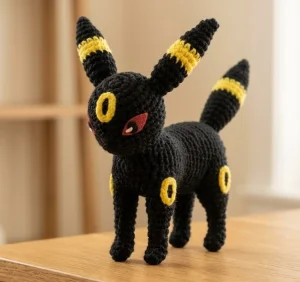
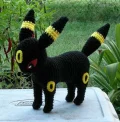
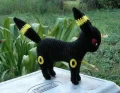
If you have been looking to add a touch of Moonlight to your collection, this Umbreon is exactly what you need. I have designed this pattern to capture that sleek, mysterious look we all love in this iconic Eeveelution. It is a rewarding project that uses clever shaping and felt details to really bring the character to life. You will love seeing those signature yellow rings come together as your new friend takes shape!
Progress Tracker
0% Complete
— 1. Body :
Round 1 :
Start with 6 sc into a MR (6)
Round 2 :
Work 2 sc into every st around (12)
Round 3 :
Work 1 sc then 1 inc; repeat this pattern around (18)
Round 4 :
Work 2 sc then 1 inc; repeat this pattern around (24)
Round 5 :
Work 3 sc then 1 inc; repeat this pattern around (30)
Round 6 :
Work 4 sc then 1 inc; repeat this pattern around (36)
Round 7 :
sc in each st around (36)
Round 8 :
sc in each st around (36)
Round 9 :
sc in each st around (36)
Round 10 :
sc in each st around (36)
Round 11 :
sc in each st around (36)
Round 12 :
sc in each st around (36)
Round 13 :
Work 10 sc followed by a dec; repeat this sequence 3 times (33)
Round 14 :
sc in each st around (33)
Round 15 :
sc in each st around (33)
Round 16 :
Work 9 sc followed by a dec; repeat this sequence 3 times (30)
Round 17 :
sc in each st around (30)
Round 18 :
sc in each st around (30)
Round 19 :
sc in each st around (30)
Round 20 :
sc in each st around (30)
Info :
Begin stuffing the body now, shaping it as you go. Use firm pressure to ensure it holds its form.
Round 21 :
Work 9 sc followed by an inc; repeat this sequence 3 times (33)
Round 22 :
Work 10 sc followed by an inc; repeat this sequence 3 times (36)
Round 23 :
sc in each st around (36)
Round 24 :
sc in each st around (36)
Round 25 :
sc in each st around (36)
Round 26 :
Work 4 sc followed by a dec; repeat this pattern around (30)
Round 27 :
Work 3 sc followed by a dec; repeat this pattern around (24)
Round 28 :
Work 2 sc followed by a dec; repeat this pattern around (18)
Round 29 :
Work 1 sc followed by a dec; repeat this pattern around (12)
Round 30 :
Decrease in every st around (6)
Info :
F/O. Add final stuffing bits to perfect the shape. Use your yarn needle to weave through the last 6 stitches and pull tight to close.
— 2. Head and Neck :
Round 1 :
Create a MR and work 8 sc into it (8)
Round 2 :
Increase in every st around (16)
Round 3 :
Work 1 sc then 1 inc; repeat this pattern around (24)
Round 4 :
Work 2 sc then 1 inc; repeat this pattern around (32)
Round 5 :
sc in each st around (32)
Round 6 :
sc in each st around (32)
Round 7 :
Work 16 sc, then 1 inc, then 15 sc (33)
Round 8 :
sc in each st around (33)
Round 9 :
Work 16 sc, then 3 sc into the next single st, then 16 sc (35)
Round 10 :
Work 17 sc, then 1 inc, then 17 sc (36)
Round 11 :
Work 14 sc, dec 4 times across the next 8 sts, then work 14 sc (32)
Round 12 :
Work 2 sc then 1 dec; repeat this pattern around (24)
Round 13 :
Repeat the pattern from Round 12 (18)
Round 14 :
Work 8 sc, then 1 inc, then 8 sc, then 1 inc (20)
Round 15 :
Work 9 sc, then 1 inc, then 9 sc, then 1 inc (22)
Round 16 :
Work 10 sc, then 1 inc, then 10 sc, then 1 inc (24)
Info :
Stuff the head firmly, paying close attention to the nose area. The neck shaping creates 'points' that should form a curve when attached to the body.
— 3. Front Legs :
Round 1 :
Start with 6 sc in a MR (6)
Round 2 :
Work 2 sc, 1 inc, 2 sc, 1 inc (8)
Round 3 :
sc in each st around (8)
Round 4 :
Work 1 dec, 1 sc, 2 inc, 1 sc, 1 dec (8)
Round 5 :
Repeat the instructions for Round 4 (8)
Info :
Begin stuffing the foot moderately firm.
Round 6 :
sc in each st around (8)
Round 7 :
sc in each st around (8)
Round 8 :
sc in each st around (8)
Round 9 :
Work 3 sc, 1 inc, 3 sc, 1 inc, 2 sc (10)
Round 10 :
Work 4 sc, 1 inc, 4 sc, 1 inc, 2 sc (12)
Round 11 :
sc in each st around (12)
Round 12 :
sc in each st around (12)
Info :
Do not cut yarn. Follow either the Right or Left shoulder instructions below.
— 4. Front Leg - Right Shoulder :
Row 13 :
sc in next 6 sts only, leave the rest unworked, ch 1 and turn (6)
Row 14 :
sc in each st across, ch 1 and turn (6)
Row 15 :
sc in next 4 sts, dec over the last 2 sts, ch 1 and turn (5)
Row 16 :
sc in next 3 sts, dec over the last 2 sts (4)
Info :
F/O and leave a tail for sewing.
— 5. Front Leg - Left Shoulder :
Info :
Turn the leg so the wrong side (inside) is facing you. Repeat Rows 13 through 16 as written for the Right Shoulder.
— 6. Back Legs :
Round 1-5 :
Follow the instructions for Rounds 1-5 of the Front Leg.
Round 6 :
sc in each st around (8)
Round 7 :
sc in each st around (8)
Info :
Stuff the foot and lower leg moderately firm.
Round 8 :
Work 1 sc then 1 inc; repeat this sequence around (12)
Round 9 :
sc in each st around (12)
Round 10 :
Work 1 sc then 1 inc; repeat this sequence around (18)
Round 11 :
sc in each st around (18)
Round 12 :
sc in each st around (18)
Info :
Do not cut yarn. Follow the Right or Left shoulder instructions below.
— 7. Back Leg - Right Shoulder :
Row 1 :
sc in next 9 sts only, leave the rest unworked, ch 1 and turn (9)
Row 2 :
sc in next 7 sts, dec over the last 2 sts, ch 1 and turn (8)
Row 3 :
sc in next 6 sts, dec over the last 2 sts, ch 1 and turn (7)
Row 4 :
sc in next 5 sts, dec over the last 2 sts, ch 1 and turn (6)
Row 5 :
sc in next 4 sts, dec over the last 2 sts, ch 1 and turn (5)
Row 6 :
sc in next 3 sts, dec over the last 2 sts (4)
Info :
F/O and leave a tail for sewing.
— 8. Back Leg - Left Shoulder :
Info :
Turn the leg so the wrong side (inside) is facing you. Repeat Rows 1 through 6 as written for the Right Shoulder.
— 9. Ears :
Round 1 :
Using black yarn, work 3 sc into a MR (3)
Round 2 :
sc in first 2 sts, then 1 inc in the last st (4)
Round 3 :
Work 1 sc, 1 inc, 1 sc, 1 inc (6)
Round 4 :
Work 1 sc then 1 inc; repeat around (9)
Round 5 :
Work 2 sc then 1 inc; repeat around (12)
Round 6 :
sc in each st around, changing to yellow yarn in the final st (12)
Round 7 :
With yellow, sc in each st around (12)
Round 8 :
sc in each st around (12)
Round 9 :
sc in each st around, changing back to black yarn in the final st (12)
Info :
Stuff the ear firmly as you continue to work.
Round 10 :
With black, sc in each st around (12)
Round 11 :
sc in each st around (12)
Round 12 :
sc in each st around (12)
Round 13 :
Work 2 sc followed by a dec; repeat around (9)
Round 14 :
Work 1 sc followed by a dec; repeat around (6)
Info :
F/O. Add any last stuffing needed to maintain the pointed ear shape.
— 10. Tail :
Round 1 :
Using black yarn, work 3 sc into a MR (3)
Round 2 :
sc in first 2 sts, then 1 inc in the last st (4)
Round 3 :
Work 1 sc, 1 inc, 1 sc, 1 inc (6)
Round 4 :
Work 1 sc then 1 inc; repeat around (9)
Round 5 :
Work 2 sc then 1 inc; repeat around (12)
Round 6 :
Work 3 sc then 1 inc; repeat around (15)
Round 7 :
sc in each st around (15)
Round 8 :
sc in each st around, changing to yellow yarn in the final st (15)
Info :
Stuff the tail firmly as you progress.
Round 9 :
With yellow, sc in each st around (15)
Round 10 :
sc in each st around (15)
Round 11 :
sc in each st around, changing back to black yarn in the final st (15)
Round 12 :
With black, sc in each st around (15)
Round 13 :
sc in each st around (15)
Round 14 :
sc in each st around (15)
Round 15 :
Work 3 sc followed by a dec; repeat around (12)
Round 16 :
sc in each st around (12)
Round 17 :
Work 2 sc followed by a dec; repeat around (9)
Round 18 :
sc in each st around (9)
Round 19 :
Work 1 sc followed by a dec; repeat around (6)
Round 20 :
sc in each st around (6)
Info :
F/O. Finish stuffing to finalize the shape and weave in the end.
I really hope you enjoyed bringing this mysterious Moonlight Pokemon to life! There is something so special about a handmade plushie, especially when it is as iconic as Umbreon. Don't forget to play around with the positioning of the legs and head before you do your final sewing—it is the best way to give your new friend a little bit of personality. Once you are finished, find a nice sunny (or moonlit!) spot to display your work. You have earned it! Keep those hooks moving and I will see you in the next project. Happy crocheting! 🧶✨