🧶 Beautiful ✨ Detailed 💝 Adorable

Bunny in a Carrot Amigurumi Pattern

Bunny in a Carrot Amigurumi Pattern
4.5★Rating
3-5 HoursTime Needed
1.4KMade This
✂️

Intermediate Level

Ideal for those with basic crocheting experience, featuring slightly more advanced stitches and techniques to expand your skills.

⏱️

Quick Craft

Fits nicely into a free afternoon — 2 to 5 hours of focused, enjoyable crocheting.

🐰

Whimsical Buddy

Playful characters full of personality, designed to spark imagination and become cherished playtime favorites.

About This Bunny in a Carrot Amigurumi Pattern

Bunny in a Carrot Amigurumi Pattern crochet pattern - detailed view

Makes a genuinely thoughtful handmade gift — tuck a small treat inside the carrot before gifting and watch someone's face completely light up. Perfect for Easter baskets or a friend who collects cute things.

Why You'll Love This Bunny in a Carrot Amigurumi Pattern

I fell hard for this one the moment I realized the carrot actually opens. There's something so satisfying about that button closure — it just makes the whole thing feel like a tiny toy you'd have found in a specialty shop. I also love how the two yarn types play off each other: the smooth cotton bunny against that squishy plush carrot is such a fun contrast to work with. Every time I've gifted one of these, the person has immediately started making the bunny peek in and out like a little puppet. That reaction? Worth every single round.

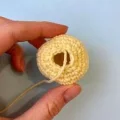
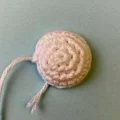
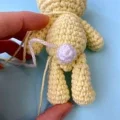
Bunny in a Carrot Amigurumi Pattern step 1 Bunny in a Carrot Amigurumi Pattern step 2 Bunny in a Carrot Amigurumi Pattern step 3 Bunny in a Carrot Amigurumi Pattern step 4

Switch Things Up

I have a thing for crochet patterns that have a little secret to them — a hidden pocket, a surprise element, something that makes someone pick up the finished toy and go 'oh WAIT.' This bunny-in-a-carrot is exactly that kind of pattern, and honestly it's one of my favorites I've made in a long time.

The first time I crocheted the carrot and figured out the buttonhole rows, I sat there opening and closing it for way too long. There's something so satisfying about that little button snap — the bunny disappearing inside and then peeking back out. My kids immediately turned it into a puppet show, which I was not expecting.

One thing I'd really recommend: don't rush the assembly on this one. The bunny itself comes together quickly — the head, body, and limbs are all fairly small pieces — but the assembly is where your patience pays off. Getting the ears positioned just right, making sure the muzzle has a little puff of stuffing in it, double-sewing that head joint so it stays upright. Those extra ten minutes make the finished toy look a hundred times more polished.

For color variations, I've seen this made with a white bunny and a more muted terracotta carrot for a softer aesthetic, and it looks absolutely beautiful. You could also do a lavender bunny tucked into a dusty rose 'carrot' for a non-traditional Easter version. The pattern structure works with any color combination — just keep the cotton for the bunny and the plush for the carrot, because that textural difference is what makes the whole thing so visually interesting.

Common Mistakes & How to Fix Them

✗ When crocheting the carrot's Round 16 buttonhole chain, it's easy to miscount the chain length — ch exactly 24 and then sc into only 6 sts of the round before chaining, or your flap won't sit correctly over the bunny.✗ The arms are finished by folding flat and sc-ing 3 stitches across the top to close — if you sc more than 3 or pull too tight, the arm ends up stiff and oddly shaped instead of softly rounded.✗ Stuffing the legs too firmly causes them to stick outward at strange angles; the pattern specifically says 'not very firmly' for a reason — light stuffing lets them fold flat after the final closing sc row.✗ When placing the safety eyes between rounds 8 and 9, the 5-stitch gap between them is critical — go narrower and the face looks pinched, go wider and the bunny loses that sweet kawaii expression entirely.✗ If you don't check carrot size against the bunny after Round 15 (before starting the buttonhole rounds), you might end up with a carrot that's too narrow to fit the bunny inside — the pattern flags this check for a reason, so don't skip it.✗ Attaching the muzzle without adding a small pinch of stuffing as you sew it down results in a completely flat disc on the face — tuck in just a tiny bit as you close the last few sewing stitches for that proper rounded snout.

Bunny in a Carrot Amigurumi Pattern

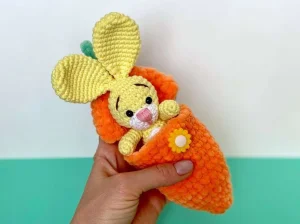
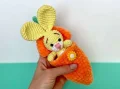
Picture this little yellow bunny peeking out of a chunky orange carrot — ears flopped over the edge, tiny arms dangling, the whole thing fitting right in the palm of your hand. This pattern gives you both pieces: the bunny and the carrot pocket it lives in, complete with a button closure so you can tuck your rabbit away whenever you like. It's the kind of project that makes people stop and say 'wait, you MADE that?' — and you'll love every stitch of it. Whether you're crocheting a spring gift or just want something ridiculously charming on your shelf, this little duo delivers.

Intermediate 3-5 Hours

Materials Needed for Bunny in a Carrot Amigurumi Pattern

— Main Fabric

  • 01
    Approximately 20g of fine-weight cotton yarn in yellow for the bunny's head, body, arms, legs, and ears
  • 02
    Approximately 5g of fine-weight cotton yarn in white for the muzzle, belly, and tail
  • 03
    Approximately 20g of bulky plush yarn in orange for the carrot body
  • 04
    Approximately 5g of bulky plush yarn in green for the carrot leaf tops
  • 05
    Small amounts of pink and brown cotton yarn for embroidering the nose and eyebrows

— Tools Required

  • 01
    Crochet hook US size B/2 (2.5 mm) for the bunny pieces
  • 02
    Crochet hook US size G/6 (4 mm) for the carrot
  • 03
    Black safety eyes, 7–8 mm (or substitute with black buttons or embroidered yarn eyes)
  • 04
    One decorative button, 15–20 mm, for the carrot front
  • 05
    Polyester fiber fill stuffing
  • 06
    Tapestry needle for sewing and weaving in ends
  • 07
    Scissors

Progress Tracker

0% Complete

— 1. Head :

Info :

Use yellow cotton yarn and a 2.5 mm hook. Start with a magic ring. All pieces are worked in a continuous spiral — no slip stitch to close rounds, no starting chain.

Round 1 :

Work 6 sc into the magic ring. =6 sts

Round 2 :

Work 2 sc in every st around. =12 sts

Round 3 :

(sc in next st, 2 sc in next st) — rep 6 times. =18 sts

Round 4 :

(sc in next 2 sts, 2 sc in next st) — rep 6 times. =24 sts

Round 5 :

(sc in next 3 sts, 2 sc in next st) — rep 6 times. =30 sts

Round 6 :

sc in every st around. =30 sts

Round 7 :

sc in every st around. =30 sts

Round 8 :

sc in every st around. =30 sts

Round 9 :

sc in every st around. =30 sts

Round 10 :

sc in every st around. =30 sts

Info :

If using safety eyes, insert them now between rounds 8 and 9, with 5 stitches between them. Also begin stuffing the head firmly before continuing with the decreases.

Round 11 :

(sc in next 3 sts, dec) — rep 6 times. =24 sts

Round 12 :

(sc in next 2 sts, dec) — rep 6 times. =18 sts

Round 13 :

(sc in next st, dec) — rep 6 times. =12 sts

Info :

Fasten off, leaving a long yarn tail of about 15 cm for sewing the head to the body.

— 2. Muzzle :

Info :

Use white cotton yarn and a 2.5 mm hook. Start with a magic ring.

Round 1 :

Work 6 sc into the magic ring. =6 sts

Round 2 :

Work 2 sc in every st around. =12 sts

Round 3 :

(sc in next st, 2 sc in next st) — rep 6 times. =18 sts

Round 4 :

sc in every st around. =18 sts

Info :

Close with a sl st and fasten off. Leave a long tail for sewing.

— 3. Ear (Make 2) :

Info :

Use yellow cotton yarn and a 2.5 mm hook. Start with a magic ring. Make this piece twice.

Round 1 :

Work 6 sc into the magic ring. =6 sts

Round 2 :

Work 2 sc in every st around. =12 sts

Round 3 :

(2 sc in next 2 sts, sc in next 4 sts) — rep 2 times. =16 sts

Round 4 :

sc in next st, 2 sc in next 2 sts, sc in next 6 sts, 2 sc in next 2 sts, sc in next 5 sts. =20 sts

Round 5 :

sc in every st around. =20 sts

Round 6 :

sc in every st around. =20 sts

Round 7 :

sc in every st around. =20 sts

Round 8 :

sc in every st around. =20 sts

Round 9 :

sc in every st around. =20 sts

Round 10 :

(dec, sc in next 8 sts) — rep 2 times. =18 sts

Round 11 :

(dec, sc in next 7 sts) — rep 2 times. =16 sts

Round 12 :

(dec, sc in next 6 sts) — rep 2 times. =14 sts

Round 13 :

(dec, sc in next 5 sts) — rep 2 times. =12 sts

Round 14 :

(dec, sc in next 4 sts) — rep 2 times. =10 sts

Round 15 :

(dec, sc in next 3 sts) — rep 2 times. =8 sts

Info :

Join with sl st and fasten off. Leave a long tail for sewing. Repeat all rounds for the second ear.

— 4. Body :

Info :

Use yellow cotton yarn and a 2.5 mm hook. Start with a magic ring.

Round 1 :

Work 6 sc into the magic ring. =6 sts

Round 2 :

Work 2 sc in every st around. =12 sts

Round 3 :

(sc in next st, 2 sc in next st) — rep 6 times. =18 sts

Round 4 :

sc in every st around. =18 sts

Round 5 :

(sc in next 2 sts, 2 sc in next st) — rep 6 times. =24 sts

Round 6 :

sc in every st around. =24 sts

Round 7 :

sc in every st around. =24 sts

Round 8 :

sc in every st around. =24 sts

Round 9 :

(sc in next 2 sts, dec) — rep 6 times. =18 sts

Info :

Stuff the body firmly before continuing.

Round 10 :

sc in every st around. =18 sts

Round 11 :

(sc in next st, dec) — rep 6 times. =12 sts

Info :

Join with sl st and fasten off.

— 5. Arm (Make 2) :

Info :

Use yellow cotton yarn and a 2.5 mm hook. Start with a magic ring. Make this piece twice.

Round 1 :

Work 6 sc into the magic ring. =6 sts

Round 2 :

(2 sc in next st, sc in next 2 sts) — rep 2 times. =8 sts

Round 3 :

sc in every st around. =8 sts

Round 4 :

(dec, sc in next 2 sts) — rep 2 times. =6 sts

Round 5 :

sc in every st around. =6 sts

Round 6 :

sc in every st around. =6 sts

Round 7 :

sc in every st around. =6 sts

Round 8 :

sc in every st around. =6 sts

Info :

Stuff the arm lightly — don't overfill. Fold it flat and sc across both layers with 3 sc to close the top. Fasten off and weave in the short end. Leave a long tail on the second arm for sewing.

— 6. Leg (Make 2) :

Info :

Use yellow cotton yarn and a 2.5 mm hook. Start with a magic ring. Make this piece twice.

Round 1 :

Work 6 sc into the magic ring. =6 sts

Round 2 :

Work 2 sc in every st around. =12 sts

Round 3 :

(2 sc in next st, sc in next 3 sts) — rep 3 times. =15 sts

Round 4 :

sc in next 2 sts, (dec) 4 times, sc in next 5 sts. =11 sts

Round 5 :

sc in next 2 sts, (dec) 2 times, sc in next 5 sts. =9 sts

Round 6 :

sc in every st around. =9 sts

Round 7 :

sc in every st around. =9 sts

Round 8 :

sc in every st around. =9 sts

Info :

Stuff the leg loosely — light stuffing only.

Round 9 :

(sc in next st, dec) — rep 3 times. =6 sts

Info :

Fold the leg flat and sc across both layers with 3 sc to close. Fasten off and weave in the short end. Leave a long tail on the second leg for sewing.

— 7. Belly :

Info :

Use white cotton yarn and a 2.5 mm hook. Start with a ch6 foundation chain.

Row 1 :

sc in the 2nd ch from hook, sc in next 3 chs, 3 sc in the last ch. Rotate and work along the other side of the chain: sc in next 3 sts, 2 sc in the last st. =12 sts

Row 2 :

2 sc in the first st, sc in next 3 sts, 2 sc in each of the next 3 sts, sc in next 3 sts, 2 sc in each of the next 2 sts. =18 sts

Info :

Join with sl st and fasten off. Leave a long tail for sewing.

— 8. Tail :

Info :

Use white cotton yarn and a 2.5 mm hook. Start with a magic ring.

Round 1 :

Work 6 sc into the magic ring. =6 sts

Round 2 :

(sc in next st, 2 sc in next st) — rep 3 times. =9 sts

Info :

Join with sl st and fasten off. Leave a long tail for sewing.

— 9. Carrot :

Info :

Use orange bulky plush yarn and a 4 mm hook. Start with a magic ring.

Round 1 :

Work 6 sc into the magic ring. =6 sts

Round 2 :

sc in every st around. =6 sts

Round 3 :

Work 2 sc in every st around. =12 sts

Round 4 :

sc in every st around. =12 sts

Round 5 :

(sc in next st, 2 sc in next st) — rep 6 times. =18 sts

Round 6 :

sc in every st around. =18 sts

Round 7 :

(sc in next 2 sts, 2 sc in next st) — rep 6 times. =24 sts

Round 8 :

sc in every st around. =24 sts

Round 9 :

sc in every st around. =24 sts

Round 10 :

sc in every st around. =24 sts

Round 11 :

sc in every st around. =24 sts

Round 12 :

sc in every st around. =24 sts

Round 13 :

sc in every st around. =24 sts

Round 14 :

sc in every st around. =24 sts

Round 15 :

sc in every st around. =24 sts

Info :

Before continuing, check that the carrot opening is wide and tall enough to fit the assembled bunny comfortably inside.

Round 16 :

sc in next 6 sts, ch 24. =30 sts (including chain)

Round 17 :

sc in next 6 sts, sc in next 9 ch, skip the following 6 ch (this creates the buttonhole), sc in remaining 9 ch. =24 sts

Round 18 :

sc in every st around. =24 sts

Round 19 :

sc in every st around. =24 sts

Round 20 :

sc in every st around. =24 sts

Round 21 :

sc in every st around. =24 sts

Round 22 :

(sc in next 2 sts, dec) — rep 6 times. =18 sts

Round 23 :

(sc in next st, dec) — rep 6 times. =12 sts

Round 24 :

dec — rep 6 times. =6 sts

Info :

Fasten off, cut yarn, and weave in ends.

— 10. Carrot Leaves :

Info :

Use green bulky plush yarn and a 4 mm hook. Join to the top of the carrot at round 24.

Leaves :

Make a sl st into any st of round 24, then (ch 10, sl st back into the same st) — rep 3 times total to create 3 looping leaf strands.

Info :

Fasten off, cut yarn, and weave in ends. Sew the decorative button centered between rounds 13 and 14 on the front of the carrot.

Assembly Instructions

  • Start with the eyes: if using safety eyes, they must be inserted between rounds 8 and 9 of the head with exactly 5 stitches between them — do this before the head is fully closed. Alternatively, embroider or button the eyes onto the finished head.
  • Attach the head to the body by sewing round 13 of the head to the stitches at round 11 of the body. Pack the neck area with extra stuffing so the head doesn't wobble, and sew through the join twice for security.
  • Sew both arms to the body, positioning them between rounds 10 and 11 on either side. Pin them first to check they're symmetrical before stitching down.
  • Attach the legs to the lower body between rounds 3 and 4. Enter and exit through the same stitch points on each leg so they hang evenly and remain slightly flexible.
  • Sew the fluffy white tail to the back of the body anywhere between rounds 2 and 5, centered at the back.
  • Position both ears at the top of the head and sew them down firmly, then take a few extra stitches to join the bases of the two ears together so they sit close and upright.
  • Sew the muzzle onto the face between rounds 8 and 13 of the head, stuffing just a little bit inside as you close the last few stitches for a rounded look. Embroider the nose in pink yarn and the eyebrows in brown yarn between rounds 4 and 8 with 3 stitches between them. Finally, sew the white belly panel onto the front of the body, spanning from round 3 up to round 11.

Important Notes

  • 💡Work all bunny pieces in a continuous spiral without closing rounds with a slip stitch — use a stitch marker to track the beginning of each round so you don't lose your place.
  • 💡Your tension matters most on the bunny, not the carrot — crochet the cotton pieces snugly so no stuffing pokes through, but the plush yarn is more forgiving with the larger hook.
  • 💡Always check the carrot size against your assembled bunny after round 15, before starting the buttonhole section — plush yarn can behave differently than the pattern sample depending on your brand, and a too-narrow carrot is a painful surprise at round 22.
  • 💡The buttonhole is created by chaining 24 in round 16 and then working across only part of it in round 17 — count carefully here because this is the trickiest part of the whole project and a miscount means restarting those two rounds.
  • 💡Don't skip stuffing the muzzle lightly during the sewing process — it makes a visible difference in how the face looks once everything is assembled.
  • 💡When sewing limbs, try to enter and exit through exactly the same stitch each time you pass the needle through the body — this keeps the arms and legs moveable rather than locked in one position.

There's something genuinely magical about a toy that has a secret — and this little bunny snuggled inside its carrot is exactly that kind of project. 🥕 You end up with a soft, squishy, palm-sized carrot that unbuttons to reveal the sweetest yellow rabbit tucked inside, ears and all. It photographs beautifully, it's a joy to make, and whoever receives one will absolutely love it. Whether it ends up on a shelf, in a gift bag, or tucked into an Easter basket, this little set has a way of making people genuinely smile. Happy crocheting — you've got something really special on your hook! 🧶✨
You ask,

we answer.

FAQs

Can I use a different plush yarn for the carrot?

Yes — any bulky chenille or plush yarn will work. Just swatch first, because plush yarns vary a lot in thickness even within the same weight category. If your carrot looks narrower than expected after round 15, add an extra plain round before starting the buttonhole section to make sure the bunny fits inside.

My bunny head keeps drooping forward after I sew it on — how do I fix that?

This usually happens when the neck area isn't packed firmly enough. Before you start sewing the head to the body, stuff both the body and the neck space really well, then sew through the join twice in two different directions. The double stitching is what keeps the head upright.

Is this pattern safe for babies or very young children?

As written, the carrot uses a button and the bunny uses safety eyes — both are choking hazards for children under 3. For a baby-safe version, skip the button closure entirely and embroider the eyes with black yarn instead. The rest of the construction is very secure once properly assembled.

What finished size will I get if I use worsted weight cotton instead of DK?

Worsted cotton with a 3.5–4 mm hook will give you a bunny that's roughly 30–40% larger than the original, so closer to 5–6 inches without ears. The proportions stay the same but you'll need to check the carrot size accordingly since you'd also be scaling that up.

I've never made a buttonhole in crochet before — is Round 16-17 hard to follow?

It's definitely the most unusual part of this pattern. In round 16 you sc 6 sts and then chain 24 (which forms the flap). In round 17 you work back across that chain but skip 6 chains in the middle — that gap is the buttonhole. Count those 6 skipped chains carefully, and you'll be fine.

Do the ears need to be stuffed?

No — the ears are not stuffed. They're worked in the round and decrease naturally to a flat point at the top, then sewn onto the head. Their flat shape is part of what gives the bunny that characteristic floppy-eared look.