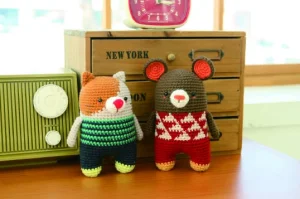
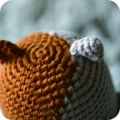
You are going to love bringing this little calico friend to life! With its charming striped sweater and tiny lime green boots, this cat is packed with personality despite its simple shape. It is a fantastic project for practicing your colorwork while creating a modern, pocket-sized buddy that looks great on any shelf. You will find the construction really clever, especially the way the legs are built right into the body.
Progress Tracker
0% Complete
— 1. Head & Body :
Round 1 :
Using Orange Brown yarn, work 6 sc into a magic ring and pull the tail to close. (6)
Round 2 :
Work 1 inc into every stitch around. (12)
Round 3 :
Repeat (1 sc, 1 inc) 6 times. (18)
Round 4 :
Repeat (2 sc, 1 inc) 6 times. (24)
Round 5 :
Repeat (3 sc, 1 inc) 6 times. (30)
Round 6 :
Repeat (4 sc, 1 inc) 6 times. (36)
Round 7 :
Repeat (5 sc, 1 inc) 6 times. (42)
Round 8 :
Repeat (6 sc, 1 inc) 6 times. (48)
Info :
For Rounds 9 through 19, you will be creating the calico face pattern. You must switch between Orange Brown and Soft Beige yarn as you work. Please refer to the grid chart in the pattern for the exact stitch-by-stitch color placement.
Round 9-19 :
sc in all 48 stitches, following the color split between Orange Brown and Soft Beige. (48)
Round 20 :
Switch to Navy yarn and sc in each of the 48 stitches. (48)
Round 21 :
Switch to Green yarn and sc in each of the 48 stitches. (48)
Round 22 :
Switch to Navy yarn and sc in each of the 48 stitches. (48)
Round 23 :
Switch to Green yarn and sc in each of the 48 stitches. (48)
Round 24 :
Switch to Navy yarn and sc in each of the 48 stitches. (48)
Round 25 :
Switch to Green yarn and sc in each of the 48 stitches. (48)
Round 26 :
Switch to Navy yarn and sc in each of the 48 stitches. (48)
Round 27 :
Switch to Green yarn and sc in each of the 48 stitches. (48)
Round 28 :
Switch to Navy yarn and sc in each of the 48 stitches. (48)
Round 29-36 :
Continue with Navy yarn and sc in every stitch around. (48)
— 2. First Leg (Left) :
Info :
To begin the first leg, identify the 31st stitch of Round 36. This will be your starting point. You will work across 18 stitches to form the leg, leaving a 6-stitch gap in the center.
Round 37-40 :
Using Navy yarn, sc in each of the 18 stitches designated for the first leg. (18)
Round 41 :
Switch to Lime yarn and repeat (1 sc, 1 dec) 6 times. (12)
Round 42 :
Work 6 dec around. (6)
Info :
Fasten off and leave a long tail. Stuff the leg firmly. Thread your needle through the front loops of the remaining 6 stitches and pull tight to close.
— 3. Second Leg (Right) :
Info :
Reattach your Navy yarn to the 7th unworked stitch on the back of Round 36. This will be the first stitch for your second leg.
Round 37-40 :
Using Navy yarn, sc in each of the 18 stitches for the second leg. (18)
Round 41 :
Switch to Lime yarn and repeat (1 sc, 1 dec) 6 times. (12)
Round 42 :
Work 6 dec around. (6)
Info :
Fasten off, leave a tail, and stuff the leg. Close the opening by weaving through the front loops and pulling tight.
— 4. Arms (Make 2) :
Round 1 :
Using Soft Beige yarn, work 5 sc into a magic ring. (5)
Round 2 :
Work 1 inc into every stitch around. (10)
Round 3-11 :
sc in each of the 10 stitches around. (10)
Info :
Fasten off and leave a tail for sewing. Flatten the arm; do not add stuffing.
— 5. Snout :
Round 1 :
Using White yarn, ch 4. Starting in the 2nd ch from the hook, work 1 sc, 1 sc in the next ch, and 3 sc in the last ch. Turn to work along the bottom of the chain: 1 sc, then 2 sc in the final ch. sl st to join. (8)
Round 2 :
ch 1, work 1 inc, 1 sc, 3 inc, 1 sc, 2 inc, then sl st to join. (14)
Round 3-4 :
ch 1, sc in each of the 14 stitches around, then sl st to join. (14)
Info :
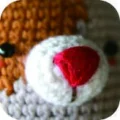
Fasten off, leaving a tail for assembly. Lightly stuff the snout and embroider a Red nose and mouth onto the front.
— 6. Ears (Make 2) :
Round 1 :
Using either Orange Brown or Soft Beige yarn, work 3 sc into a magic ring. (3)
Round 2 :
Work 1 inc into every stitch around. (6)
Round 3 :
Repeat (1 sc, 1 inc) 3 times. (9)
Round 4 :
Repeat (2 sc, 1 inc) 3 times. (12)
Info :
Fasten off and leave a tail. Flatten the ear without stuffing it.
There is something so rewarding about finishing a project that looks this polished and professional. Whether he is sitting on your desk keeping you company or tucked into a gift basket for a friend, this little cat is sure to bring a smile to everyone who sees him. I hope you enjoyed every stitch of this process, from the tricky color changes to the final assembly of that tiny snout. Don't forget to share your finished photos with our community! Happy crafting, and I can't wait to see which colors you choose for your next Minimal buddy! 🧶✨