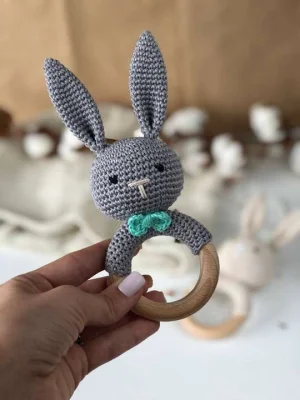
There is nothing quite like the soft rattle of a handmade baby toy to bring a smile to a little one's face. This sweet bunny teething rattle combines the natural warmth of beech wood with the soft, comforting texture of hand-crocheted cotton. It is a joy to create, working up quickly with simple shapes that transform into an adorable heirloom gift. You will love watching this little character come to life stitch by stitch, knowing it will be cherished for years.
Progress Tracker
0% Complete
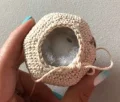
— 1. Wooden Ring Cover - Option 1 (Seamless Spiral) :
Info :
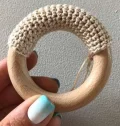
This option is worked directly around the wood. Use the smaller hook to keep your stitches extra neat and tight.
Round 1 :
ch 10, join with sl st around the wooden ring, sc in each of the 10 ch around
Round 2 :
Work sc in each st around in a continuous spiral without joining
Info :
Continue working in a spiral until slightly less than half of the wooden ring is covered. End with sl st, fasten off, and weave in your ends tightly inside the fabric.
— 2. Wooden Ring Cover - Option 2 (Flat Rectangle) :
Info :
If working around the ring is too tricky, you can make this simple flat piece and sew it on afterward.
Row 1 :
ch 20, starting in second ch from hook, sc in each ch across (19)
Row 2 :
ch 1, turn, sc in each st across (19)
Row 3 :
ch 1, turn, sc in each st across (19)
Row 4 :
ch 1, turn, sc in each st across (19)
Row 5 :
ch 1, turn, sc in each st across (19)
Row 6 :
ch 1, turn, sc in each st across (19)
Row 7 :
ch 1, turn, sc in each st across (19)
Row 8 :
ch 1, turn, sc in each st across (19)
Row 9 :
ch 1, turn, sc in each st across (19)
Info :
Fasten off leaving a long tail. Fold the piece over the wooden ring and whipstitch the edges together tightly so the seam sits on the inside of the ring.
— 3. Head :
Round 1 :
6 sc in magic ring (6)
Round 2 :
inc in each of the next 6 sts (12)
Round 3 :
(inc, sc in next st) * 6 (18)
Round 4 :
(inc, sc in next 2 sts) * 6 (24)
Round 5 :
(inc, sc in next 3 sts) * 6 (30)
Round 6 :
(inc, sc in next 4 sts) * 6 (36)
Round 7 :
(inc, sc in next 5 sts) * 6 (42)
Round 8 :
(inc, sc in next 6 sts) * 6 (48)
Round 9 :
sc in each of the 48 sts (48)
Round 10 :
sc in each of the 48 sts (48)
Round 11 :
sc in each of the 48 sts (48)
Round 12 :
sc in each of the 48 sts (48)
Round 13 :
sc in each of the 48 sts (48)
Round 14 :
sc in each of the 48 sts (48)
Round 15 :
sc in each of the 48 sts (48)
Round 16 :
(dec, sc in next 6 sts) * 6 (42)
Round 17 :
(dec, sc in next 5 sts) * 6 (36)
Round 18 :
(dec, sc in next 4 sts) * 6 (30)
Round 19 :
(dec, sc in next 3 sts) * 6 (24)
Info :
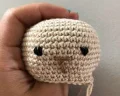
Embroider the eyes at the level of Round 3 or 4 below your final increase round, leaving 7 stitches between them. Embroider a small nose one row below the eyes. Stuff the top half of the head, then place the rattle insert in the middle.
Round 20 :
(dec, sc in next 2 sts) * 6 (18)
Info :
Finish stuffing the head firmly around the rattle insert using tweezers to push stuffing into the gaps.
Round 21 :
(dec, sc in next st) * 6 (12)
Info :
Thread your yarn tail through the front loops of the remaining 6 stitches, pull tight to close, and leave a long tail (about 18-20 inches) for attaching to the ring cover.
— 4. Ears (Make 2) :
Round 1 :
4 sc in magic ring (4)
Round 2 :
(inc, sc in next st) * 2 (6)
Round 3 :
(inc, sc in next 2 sts) * 2 (8)
Round 4 :
(inc, sc in next 3 sts) * 2 (10)
Round 5 :
(inc, sc in next 4 sts) * 2 (12)
Round 6 :
(inc, sc in next 5 sts) * 2 (14)
Round 7 :
(inc, sc in next 6 sts) * 2 (16)
Round 8 :
sc in each of the 16 sts (16)
Round 9 :
sc in each of the 16 sts (16)
Round 10 :
sc in each of the 16 sts (16)
Round 11 :
sc in each of the 16 sts (16)
Round 12 :
sc in each of the 16 sts (16)
Round 13 :
sc in each of the 16 sts (16)
Round 14 :
sc in each of the 16 sts (16)
Round 15 :
sc in each of the 16 sts (16)
Round 16 :
sc in each of the 16 sts (16)
Round 17 :
sc in each of the 16 sts (16)
Round 18 :
sc in each of the 16 sts (16)
Round 19 :
sc in each of the 16 sts (16)
Round 20 :
sc in each of the 16 sts (16)
Info :
sl st in the next stitch, fasten off and leave a long sewing tail. Fold the lower edge of the ear in half and make a few small stitches across the bottom to secure the folded shape.
— 5. Bow Tie :
Round 1 :
In a magic ring, work: ch 4, 4 tr, ch 4, sl st, ch 4, 4 tr, ch 4, sl st
Info :
Pull the magic ring closed tightly. Wrap the remaining yarn tail securely around the center of the bow several times to create a neat knot, then tie off, leaving a tail for sewing.
I hope you have the absolute best time making this darling little bunny rattle! There is something so incredibly special about creating a handmade piece that will be held, shaken, and loved by a sweet little baby. Don't forget to take your time with the facial details—that is where your bunny's unique personality really shines through. Happy stitching, and may your hands stay cozy! 🧶✨