🧢 Beautiful ✨ Detailed πŸ’ Adorable

Classic Tea Biscuit Trio Amigurumi Pattern

Classic Tea Biscuit Trio Amigurumi Pattern
4.1β˜…Rating
3-5 HoursTime Needed
2.3KMade This
βœ‚οΈ

Intermediate Level

Ideal for those with basic crocheting experience, featuring slightly more advanced stitches and techniques to expand your skills.

⏱️

Quick Craft

Fits nicely into a free afternoon β€” 2 to 5 hours of focused, enjoyable crocheting.

🎁

Tiny Treasure

Small, sweet, and gift-worthy creations that fit perfectly in the palm of your hand with detailed charm.

About This Classic Tea Biscuit Trio Amigurumi Pattern

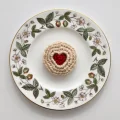
Classic Tea Biscuit Trio Amigurumi Pattern crochet pattern - detailed view

These make a brilliant gift for the tea lover in your life. They are also fantastic for craft fairs because they are small, recognizable, and look adorable displayed in a glass jar.

Why You'll Love This Classic Tea Biscuit Trio Amigurumi Pattern

I love how satisfying these are to finish because you get that 'instant gratification' feeling three times over! There is something so happy about seeing a pile of these growing in your yarn basket. Plus, the Jammie Dodger technique for making the heart center is such a clever little trick that you will definitely want to use on other projects.

Classic Tea Biscuit Trio Amigurumi Pattern step 1 Classic Tea Biscuit Trio Amigurumi Pattern step 2 Classic Tea Biscuit Trio Amigurumi Pattern step 3 Classic Tea Biscuit Trio Amigurumi Pattern step 4

Switch Things Up

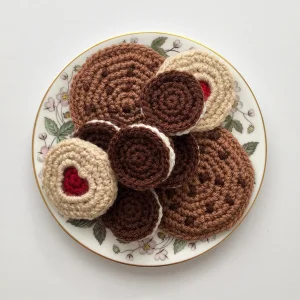
I honestly think there is nothing more charming than a plate of crochet treats that never go stale! When I first started making these, I was obsessed with getting the Jammie Dodger just right. The trick is all in that center holeβ€”shaping it into a heart with your tapestry needle feels like magic as it comes together.

If you want to customize your biscuit tin, try playing with the yarn colors. You could make lemon cream Oreos with a pale yellow center or even double stuffed ones by adding an extra round to the filling piece. For the chocolate chips on the big cookie, I like to use a variety of stitch lengths to make them look like real, uneven chunks of chocolate.

These are such a fantastic palate cleanser project between bigger makes like blankets or sweaters. They don't require much yarn, so they are perfect for using up those random scraps we all have stashed away. I usually keep a few finished ones on hand for last-minute giftsβ€”they always bring a smile to people's faces!

Common Mistakes & How to Fix Them

βœ— When sewing the Oreo together, if you pull your stitches too tight near the edge, the white cream center will get squashed and become invisible.βœ— For the Choc Chip Cookie, if you bunch all the chips in the center, it won't look natural; make sure to scatter a few right on the final round.βœ— On the Jammie Dodger top, forgetting to leave a long starting tail will make shaping the heart much harder when you go to assemble it.βœ— If your tension varies between the top and bottom pieces of the cookies, they won't line up correctly when you try to join the edges.

Classic Tea Biscuit Trio Amigurumi Pattern

Nothing beats a cup of tea and a plate of biscuits, right? I have put together this fun little set so you can whip up your own calorie-free treats at home. We are making three iconic favorites: a chunky choc chip cookie, a sweet Jammie Dodger, and a classic cream-filled Oreo. They are super quick to work up and make the cutest play food for kids or quirky kitchen decor for your own space. Grab your scraps and let's get baking with our hooks!

Intermediate 3-5 Hours

Materials Needed for Classic Tea Biscuit Trio Amigurumi Pattern

β€” Main Fabric

  • 01
    Light brown DK weight acrylic yarn (Soft Fudge) for the main cookie bases
  • 02
    Dark chocolate brown DK yarn (Coffee Bean) for the Oreo and chocolate chips
  • 03
    Creamy off-white DK yarn (Vanilla Cream) for the Jammie Dodger biscuit
  • 04
    Deep red DK yarn (Red Wine) for the jam center
  • 05
    Bright white DK yarn (Champagne White) for the Oreo filling

β€” Tools Required

  • 01
    4mm crochet hook (Size G/6)
  • 02
    Sharp scissors
  • 03
    Tapestry needle for assembly and embroidery
  • 04
    Stitch markers to keep track of your rounds

Progress Tracker

0% Complete

β€” 1. Choc Chip Cookie β€” Top & Base :

Info :

You will need to make two of these circles using yarn A.

Round 1 :

Using yarn A, work 7 sc into a mc and join with a ss to the first st (7)

Round 2 :

ch 1, then work an inc into the first st and every st around, joining with a ss to the first sc (14)

Round 3 :

ch 1, sc in the first st, inc in the next st, then repeat (sc, inc) 6 more times, joining with a ss (21)

Round 4 :

ch 1, sc in the first 2 st, inc in the next st, then repeat (2 sc, inc) 6 more times, joining with a ss (28)

Round 5 :

ch 1, sc in the first 3 st, inc in the next st, then repeat (3 sc, inc) 6 more times, joining with a ss (35)

Round 6 :

ch 1, sc in the first 4 st, inc in the next st, then repeat (4 sc, inc) 6 more times, joining with a ss (42)

Round 7 :

ch 1, sc in the first 5 st, inc in the next st, then repeat (5 sc, inc) 6 more times, joining with a ss (49)

Info :

Cut yarn and weave in your ends. On the right side of just one piece, use yarn B to stitch random chocolate chips across the surface.

Joining :

Hold the two circles together with wrong sides facing. Using yarn A, join through both layers and sc around the entire circumference to close, finishing with a ss.

β€” 2. Jammie Dodger β€” Base :

Round 1 :

Using yarn C, work 7 sc into a mc and join with a ss (7)

Round 2 :

ch 1, work an inc into every st around, joining with a ss (14)

Round 3 :

ch 1, (sc, inc) repeat 7 times total around, joining with a ss (21)

Round 4 :

ch 1, (2 sc, inc) repeat 7 times total around, joining with a ss (28)

Round 5 :

ch 1, (3 sc, inc) repeat 7 times total around, joining with a ss (35)

Info :

Fasten off and weave in the yarn ends.

β€” 3. Jammie Dodger β€” Jam Centre :

Round 1 :

Using yarn D, work 7 sc into a mc and join with a ss (7)

Round 2 :

ch 1, work an inc into every st around, joining with a ss (14)

Round 3 :

ch 1, (sc, inc) repeat 7 times total around, joining with a ss (21)

Round 4 :

ch 1, (2 sc, inc) repeat 7 times total around, joining with a ss (28)

Info :

Cut yarn and weave in the ends.

β€” 4. Jammie Dodger β€” Top Biscuit :

Round 1 :

Using yarn C, ch 14 and join with a ss to form a loop. ch 1 and work 21 sc into the center of the ring, joining with a ss (21). Leave a long tail at the start for later.

Round 2 :

ch 1, (2 sc, inc) repeat 7 times total around, joining with a ss (28)

Round 3 :

ch 1, (3 sc, inc) repeat 7 times total around, joining with a ss (35)

Info :

Fasten off and weave in the final tail.

β€” 5. Oreo β€” Top & Base :

Info :

Make two of these pieces using yarn B.

Round 1 :

Using yarn B, work 7 sc into a mc and join with a ss (7)

Round 2 :

ch 1, work 2 sc into every st around, joining with a ss (14)

Round 3 :

ch 1, (sc, inc) repeat 7 times total around, joining with a ss (21)

Round 4 :

ch 1, (2 sc, inc) repeat 7 times total around, joining with a ss (28)

Info :

Cut yarn and weave in ends.

β€” 6. Oreo β€” Cream Filling :

Round 1 :

Using yarn E, work 7 sc into a mc and join with a ss (7)

Round 2 :

ch 1, work 2 sc into every st around, joining with a ss (14)

Round 3 :

ch 1, (sc, inc) repeat 7 times total around, joining with a ss (21)

Round 4 :

ch 1, (2 sc, inc) repeat 7 times total around, joining with a ss (28)

Info :

Fasten off and weave in ends.

Assembly Instructions

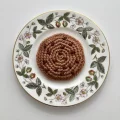
  • For the Choc Chip Cookie, stitch small dark brown dashes randomly across the top piece before joining the two circles together.
  • To assemble the Jammie Dodger, use the long starting tail from the top biscuit piece to stitch it to the red jam center.
  • While sewing the Jammie Dodger center, pull the stitches to shape the inner circle into a heart, adding extra stitches at the top to create the 'V' dip.
  • Place the Jammie Dodger top and base with wrong sides together and use yarn A to sew around the outer edge.
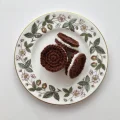
  • Stack the Oreo pieces: the base should be upside down, with the white filling and the top piece both facing right side up.
  • Sew the Oreo layers together using yarn B, making sure to keep your stitches away from the very edge so the white center remains visible.

Important Notes

  • πŸ’‘This pattern uses UK terminology in the source, but I have converted everything to US terms (sc) for these instructions.
  • πŸ’‘Keep your tension consistent across all pieces so that the biscuit tops and bottoms line up perfectly during assembly.
  • πŸ’‘These biscuits are a great way to use up small amounts of DK weight yarn from your stash.
  • πŸ’‘Because these are small items, ensure all ends are woven in securely if they are being used as toys for children.
  • πŸ’‘If you want a thicker Oreo, you can add an extra round to the white filling piece using the same increase pattern.

I hope you have as much fun making this little biscuit collection as I did! There is something so satisfying about seeing a pile of handmade treats come to life with just a hook and some scrap yarn. Whether they end up in a play kitchen or as a quirky gift for a tea-loving friend, these biscuits are sure to be a hit. Don't be afraid to experiment with different flavors by swapping out your yarn colors. Happy crocheting, and may your tea always be warm and your stitches always be even! 🧢✨

You ask,

we answer.

FAQs

Can I use cotton yarn instead of acrylic for these biscuits?

Absolutely! Cotton yarn works beautifully for play food because it is durable and gives great stitch definition, making the biscuits look even more realistic.

How do I make the heart shape on the Jammie Dodger look perfect?

The secret is in the embroidery. Use your yarn tail to pull the center hole into a point at the bottom and a dip at the top; the crochet itself is just a circle until you shape it with your needle.

The Oreo filling is getting hidden when I sew it. What am I doing wrong?

You are likely sewing too close to the outer edge. Try to place your assembly stitches about one round inward from the edge to let the white 'cream' peek out naturally.

What size will the finished biscuits be?

Using DK yarn and a 4mm hook, the Choc Chip Cookie is about 9cm wide, the Jammie Dodger is 6cm, and the Oreo is 5cm.