About This Floppy Plush Bunny Snuggler Amigurumi Pattern
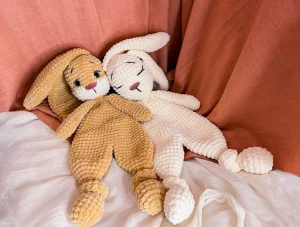
This lovely bunny makes a wonderful baby shower gift or a cozy addition to a nursery, sure to be cherished and loved for years to come.
Ideal for those with basic crocheting experience, featuring slightly more advanced stitches and techniques to expand your skills.
Takes 5-7 hours, making it an enjoyable project to finish over a couple of days.
An adorable friend to cherish, handcrafted with love to bring comfort and joy for years to come.
This lovely bunny makes a wonderful baby shower gift or a cozy addition to a nursery, sure to be cherished and loved for years to come.
I absolutely adore how quickly this snuggler works up thanks to the chunky plush yarn! There is something so satisfying about watching those big, floppy ears take shape, and the clever join-as-you-go legs mean less sewing at the end—always a huge win in my book!

I still remember the first time I made a plush snuggler—I was completely hooked from the very first stitch! There is something so incredibly magical about how the chunky chenille yarn feels in your hands, and the way the project grows so quickly is just pure instant gratification. This sweet bunny has quickly become my absolute go-to baby shower gift because it is the perfect blend of a comforting lovey blanket and a cute stuffed animal.\n\nWhen I am working on this pattern, I love to play around with colors. While a classic cream or soft caramel is always gorgeous, don't be afraid to try pastel pinks, sage greens, or even a dusty blue. If you want to customize it even further, you can add a little fabric bow around the neck or embroider some tiny flowers onto the floppy ears. The possibilities are truly endless, and each one you make will have its own unique personality. I promise you won't be able to make just one!
Meet your next favorite make! This adorable, floppy-eared bunny snuggler is the ultimate security blanket and plushie hybrid. Crocheted with super bulky chenille yarn, it is unbelievably soft, squishy, and perfect for tiny hands to hold. You'll love watching this sweet companion come to life stitch by stitch, creating a treasured keepsake that brings comfort and joy to any nursery.
Work 6 sc inside a MR (6)
Work 6 inc around (12)
Repeat (1 sc, 1 inc) 6 times (18)
Work 18 sc around (18)
Repeat (4 sc, 1 dec) 3 times (15)
Repeat (3 sc, 1 dec) 3 times (12)
Lightly stuff the bottom of the foot before continuing.
Repeat (2 sc, 1 dec) 3 times (9)
Repeat (1 sc, 1 dec) 3 times (6)
Work 6 sc around (6)
Repeat (1 sc, 1 inc) 3 times (9)
Repeat (2 sc, 1 inc) 3 times (12)
Repeat (3 sc, 1 inc) 3 times (15)
Repeat (4 sc, 1 inc) 3 times (18)
Repeat (5 sc, 1 inc) 3 times (21)
Repeat (6 sc, 1 inc) 3 times (24)
Work 24 sc around (24)
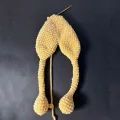
Cut yarn after completing the first leg. Do not cut yarn on the second leg, as you will continue with it to join.
To join the legs: insert your hook into the last stitch of the first leg and make 1 sc. Crochet 23 sc around the first leg, then insert hook into the second leg and make 1 sc, followed by 23 sc around the second leg (48)
Work 48 sc around (48)
Repeat (6 sc, 1 dec) 6 times (42)
Work 42 sc around (42)
Repeat (5 sc, 1 dec) 6 times (36)
Work 36 sc around (36)
Repeat (4 sc, 1 dec) 6 times (30)
Work 30 sc around (30)
Repeat (3 sc, 1 dec) 6 times (24)
Work 24 sc around (24)
Repeat (2 sc, 1 dec) 6 times (18)
Work 18 sc around (18)
Repeat (1 sc, 1 dec) 6 times (12), then sl st to finish. Cut yarn and tie off.
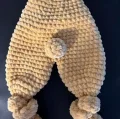
Tie decorative knots on the thin section of the legs as shown in the photos.
Work 6 sc inside a MR (6)
Repeat (1 sc, 1 inc) 3 times (9)
Repeat (2 sc, 1 inc) 3 times (12)
Work 12 sc around (12)
Work 10 sc, then 1 dec (11)
Work 9 sc, then 1 dec (10)
Work 10 sc around (10)
Press the open edges flat and work 5 sc across both sides to close. Cut yarn, leaving a tail.
Work 6 sc inside a MR (6)
Repeat (1 sc, 1 inc) 3 times (9)
Repeat (2 sc, 1 inc) 3 times (12)
Work 12 sc around (12)
Work 1 dec, then 10 sc (11)
Work 1 dec, then 9 sc (10)
Work 10 sc around (10)
Press the open edges flat and work 5 sc across both sides to close. Cut yarn, leaving a tail.
Using the muzzle color, work 6 sc inside a MR (6)
Work 6 inc around (12)
Repeat (1 sc, 1 inc) 6 times (18)
Repeat (2 sc, 1 inc) 6 times (24)
Repeat (3 sc, 1 inc) 6 times (30)
Repeat (4 sc, 1 inc) 6 times (36)
Work 36 sc around (36)
Switch to the main body color yarn.
Work 36 sc around (36)
If you are using plastic safety eyes, insert them between Rounds 10 and 11, leaving 8 stitches of space between them.
Repeat (4 sc, 1 dec) 6 times (30)
Repeat (3 sc, 1 dec) 6 times (24)
Stuff the head firmly with stuffing.
Repeat (2 sc, 1 dec) 6 times (18)
Repeat (1 sc, 1 dec) 6 times (12)
Add extra stuffing to ensure the head is solid and well-shaped.
Work 6 dec (6)
Cut yarn, pull the opening closed tightly, and weave in the tail end inside the head.
Work 6 sc inside a MR (6)
Repeat (1 sc, 1 inc) 3 times (9)
Repeat (2 sc, 1 inc) 3 times (12)
Repeat (3 sc, 1 inc) 3 times (15)
Repeat (4 sc, 1 inc) 3 times (18)
Repeat (5 sc, 1 inc) 3 times (21)
Repeat (6 sc, 1 inc) 3 times (24)
Work 24 sc around (24)
Repeat (6 sc, 1 dec) 3 times (21)
Work 21 sc around (21)
Repeat (5 sc, 1 dec) 3 times (18)
Work 18 sc around (18)
Repeat (4 sc, 1 dec) 3 times (15)
Work 15 sc around (15)
Repeat (3 sc, 1 dec) 3 times (12)
Work 12 sc around (12)
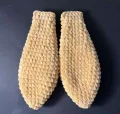
Fold the opening flat and work 6 sc through both thicknesses to close. Cut yarn, leaving a tail.
Work 6 sc inside a MR (6)
Work 6 inc around (12)
Work 12 sc around (12)
Repeat (2 sc, 1 dec) 3 times (9)
Cut yarn and leave a tail for sewing.
I hope you have the absolute best time crafting this sweet little bunny snuggler! There is nothing quite like the feeling of finishing a handmade toy, especially one this soft and cuddly. Whether it is destined for a special little one in your life or as a beautiful display piece, it is sure to bring endless smiles. Happy crocheting, my lovely friends! 🧶✨🐰
Absolutely! Any super bulky weight yarn works wonderfully, but keep in mind that blanket yarn might make your bunny slightly larger and require a larger hook size like 5.0 mm or 6.0 mm.
Try to maintain a gentle tension and avoid pulling too hard on the yarn. You can also singe the very tip of your yarn tail with a lighter to stop it from shedding while you work.
It is not mandatory, but it really gives the bunny its sweet, expressive face by pulling the eyes back slightly and defining the cheeks. It only takes a few minutes and makes a huge difference!
Lay both legs flat with the feet pointing forward. Use stitch markers to mark the exact joining points on both legs before you begin crocheting the assembling round to ensure they do not twist.
