About This Adorable Stitch Amigurumi Pattern
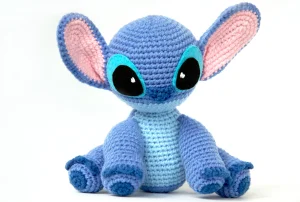
You'll love how the felt eyes and tiny crocheted claws give him that extra bit of character that makes him look like he jumped right off the screen.
Ideal for those with basic crocheting experience, featuring slightly more advanced stitches and techniques to expand your skills.
Takes 5-7 hours, making it an enjoyable project to finish over a couple of days.
Playful characters full of personality, designed to spark imagination and become cherished playtime favorites.
You'll love how the felt eyes and tiny crocheted claws give him that extra bit of character that makes him look like he jumped right off the screen.
I honestly couldn't get enough of how the color-blocked belly worked up! It’s a great way to practice neat color changes while creating something that feels really high-quality and professional.
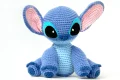
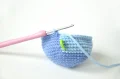
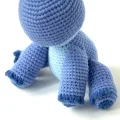

I still remember the first time I tried to crochet a character with specific color patches. I was so nervous about the transitions looking messy! But honestly, that is the beauty of making a character like Stitch. Those little shifts between medium and light blue are what make him instantly recognizable. When I was working on this pattern, I found that carrying the yarn loosely on the inside made a world of difference for the belly section. It keeps the fabric flexible but sturdy enough to hold all that stuffing.
If you are feeling adventurous, you could even try using a slightly fuzzy yarn for the inner pink part of the ears to give him a softer look. I always tell my friends that amigurumi is as much about the assembly as it is about the stitching. Taking that extra time to pin the eyes and nose exactly where you want them is what really brings his mischievous experiment vibe to life. I hope you enjoy every single round of this project as much as I did. Seeing him sit on my shelf always makes me smile, and I bet he will do the same for you!
Bring the galaxy's most mischievous yet lovable experiment to life with your crochet hook! This project is such a joy because you get to see his iconic personality emerge with every stitch. Whether you're a long-time fan of the movie or just love unique creatures, making this little guy will definitely brighten up your crafting corner and give you a real sense of accomplishment.
Using medium blue yarn, work 6 sc into a MR (6)
Work 2 sc in every stitch around (12)
(1 sc, 1 inc) repeat 6 times (18)
(2 sc, 1 inc) repeat 6 times (24)
(3 sc, 1 inc) repeat 6 times (30)
(4 sc, 1 inc) repeat 6 times (36)
(5 sc, 1 inc) repeat 6 times (42)
(6 sc, 1 inc) repeat 6 times (48)
(7 sc, 1 inc) repeat 6 times (54)
Work 1 sc in every stitch around (54)
Switch yarn to light blue.
(7 sc, 1 inv dec) repeat 6 times (48)
(6 sc, 1 inv dec) repeat 6 times (42)
(5 sc, 1 inv dec) repeat 6 times (36)
(4 sc, 1 inv dec) repeat 6 times (30)
Stuff the head firmly now, adding a bit more at the very end to ensure it holds its shape.
(3 sc, 1 inv dec) repeat 6 times (24)
(2 sc, 1 inv dec) repeat 6 times (18)
Fasten off, leaving a long tail for sewing the head to the body later.
You will need to make 2 pieces in medium blue and 2 pieces in pink. Start with the pink inner ears first. Work in rounds without turning.
ch 15. Starting in the second ch from the hook:
13 sc, 5 sc in the final ch. Continue on the other side of the foundation chain with 13 sc (31)
ch 1 (does not count as a stitch), 12 sc, 5 inc, 13 sc. Skip the starting ch or finish with 1 sl st (35)
ch 1, 12 sc, (1 sc, 1 inc) repeat 5 times, 13 sc (40)
ch 1, work 1 sc in each of the 40 stitches (40)
For the pink pieces, fasten off and weave in ends. For the blue pieces, do not cut the yarn. Place one pink and one blue piece together with right sides facing out and sc them together around the edge. Leave a long tail on the blue ears for assembly.
Using medium blue, work 6 sc into a MR (6)
Work 2 sc in every stitch around (12)
(1 sc, 1 inc) repeat 6 times (18)
(2 sc, 1 inc) repeat 6 times (24)
(3 sc, 1 inc) repeat 6 times (30)
(4 sc, 1 inc) repeat 6 times (36)
(5 sc, 1 inc) repeat 6 times (42)
(6 sc, 1 inc) repeat 6 times (48)
46 sc in medium blue, start the 47th sc with medium blue and finish with light blue, then 1 sc in light blue (48)
After every color switch, it is helpful to knot the yarn ends together on the inside to keep them secure.
15 sc in light blue (finish the 15th with medium blue), 30 sc in medium blue (finish the 30th with light blue), 3 sc in light blue (48)
In light blue: (3 sc, 1 inv dec), 6 sc, 1 inv dec, 2 sc, switch to medium blue. In medium blue: 3 sc, 1 inv dec, (6 sc, 1 inv dec) repeat 3 times, 1 sc, switch to light blue, 1 sc (42)
14 sc in light blue (finish 15th with medium blue), sc in every stitch until the end of the round, finishing the last stitch in light blue (42)
In light blue: (5 sc, 1 inv dec) repeat 2 times, switch to medium blue. In medium blue: 4 sc, 1 inv dec, (5 sc, 1 inv dec) repeat 2 times, 5 sc, switch to light blue (36)
12 sc in light blue, switch to medium blue, 22 sc in medium blue, switch to light blue (36)
13 sc in light blue, switch to medium blue, 21 sc in medium blue, switch to light blue (36)
In light blue: (4 sc, 1 inv dec) repeat 2 times, 1 sc, switch to medium blue. In medium blue: 2 sc, 1 inv dec, (4 sc, 1 inv dec) repeat 2 times, 4 sc, 2 inv dec, switch to light blue (30)
Work 1 sc in each stitch around, maintaining the color changes as established (30)
In light blue: (3 sc, 1 inv dec) repeat 2 times, 1 sc, switch to medium blue. In medium blue: 1 sc, 1 inv dec, (3 sc, 1 inv dec) repeat 2 times, 3 sc, work across 2 stitches to switch back to light blue (24)
Work 1 sc in each stitch around, maintaining the color changes (24)
(2 sc, 1 inv dec) repeat 2 times, 1 sc, switch to medium blue, 1 inv dec, (2 sc, 1 inv dec) repeat 3 times (18)
Fasten off and hide the yarn tail. Stuff the body firmly.
Using dark blue, work 6 sc into a MR (6)
Work 2 sc in every stitch around (12)
Switch to medium blue.
(1 sc, 1 inc) repeat 6 times (18)
(2 sc, 1 inc) repeat 6 times (24)
Work 1 sc in every stitch around (24)
(2 sc, 1 inv dec) repeat 6 times (18)
Work 1 sc in every stitch around (18)
(2 sc, 1 inc) repeat 6 times (24)
Work 1 sc in every stitch around (24)
(2 sc, 1 inv dec) repeat 6 times (18)
Work 1 sc in every stitch around (18)
Stuff the leg, then flatten the opening and sc through both layers to close it. Leave a long tail for sewing.
Attach yarn between Rounds 4 and 5 at the 5th stitch. ch 1, in the next stitch: (1 dc, ch 1), in the next stitch: 1 sc.
In the next stitch: 1 sl st and ch 2, in the next stitch: (1 dc, ch 1), in the next stitch: 1 sc.
In the next stitch: 1 sl st and ch 2, 1 dc, ch 1, 1 sl st.
Using dark blue, work 6 sc into a MR (6)
Work 2 sc in every stitch around (12)
Switch to medium blue.
(1 sc, 1 inc) repeat 6 times (18)
(2 sc, 1 inc) repeat 6 times (24)
Work 1 sc in every stitch around (24)
(2 sc, 1 inv dec) repeat 6 times (18)
Work 1 sc in every stitch around (18)
(2 sc, 1 inc) repeat 6 times (24)
Work 1 sc in every stitch around (24)
(2 sc, 1 inv dec) repeat 6 times (18)
Work 1 sc in every stitch around (18)
(1 sc, 1 inv dec) repeat 6 times (12)
Work 1 sc in every stitch around (12)
Stuff the arm and sc through both layers of the edge to close. Add the claws following the same method as the legs, but ensure they align with the flattened edge.
Using medium blue, work 6 sc into a MR (6)
Work 2 sc in every stitch around (12)
Work 1 sc in every stitch around (12)
(1 sc, 1 inc) repeat 6 times (18)
(1 sc, 1 inv dec) repeat 6 times (12)
Fasten off and leave a tail for sewing.
Using dark blue yarn, ch 5 and add 1 turning ch. In the first ch: 1 sl st. In the second ch: 1 hdc. In the third ch: 2 dc. In the fourth ch: 1 hdc. ch 1 and finish with 1 sl st in the final ch.
I am so excited for you to finish your very own Stitch! There is nothing quite like the feeling of sewing on that last little claw and realizing you have created a tiny piece of movie magic. I hope this pattern brings a bit of cosmic joy to your crochet hook and that your new alien friend finds a special place in your home. Happy crafting, and don't forget to give him a big squeeze once he's all finished! 🧶✨
You certainly can, but it will change the size of your Stitch. If you use worsted weight instead of DK, he will turn out about 20-30% larger. Just remember to adjust your hook size so the stuffing doesn't peek through!
The trick is using very sharp scissors and a tiny bit of fabric glue or sewing thread in a matching color. I recommend cutting the light blue felt slightly larger than the black part to create that iconic 'alien eye' look.
Yes! You can crochet flat ovals in light blue and black, but keep in mind they will be bulkier. Felt gives that clean, animated look that really suits this character.
Always carry the non-working yarn loosely inside the body. When you switch colors, make sure the last loop of the previous stitch is done with the new color. This creates a perfectly straight vertical line.
