About This Giant Forester Wizard Amigurumi Pattern
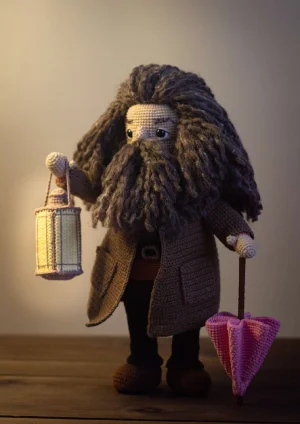
This gentle giant is a masterpiece for any collection. He’s the perfect gift for fans of high-fantasy and makes a stunning centerpiece on a bookshelf or in a themed nursery.
Designed for experienced crocheters, these patterns involve intricate designs and complex techniques to challenge and inspire.
A 10-12 hour project—great for savoring the process over several sessions.
Playful characters full of personality, designed to spark imagination and become cherished playtime favorites.
This gentle giant is a masterpiece for any collection. He’s the perfect gift for fans of high-fantasy and makes a stunning centerpiece on a bookshelf or in a themed nursery.
I absolutely loved the process of creating the hair — dividing the yarn strands gives him such a unique, frizzy texture that really brings his personality to life. Plus, making the tiny accessories like the pink umbrella is just pure joy. It's one of those projects where you're constantly surprised by how much character a few stitches can create.
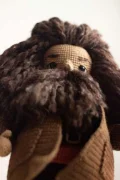
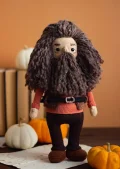
I’ve always felt that some characters just belong in yarn, and this giant is definitely one of them. There’s something about his rugged coat and that wild, tangled beard that just begs for the texture only crochet can provide. When I first started working on him, I was a bit intimidated by the hair—it’s a lot of work! But once you see those curls starting to frame his face, it completely changes his personality.
One thing I really want to emphasize is the wire frame. Don’t be tempted to skip it! It’s what gives him that sturdy, lifelike presence and allows him to hold his accessories. I spent quite a while getting the lantern just right so it would look like it was actually casting a glow. If you want to get creative, try using a slightly fuzzy yarn for the coat to give it that well-worn, rustic feel. This pattern is definitely a journey, but every single stitch is worth it when you see him standing on your shelf, ready for an adventure in the woods. He’s become a permanent resident in my craft room, and I hope you love making him as much as I did.
Meet our gentle giant! This project is a labor of love, capturing all the rugged charm of everyone's favorite woodsman. You'll get to play with different textures, from the smooth stitches of his coat to the wild, tousled look of his iconic hair. It's a substantial piece that feels so rewarding as he starts to come together, lantern in hand. You'll love the challenge of the wire frame and the joy of creating his tiny, iconic accessories.
Start with 6 sc into a MR (6)
Work 6 sc (6)
Work 6 sc (6)
Fasten off and cut the yarn. Make two of these.
Using skin color, work 6 sc into a MR (6)
Work 6 inc around (12)
(1 sc, inc) repeat 6 times (18)
Work 18 sc (18)
Work 18 sc (18)
Work 18 sc (18)
Work 18 sc (18)
Work 18 sc (18)
Join the thumb by working 3 sc through both the thumb and main piece, then sc 15 around the main piece (18)
Work 3 sc along the remaining thumb stitches, then sc 15 around the main piece (18)
(4 sc, dec) repeat 3 times (15)
Stuff the hand lightly and insert your prepared 22 cm wire frame. Continue stuffing as you work.
Work 15 sc (15)
Work 15 sc (15)
Switch to terracotta yarn and fasten off the skin tone.
(4 sc, inc) repeat 3 times (18)
Work 18 sc into the BLO (18)
Work 18 sc for 26 rounds (18)
Flatten the arm and work extra sc as needed to align the thumb to the side. Fasten off. Repeat for the second arm.
Return to the FLO of Round 14 on the arm. Hold the hand facing down and attach terracotta yarn.
Work 18 sc for 5 rounds (18)
Work extra sc to finish above the thumb, then fold the cuff down and weave in tails.
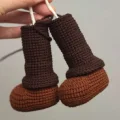
Begin with tobacco brown yarn. ch 13 and start in the second ch from the hook.
inc, 10 sc, 4 sc in one stitch, 10 sc, inc in the first stitch (28)
2 inc, 10 sc, 4 inc, 10 sc, 2 inc (36)
(1 sc, inc) twice, 10 sc, (inc, 1 sc) twice, (1 sc, inc) twice, 10 sc, (inc, 1 sc) twice (44)
(2 sc, inc) twice, 10 sc, (inc, 2 sc) twice, (2 sc, inc) twice, 10 sc, (inc, 2 sc) twice (52)
Trace the sole onto cardboard and cut two insoles to fit later.
Work 52 sc into the BLO for 2 rounds (52)
13 sc, 26 hdc, 13 sc (52)
Ensure your marker is centered at the heel. Insert the cardboard insole now.
13 sc, (dc dec, 2 hdc) 6 times, dc dec, 13 sc (45)
13 sc, (1 hdc, dc dec) 6 times, 1 hdc, 13 sc (39)
13 sc, 7 dc dec, 12 sc (32)
(2 sc, dec) repeat 8 times (24)
Switch to dark brown yarn for the trousers. Fasten off tobacco brown.
Work 24 sc into the BLO (24)
Prepare the leg wire (36 cm), wrap 15 cm with tape, and insert into the foot. Stuff firmly.
Work 24 sc for 4 rounds (24)
(5 sc, inc) repeat 4 times (28)
Work 28 sc for 2 rounds (28)
Fasten off. Now we create the trouser leg overlay.
Attach dark brown yarn to the FLO of Round 13 on the leg, centered at the back.
(2 sc, inc) repeat 8 times (32)
Work 32 sc for 2 rounds (32)
sl st into the next stitch, ch 1, turn. Work 32 sc into the FLO, sl st into the ch, ch 1, turn (32)
Work 32 sc into the BLO (32)
(15 sc, inc) repeat twice (34)
Work 34 sc (34)
(15 sc, dec) repeat twice (32)
(dec, 6 sc) repeat 4 times (28)
Work 28 sc for 4 rounds (28)
Join the trouser piece to the leg by working 28 sc through both layers (28)
Work 28 sc for 13 rounds (28)
Work extra sc to finish on the inner side of the leg. Repeat everything for the second leg, but do not cut the yarn on the second one.
ch 7 from the second leg, join to the first leg with sc. Work 14 sc, place marker. sc 14, 7 sc along the ch, 28 sc, 7 sc along the ch, 14 sc (70)
14 sc, inc, 5 sc, inc, 28 sc, inc, 5 sc, inc, 14 sc (74)
5 sc, inc, 8 sc, inc, 7 sc, inc, 8 sc, inc, 10 sc, inc, 8 sc, inc, 7 sc, inc, 8 sc, inc, 5 sc (82)
Work 82 sc for 5 rounds (82)
15 sc, inc, 9 sc, inc, 56 sc (84)
Work 84 sc for 12 rounds (84)
Switch to terracotta yarn on the last stitch of Round 21.
Work 84 sc for 2 rounds (84)
Work 84 sc into the BLO (84)
Work 84 sc for 4 rounds (84)
7 sc, dec, (11 sc, dec) twice, 49 sc (81)
Work 81 sc for 5 rounds (81)
(8 sc, dec) 3 times, 51 sc (78)
Work 78 sc for 11 rounds (78)
Join arms: 7 sc through body and first arm, 34 sc across front, 7 sc through body and second arm, 30 sc across back (78)
11 sc along outer arm, 34 sc across front, 11 sc along other outer arm, 30 sc across back (86)
Work 86 sc for 2 rounds (86)
(10 sc, dec, 9 sc, dec) twice, 10 sc, dec, 7 sc, dec, 8 sc, dec, 7 sc, dec (78)
(4 sc, dec) repeat 13 times (65)
Work 65 sc (65)
4 sc, dec, 21 sc, dec, 8 sc, dec, (9 sc, dec) twice, 4 sc (60)
(2 sc, dec, 2 sc) repeat 10 times (50)
Work 50 sc (50)
(3 sc, dec) repeat 10 times (40)
Work 40 sc (40)
(2 sc, dec) repeat 10 times (30)
Work 30 sc (30)
(1 sc, dec) repeat 10 times (20)
Switch to skin color on the last stitch of Round 61.
Work 20 sc into the BLO (20)
(dec, 8 sc) repeat twice (18)
Work 18 sc for 3 rounds (18)
Fasten off, leaving a long tail for attaching the head.
Attach terracotta yarn to the FLO of Round 23 on the body at the back center.
Work 84 sc (84)
20 sc, inc, 41 sc, inc, 21 sc (86)
Work 86 sc for 6 rounds (86)
sl st into the next stitch, fasten off and hide tails.
Using skin tone, 6 sc into a MR (6)
Work 6 inc (12)
(1 sc, inc) repeat 6 times (18)
(2 sc, inc) repeat 6 times (24)
(3 sc, inc) repeat 6 times (30)
(2 sc, inc, 2 sc) repeat 6 times (36)
(5 sc, inc) repeat 6 times (42)
(3 sc, inc, 3 sc) repeat 6 times (48)
(7 sc, inc) repeat 6 times (54)
(4 sc, inc, 4 sc) repeat 6 times (60)
(9 sc, inc) repeat 6 times (66)
(5 sc, inc, 5 sc) repeat 6 times (72)
Work 72 sc for 16 rounds (72)
Place 10 mm safety eyes between Rounds 20 and 21, spaced 14 stitches apart.
(5 sc, dec, 5 sc) repeat 6 times (66)
(9 sc, dec) repeat 6 times (60)
(4 sc, dec, 4 sc) repeat 6 times (54)
(7 sc, dec) repeat 6 times (48)
(3 sc, dec, 3 sc) repeat 6 times (42)
(5 sc, dec) repeat 6 times (36)
(2 sc, dec, 2 sc) repeat 6 times (30)
(3 sc, dec) repeat 6 times (24)
(2 sc, dec) repeat 6 times (18)
Fasten off and stuff the head firmly.
Using skin tone, 6 sc into a MR (6)
3 inc, 3 sc (9)
inc, 1 sc, 2 hdc inc, 1 sc, inc, 3 sc (13)
Fasten off, leave a tail for sewing. Sew between the eyes.
In a MR: ch 3, 2 dc, 2 hdc, 2 sc. Pull ring closed and fasten off.
In a MR: 2 sc, 2 hdc, 2 dc, ch 3, sl st into ring. Pull closed and fasten off.
Using chocolate yarn, ch 29. Starting in 2nd ch: 2 inc, (2 sc, inc) 7 times, 3 sc, 2 inc, ch 1, turn (39)
inc, 11 sc, inc, 13 sc, inc, 11 sc, inc, ch 1, turn (43)
(inc, 5 sc) 7 times, inc, ch 1, turn (51)
(inc, 6 sc) 3 times, inc, 7 sc, inc, (6 sc, inc) 3 times, ch 1, turn (59)
(inc, 7 sc) 3 times, inc, 9 sc, inc, (7 sc, inc) 3 times, ch 1, turn (67)
(inc, 8 sc) 2 times, (inc, 9 sc) 3 times, (inc, 8 sc) 2 times, inc, ch 1, turn (75)
inc, 73 sc, inc, ch 1, turn (77)
Now divide for the foreparts and back. Fasten off.
Attach yarn to Row 7. Row 1-2: 12 sc, ch 1, turn. Row 3: 11 sc, inc. Row 4: inc, 12 sc. Row 5: 13 sc, inc. Row 6: inc, 14 sc. Row 7-24: 16 sc. (16)
Skip 12 stitches from Forepart 1. Row 1-2: 29 sc. Row 3: inc, 27 sc, inc. Row 4: inc, 29 sc, inc. Row 5: inc, 31 sc, inc. Row 6: inc, 33 sc, inc. Row 7-14: 37 sc. Row 15: inc, 35 sc, inc. Row 16-24: 39 sc. (39)
Skip 12 stitches from Back Side. Row 1-2: 12 sc. Row 3: inc, 11 sc. Row 4: 12 sc, inc. Row 5: inc, 13 sc. Row 6: 14 sc, inc. Row 7-24: 16 sc. (16)
Using copper brown, ch 29. Starting in 2nd ch: inc, 1 sc, (2 sc, inc) 7 times, 4 sc, inc, ch 1, turn (37)
(inc, 4 sc) 3 times, inc, 5 sc, (inc, 4 sc) 3 times, inc, ch 1, turn (45)
(inc, 5 sc) 3 times, inc, 7 sc, (inc, 5 sc) 3 times, inc, ch 1, turn (53)
(inc, 6 sc) 3 times, inc, 9 sc, (inc, 6 sc) 3 times, inc, ch 1, turn (61)
(inc, 7 sc) 3 times, inc, 11 sc, (inc, 7 sc) 3 times, inc, ch 1, turn (69)
inc, 67 sc, inc, ch 1, turn (71)
(inc, 8 sc) 3 times, inc, 15 sc, (inc, 8 sc) 3 times, inc, ch 1, turn (79)
Work 79 sc for 2 rows (79)
inc, 77 sc, inc, ch 1, turn (81)
14 sc, inc, 10 sc, inc, 29 sc, inc, 10 sc, inc, 14 sc, ch 1, turn (85)
inc, 83 sc, inc, ch 1, turn (87)
16 sc, inc, 10 sc, inc, 31 sc, inc, 10 sc, inc, 16 sc, ch 1, turn (91)
inc, 89 sc, inc, ch 1, turn (93)
Create armholes: 16 sc, ch 10, skip 14, 33 sc, ch 10, skip 14, 16 sc, ch 1, turn (85)
inc, 15 sc, 10 sc along ch, 33 sc, 10 sc along ch, 15 sc, inc, ch 1, turn (87)
Follow the increasing pattern every few rows until you reach 115 stitches at Row 55. Finish with a sc border around the edges.
Using cocoa yarn, ch 21. Starting in 2nd ch: 20 sc, ch 1, turn (20)
Switch to light yellow. Work 20 sc into the FLO, ch 1, turn (20)
Work 20 sc for 7 rows (20)
Repeat the yellow panels separated by cocoa sc rows until all 4 windows are complete.
Using pink yarn, 6 sc in MR (6)
6 inc (12)
12 sc (12)
(inc, 1 sc) 6 times (18)
Continue increasing by 12 stitches every even round until Round 27 (138). Finish with sl st.
I'm so proud of you for tackling this massive project! Seeing him stand there with his little pink umbrella and glowing lantern is honestly one of the best feelings in the world. Take a moment to admire your hard work—from the needle sculpting on his face to the layered textures of his clothes. He’s not just a toy; he’s a character full of heart. I hope he brings a bit of magic and comfort to your home for a long time to come. Happy crocheting! 🧶✨
You can, but he won't be able to stand on his own or hold his accessories. The wire gives him the structural integrity needed to support the heavy hair and clothing.
I recommend dividing the thick melange yarn into individual strands. It takes time, but it creates that perfect frizzy, tousled look that defines the character.
You likely used a 'V-shape' stitch (yarn over). This pattern is designed with 'semi-X' stitches (yarn under then yarn over), which creates a denser, smaller fabric.
Use a very bright, pale yellow yarn for the window panels and ensure you embroider the cocoa-colored frame lines neatly to create the window effect.
