🧢 Beautiful ✨ Detailed πŸ’ Adorable

Giant Fox Plush Pillow Amigurumi Pattern

Giant Fox Plush Pillow Amigurumi Pattern
4.4β˜…Rating
5-8 HoursTime Needed
3.8KMade This
βœ‚οΈ

Intermediate Level

Ideal for those with basic crocheting experience, featuring slightly more advanced stitches and techniques to expand your skills.

⏱️

Weekend Treat

Takes 5-7 hours, making it an enjoyable project to finish over a couple of days.

🏑

Cozy Accent

A warm touch for your space that transforms ordinary corners into inviting nooks filled with handmade charm.

About This Giant Fox Plush Pillow Amigurumi Pattern

Giant Fox Plush Pillow Amigurumi Pattern crochet pattern - detailed view

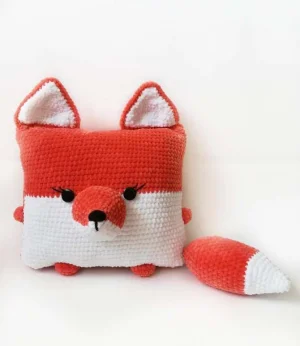
This fox makes an incredible gift for kids who love forest animals. It's big enough to be a real pillow but cute enough to be a favorite toy, and it looks amazing sitting on a bed or armchair.

Why You'll Love This Giant Fox Plush Pillow Amigurumi Pattern

I absolutely love how the plush yarn feels in my hands as I workβ€”it’s like crocheting a cloud! The best part is how the simple rectangular shape of the body transforms into a recognizable character just by adding the facial details.

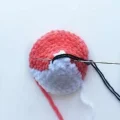
Giant Fox Plush Pillow Amigurumi Pattern step 1 Giant Fox Plush Pillow Amigurumi Pattern step 2 Giant Fox Plush Pillow Amigurumi Pattern step 3 Giant Fox Plush Pillow Amigurumi Pattern step 4

Switch Things Up

There is something so incredibly satisfying about working with super bulky plush yarn. It grows so fast! I remember making my first large-scale pillow like this; I was worried it would take weeks, but because of the yarn weight, I had a finished friend in just a couple of evenings. This fox is such a charmer. The way the white and orange sections come together to form that classic foxy face always makes me smile when I reach the halfway point.

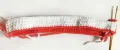
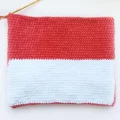
When you are working on the body, keep an eye on your tension where the colors switch. If you pull too tight, the pillow might start to lean or look a bit pinched along the seam. I usually carry my yarn along the back for these short stretches, but you can also use separate bobbins if that feels more comfortable for you.

One of my favorite things about this design is how versatile it is. While I used classic orange and white, I have seen some makers do a 'silver fox' version using greys and creams, and it looks absolutely stunning in a modern living room. Don't be afraid to play with the eye placement tooβ€”moving them just a stitch or two can completely change his expression from curious to sleepy! It is the perfect project for when you want something substantial to show for your weekend crafting time.

Common Mistakes & How to Fix Them

βœ— When stuffing the main pillow body, it is easy to neglect the corners; make sure to push plenty of fiberfill into the very edges so your fox doesn't end up with rounded, saggy corners.βœ— The color changes on the body need a consistent tensionβ€”if you pull the new color too tight, the fabric will pucker along the vertical line where the white and orange meet.βœ— When sewing the nose between rounds 12 and 21, it can easily shift off-center; I always recommend pinning it in place and checking it from a distance before you start stitching.βœ— If you are using chenille yarn, the magic ring can be tricky to pull closed; try to work your initial stitches loosely so the yarn doesn't snap when you pull the tail tight.

Giant Fox Plush Pillow Amigurumi Pattern

If you've been looking for a project that combines home decor with cuddly amigurumi, you've found it! This fox pillow is a massive hit in my house because it's just so squishy. We're using plush chenille yarn to make him extra soft, making him the perfect companion for movie nights or as a decorative piece in a woodland-themed nursery. You'll love seeing his little face come to life as you work through the rounds.

Intermediate 5-8 Hours

Materials Needed for Giant Fox Plush Pillow Amigurumi Pattern

β€” Main Fabric

  • 01
    Two skeins (approx. 200g) of orange plush chenille yarn like YarnArt Dolce
  • 02
    One skein (approx. 100g) of white plush chenille yarn
  • 03
    Small amount of yellow or orange plush yarn for the limbs
  • 04
    Scrap amount of black cotton or acrylic yarn for the nose and eyelash details

β€” Tools Required

  • 01
    3.5mm crochet hook (or size needed to achieve a tight fabric)
  • 02
    One pair of 18-22mm black safety eyes or buttons
  • 03
    High-quality polyester fiberfill stuffing
  • 04
    Large-eyed yarn needle for assembly
  • 05
    Stitch markers to track the start of your rounds

Progress Tracker

0% Complete

β€” 1. Main Pillow Body :

Round 1 :

Using orange plush yarn, ch 93 and join to the first ch with a sl st to form a large ring (93)

Round 2 :

Switch to white yarn for 45 sc, then switch back to orange for 48 sc (93)

Round 3-19 :

Repeat the previous round: 45 sc in white and 48 sc in orange (93)

Round 20-38 :

Work all sts using only orange yarn: 93 sc per round (93)

Info :

Fasten off leaving a long tail. Sew the bottom edge closed, stuff the pillow firmly (paying attention to the corners), and then sew the top edge shut.

β€” 2. The Nose :

Round 1 :

Using white yarn, work 6 sc into a MR (6)

Round 2 :

Switch to orange: 3 x inc. Switch to white: 3 x inc (12)

Round 3 :

In orange: 7 sc. In white: 5 sc (12)

Round 4 :

In orange: (3 sc, inc, 1 sc, inc, 1 sc). In white: 5 sc (14)

Round 5 :

In orange: (2 sc, inc, 2 sc, inc, 3 sc). In white: (inc, 2 sc, inc, 1 sc) (18)

Round 6 :

In orange: (2 sc, inc, 3 sc, inc, 3 sc, inc). In white: (3 sc, inc, 3 sc) (22)

Round 7 :

In orange: (3 sc, inc, 4 sc, inc, 5 sc). In white: (inc, 4 sc, inc, 2 sc) (26)

Round 8 :

In orange: (3 sc, inc, 2 sc, inc, 2 sc, inc, inc, 2 sc, inc, 2 sc). In white: (inc, 2 sc, inc, 2 sc, inc, 3 sc) (34)

Round 9 :

In orange: (inc, 20 sc). In white: 13 sc (35)

Round 10 :

In orange: 22 sc. In white: 13 sc (35)

Round 11 :

In orange: 22 sc. In white: 13 sc (35)

Info :

Fasten off leaving a long tail of both colors for sewing. Stuff the nose lightly before attaching.

β€” 3. Little Legs (Make 2) :

Round 1 :

Using yellow (or orange) yarn, work 6 sc into a MR (6)

Round 2 :

Work 1 inc into every st around (12)

Round 3 :

Repeat (1 sc, inc) 6 times (18)

Round 4 :

sc in each st around (18)

Info :

Fasten off and leave a tail for sewing.

β€” 4. Tiny Arms (Make 2) :

Round 1 :

Using yellow (or orange) yarn, work 6 sc into a MR (6)

Round 2 :

Work 1 inc into every st around (12)

Round 3 :

sc in each st around (12)

Info :

Fasten off and leave a tail for sewing.

β€” 5. The Tail :

Round 1 :

Using white yarn, work 6 sc into a MR (6)

Round 2 :

Repeat (2 sc, inc) 2 times (8)

Round 3 :

Repeat (3 sc, inc) 2 times (10)

Round 4 :

Repeat (2 sc, inc) 3 times, then 1 sc (13)

Round 5 :

Repeat (3 sc, inc) 3 times, then 1 sc (16)

Round 6 :

Repeat (4 sc, inc) 3 times, then 1 sc (19)

Round 7 :

Repeat (5 sc, inc) 3 times, then 1 sc (22)

Round 8 :

Repeat (4 sc, inc) 4 times, then 2 sc (26)

Round 9 :

Repeat (4 sc, inc) 5 times, then 1 sc (31)

Round 10-19 :

Switch to orange yarn and work 31 sc in each round (31)

Round 20 :

Repeat (4 sc, dec) 5 times, then 1 sc (26)

Round 21 :

sc in each st around (26)

Round 22 :

Repeat (3 sc, dec) 5 times, then 1 sc (21)

Round 23 :

sc in each st around (21)

Round 24 :

Repeat (2 sc, dec) 5 times, then 1 sc (16)

Round 25 :

sc in each st around (16)

Info :

Stuff the tail moderately and leave a tail for sewing.

β€” 6. Ears (Make 2 Orange & 2 White) :

Row 1 :

ch 15 (15)

Row 2 :

Starting in the 2nd ch from hook, work 14 sc, ch 1, turn (14)

Row 3-4 :

Work 14 sc, ch 1, turn (14)

Row 5 :

dec, 10 sc, dec, ch 1, turn (12)

Row 6 :

dec, 8 sc, dec, ch 1, turn (10)

Row 7 :

dec, 6 sc, dec, ch 1, turn (8)

Row 8 :

dec, 4 sc, dec, ch 1, turn (6)

Row 9 :

dec, 2 sc, dec, ch 1, turn (4)

Row 10 :

Work 2 dec across the row, ch 1, turn (2)

Row 11 :

dec, then fasten off (1)

β€” 7. Ear Finishing :

Info :

For the orange pieces only: attach orange yarn to the bottom corner and sc around the edges (12 sc up the side, 3 sc in the tip, 12 sc down the other side).

Info :

Place one white ear piece against one orange ear piece. Using orange yarn, sc through both layers to join them together. Repeat for the second ear.

Assembly Instructions

  • Pin the nose to the front of the pillow, positioning it between rounds 12 and 21. Ensure the color change on the nose aligns with the color change on the body before sewing.
  • Install the safety eyes or sew buttons onto the face, leaving a distance of approximately 11 stitches between them.
  • Using black yarn or embroidery thread, stitch delicate eyelashes coming off the outer corners of the eyes and embroider a small nose onto the white tip of the snout.
  • Attach the ears to the top corners of the orange section of the pillow, spacing them evenly.
  • Stuff the small arms and legs lightly, then sew them to the sides and bottom of the pillow to act as little decorative limbs.
  • Finally, sew the tail to the bottom right corner of the pillow so it peeks out from the side.

Important Notes

  • πŸ’‘When working the color changes on the body, carry the unused yarn loosely behind your work to prevent the fabric from bunching.
  • πŸ’‘If you prefer a more secure finish for a child's toy, consider embroidering the eyes with black yarn instead of using plastic safety eyes.
  • πŸ’‘Use a stitch marker religiously at the start of every round, as it is very difficult to see individual stitches in plush chenille yarn.
  • πŸ’‘To make the pillow extra durable, you can sew a fabric lining inside before stuffing, though the tight crochet fabric usually holds fiberfill well on its own.

I really hope you enjoy bringing this little fox to life as much as I did. There's something so rewarding about finishing a project this sizeβ€”it feels like a real accomplishment! Once he's all sewn together and those eyelashes are added, he truly takes on a personality of his own. Don't forget to give him a good squish once he's finished! I can't wait to see the different colors you choose for your foxy friends. Happy crocheting, and enjoy your new cozy companion! 🧢✨🦊

You ask,

we answer.

FAQs

Can I use a different yarn weight for this pillow?

Yes! You can use worsted weight yarn, but your fox will be significantly smaller. If you want to keep the large size, try using two strands of worsted weight yarn held together with a 5mm or 6mm hook.

How do I clean my finished fox pillow?

Since it's made with chenille yarn and fiberfill, I recommend spot cleaning with a damp cloth and mild soap. If it needs a deep clean, hand wash in cold water and air dry to keep the yarn fluffy.

My color change line is drifting to the side, how do I fix it?

Crochet stitches naturally slant slightly. To keep your vertical color line straight, you may need to add an extra stitch or skip one occasionally at the transition point to keep things aligned.

What size eyes should I use if I can't find 22mm ones?

Anything from 18mm to 24mm will look great. If you don't have safety eyes, you can crochet small black circles (6 sc in a MR) and sew them on instead!