🧢 Beautiful ✨ Detailed πŸ’ Adorable

Giant Plush Donut Pillow Amigurumi Pattern

Giant Plush Donut Pillow Amigurumi Pattern
4.2β˜…Rating
3-5 HoursTime Needed
3.7KMade This
βœ‚οΈ

Intermediate Level

Ideal for those with basic crocheting experience, featuring slightly more advanced stitches and techniques to expand your skills.

⏱️

Quick Craft

Fits nicely into a free afternoon β€” 2 to 5 hours of focused, enjoyable crocheting.

🏑

Cozy Accent

A warm touch for your space that transforms ordinary corners into inviting nooks filled with handmade charm.

About This Giant Plush Donut Pillow Amigurumi Pattern

Giant Plush Donut Pillow Amigurumi Pattern crochet pattern - detailed view

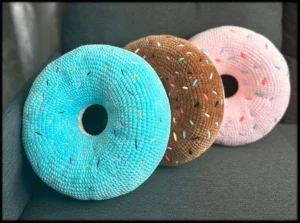
This pillow makes a fantastic gift for kids or a quirky housewarming present. It is also a great way to use up those colorful yarn scraps for the sprinkles while adding a handmade touch to your home.

Why You'll Love This Giant Plush Donut Pillow Amigurumi Pattern

I honestly love how fast this builds up despite its size. Using the chunky yarn means you get a massive result without spending weeks on it. Plus, choosing the frosting flavor by picking a new color is the best partβ€”I have made a strawberry pink one and a chocolate brown one already and they both look delicious!

Giant Plush Donut Pillow Amigurumi Pattern step 1 Giant Plush Donut Pillow Amigurumi Pattern step 2 Giant Plush Donut Pillow Amigurumi Pattern step 3 Giant Plush Donut Pillow Amigurumi Pattern step 4

Switch Things Up

I have always felt that every home needs at least one oversized, squishy donut pillow. There is just something about the combination of velvet-style yarn and the classic pastry shape that brings out the inner child in everyone who sees it! When I first sat down to write this out, I wanted to make sure the transition between the dough and the frosting was as clean as possible, which is why that back-loop round is so important. It creates a nice little ridge that really defines where the topping begins.

One of my favorite things to do is play around with the sprinkle colors. If you are making a chocolate donut, bright neons look incredible, but for a strawberry pink frosting, I usually stick to soft pastels or even little white sugar stitches. Don't be afraid to get creative with your embroideryβ€”some of my testers even added little crochet fruit slices on top! Just remember to stuff it much more than you think you need to. Chenille yarn has a lot of stretch, and you want your donut to hold its plump, round shape even after a few months of being used as a headrest. It is such a joy to make, and I hope you find the process as relaxing as I do!

Common Mistakes & How to Fix Them

βœ— If you do not stuff the donut firmly enough as you are seaming the inner ring, it can end up looking a bit lumpy or deflated once finished.βœ— When working Round 24 in the back loops, make sure you do not pull your stitches too tight or the frosting will not sit flat against the base.βœ— It is easy to lose track of the 12-repeat pattern during the large increase rounds; I highly recommend using a stitch marker for the first stitch of every round.βœ— If your inner ring seaming is too loose, the fiberfill might start poking through the gap, so keep your tension consistent while sewing.

Giant Plush Donut Pillow Amigurumi Pattern

I am so excited to share this squishy project with you! There is something so satisfying about working with chunky chenille yarn, and this donut is the ultimate cuddle companion. You will love watching the frosting layer come to life as you work through the increases. It is a great mindless make for a movie night, resulting in a piece of home decor that everyone will want to steal from your sofa!

Intermediate 3-5 Hours

Materials Needed for Giant Plush Donut Pillow Amigurumi Pattern

β€” Main Fabric

  • 01
    One skein of super bulky chenille yarn in a dough color like peach or light beige
  • 02
    One skein of super bulky chenille yarn in your choice of frosting color such as pink or chocolate brown
  • 03
    Scraps of various colored cotton or acrylic yarn for the embroidered sprinkles

β€” Tools Required

  • 01
    3.5mm crochet hook
  • 02
    Approximately 150 grams of high-quality polyester fiberfill
  • 03
    A long yarn needle for seaming and embroidery
  • 04
    Sharp scissors
  • 05
    Stitch markers to keep track of your rounds

Progress Tracker

0% Complete

β€” 1. The Doughy Base :

Round 1 :

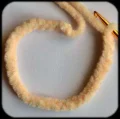
Start by creating 36 ch and joining them into a circle to begin the center of your pillow (36)

Round 2 :

Work 1 sc into every stitch around the ring (36)

Round 3 :

Repeat (2 sc, 1 inc) a total of 12 times (48)

Round 4 :

Work 1 sc into each stitch around (48)

Round 5 :

Repeat (3 sc, 1 inc) a total of 12 times (60)

Round 6 :

Repeat (4 sc, 1 inc) a total of 12 times (72)

Round 7 :

Work 1 sc into each stitch around (72)

Round 8 :

Repeat (5 sc, 1 inc) a total of 12 times (84)

Round 9 :

Repeat (6 sc, 1 inc) a total of 12 times (96)

Round 10 :

Work 1 sc into each stitch around (96)

Round 11 :

Repeat (7 sc, 1 inc) a total of 12 times (108)

Round 12 :

Work 1 sc into each stitch around (108)

Round 13 :

Repeat (8 sc, 1 inc) a total of 12 times (120)

Round 14 :

Work 1 sc into each stitch around (120)

Round 15 :

Repeat (9 sc, 1 inc) a total of 12 times (132)

Round 16 :

Work 1 sc into each stitch around (132)

Round 17 :

Repeat (10 sc, 1 inc) a total of 12 times (144)

Round 18 :

Work 1 sc into each stitch around (144)

Round 19 :

Repeat (11 sc, 1 inc) a total of 12 times (156)

Info :

Note: The original pattern source contains a typo for the next four rounds. To maintain the correct shape, you should continue with 156 stitches per round as indicated by the final count.

Round 20 :

Work 1 sc into every stitch around (156)

Round 21 :

Work 1 sc into every stitch around (156)

Round 22 :

Work 1 sc into every stitch around (156)

Round 23 :

Work 1 sc into every stitch around (156)

β€” 2. The Sweet Frosting :

Round 24 :

Perform a cc to your frosting yarn and work this round into the blo only (156)

Round 25 :

Work 1 sc into each stitch around (156)

Round 26 :

Work 1 sc into each stitch around (156)

Round 27 :

Work 1 sc into each stitch around (156)

Round 28 :

Work 1 sc into each stitch around (156)

Round 29 :

Work 1 sc into each stitch around (156)

Round 30 :

Work 1 sc into each stitch around (156)

Round 31 :

Repeat (11 sc, 1 dec) a total of 12 times (144)

Round 32 :

Work 1 sc into each stitch around (144)

Round 33 :

Repeat (10 sc, 1 dec) a total of 12 times (132)

Round 34 :

Work 1 sc into each stitch around (132)

Round 35 :

Repeat (9 sc, 1 dec) a total of 12 times (120)

Round 36 :

Work 1 sc into each stitch around (120)

Round 37 :

Repeat (8 sc, 1 dec) a total of 12 times (108)

Round 38 :

Work 1 sc into each stitch around (108)

Round 39 :

Repeat (7 sc, 1 dec) a total of 12 times (96)

Round 40 :

Work 1 sc into each stitch around (96)

Round 41 :

Repeat (6 sc, 1 dec) a total of 12 times (84)

Round 42 :

Repeat (5 sc, 1 dec) a total of 12 times (72)

Round 43 :

Work 1 sc into each stitch around (72)

Round 44 :

Repeat (4 sc, 1 dec) a total of 12 times (60)

Round 45 :

Repeat (3 sc, 1 dec) a total of 12 times (48)

Round 46 :

Work 1 sc into each stitch around (48)

Round 47 :

Repeat (2 sc, 1 dec) a total of 12 times (36)

Round 48 :

Work 1 sc into each stitch around (36)

Assembly Instructions

  • Finish your last stitch and pull a very long tail of yarn through the loop to secure it.
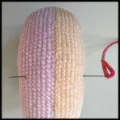
  • Fold your crochet tube in half so that the foundation chain and the final round line up perfectly.
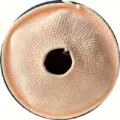
  • Using your long needle, start sewing the inner edges of the donut together to form the center hole.
  • After sewing a small section, begin stuffing the donut firmly with fiberfill before moving on.
  • Continue this process of sewing a bit and then stuffing until you have worked your way around the entire circle.
  • Once the donut is fully stuffed and the inner seam is closed, fasten off and weave in your ends.
  • Take your colorful scrap yarns and embroider small straight lines all over the frosting side to create sprinkles.

Important Notes

  • πŸ’‘Always use a stitch marker at the beginning of your rounds, as it is very easy to lose your place in this large project.
  • πŸ’‘If you find that your stitches are too loose and stuffing is showing through, try dropping down to a 3.0mm hook.
  • πŸ’‘Stuff the pillow much more firmly than you think you need to; chenille yarn stretches over time and firm stuffing keeps the shape.
  • πŸ’‘When embroidering the sprinkles, do not pull the yarn too tight or you will create puckers in the soft velvet fabric.
  • πŸ’‘You can customize the size of your donut by using a different weight of yarn, but remember this will change the amount of stuffing required.

I can't wait to see your finished donut pillows! Whether you go for a classic glazed look or something wild with rainbow sprinkles, I know it's going to look amazing on your couch or bed. Don't forget to give it a good squish once you're doneβ€”that's the most rewarding part of the whole process. These pillows are so addictive to make that you might find yourself with a whole bakery's worth before you know it! It has been such a pleasure sharing this design with you. Happy stitching, friends! 🧢🍩✨

You ask,

we answer.

FAQs

Can I use regular cotton yarn instead of chenille for this pillow?

You definitely can, but keep in mind that the finished pillow will be much smaller and less squishy. If you use DK weight cotton, your donut might turn out more like a coaster or a small toy rather than a bed pillow!

How do I make the sprinkles look realistic?

The key is randomness! Use 3 to 5 different colors of scrap yarn and sew them in different directions. Keep each sprinkle about 2cm long and space them out so the frosting color still shines through.

My donut looks more like a flat tire than a plump pastry. What happened?

This usually comes down to stuffing. Don't be afraid to really pack the fiberfill in as you seam the center. Chenille yarn is very forgiving and will expand to accommodate plenty of fluff!

Is it hard to sew the inner ring together?

It can be a bit fiddly at first because the yarn is thick. Just take your time and match up the 36 stitches from the start to the 36 stitches at the end. Using a very long needle makes it much easier to manage.