🧶 Beautiful ✨ Detailed 💝 Adorable

Golden Wildflower Crown Crochet Pattern

Golden Wildflower Crown Crochet Pattern
4.6★Rating
5-8 HoursTime Needed
1.2KMade This
✂️

Intermediate Level

Ideal for those with basic crocheting experience, featuring slightly more advanced stitches and techniques to expand your skills.

⏱️

Weekend Treat

Takes 5-7 hours, making it an enjoyable project to finish over a couple of days.

Stylish Touch

An elegant detail to elevate any look, combining traditional techniques with contemporary design sensibilities.

About This Golden Wildflower Crown Crochet Pattern

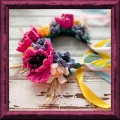
Golden Wildflower Crown Crochet Pattern crochet pattern - detailed view

This headband is the ultimate accessory for a summer wedding or a music festival. It looks high-end and designer but carries the heart of a handmade piece you'll cherish for years.

Why You'll Love This Golden Wildflower Crown Crochet Pattern

I'm obsessed with how we use everyday zip ties to create that stunning sunburst effect! It’s such a satisfying 'aha' moment when you paint them gold and see them transform from plastic utility items into a royal crown base.

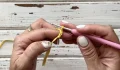
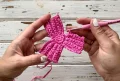
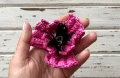
Golden Wildflower Crown Crochet Pattern step 1 Golden Wildflower Crown Crochet Pattern step 2 Golden Wildflower Crown Crochet Pattern step 3 Golden Wildflower Crown Crochet Pattern step 4

Switch Things Up

Working with raffia always feels like a little mini-vacation to me. There’s something about that organic, papery texture that just screams 'summer.' When I first sat down to design this headband, I wanted something that felt regal but still deeply connected to nature. The secret is definitely in the base—those zip ties might seem basic, but once they’re painted gold and trimmed into that starburst shape, they provide the most amazing structural support for our heavy blooms.

One thing I learned the hard way: don’t rush the painting step! If you spray the zip ties while they’re too close together, they’ll stick, and you’ll lose that beautiful individual 'ray' effect. I like to space them out just a bit more than the final placement while painting, then slide them into their permanent homes once they’re bone dry. Also, if you find the raffia a bit tough on your hands, try to maintain a relaxed grip. The material has a lot of 'memory,' so you don't need to pull as hard as you would with wool. I can’t wait to see the color palettes you choose—maybe a monochromatic white version for a bride? The possibilities are endless!

Common Mistakes & How to Fix Them

✗ If you tighten the zip ties unevenly on the headband, the 'rays' will lean at different angles — check the spacing and tension before you trim them.✗ Raffia can be prone to splitting if your hook is too sharp or your tension is too tight, so try to maintain a gentle, consistent flow with each stitch.✗ Applying the gold paint in one heavy coat often leads to drips or sticking; it's much better to do two light, even passes for a professional finish.✗ When gluing the flowers, it's easy to use too much hot glue which can seep through the raffia — apply small dots to the center and press firmly but carefully.

Golden Wildflower Crown Crochet Pattern

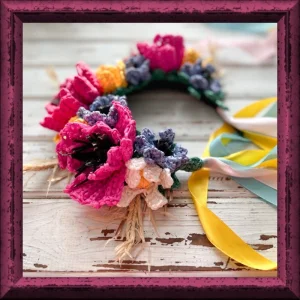
There is something truly magical about turning humble materials into a regal statement piece. This pattern guides you through creating a lush, sun-drenched floral crown using natural raffia and a clever hardware-store base. You'll love watching these vibrant blooms come to life as you build a crown that feels like it was plucked straight from a summer meadow.

Intermediate 5-8 Hours

Materials Needed for Golden Wildflower Crown Crochet Pattern

— Main Fabric

  • 01
    Approximately 66 yards of raffia yarn in vibrant pink or red for the poppy petals
  • 02
    About 22 yards each of raffia in white and blue for the camomiles and cornflowers
  • 03
    22 yards of green raffia for the textured leaves
  • 04
    11 yards of natural or straw-colored raffia for the spikelets
  • 05
    Small amount of yellow and black raffia for the flower centers

— Tools Required

  • 01
    3.0 mm crochet hook
  • 02
    Standard plastic headband (10mm width)
  • 03
    33 adjustable plastic zip ties (4-5 inches long)
  • 04
    Gold spray paint or metallic nail polish
  • 05
    Fine gold glitter and PVA glue for detailing
  • 06
    Hot glue gun and extra glue sticks
  • 07
    Sharp scissors and a craft iron for steaming
  • 08
    Optional: 5 red beads (10-15mm) and 1 meter of decorative ribbon

Progress Tracker

0% Complete

— 1. Camomile Base :

Round 1 :

Start with 2 ch, then work 6 sc into the 2nd ch from your hook.

Round 2 :

Work 1 inc into every stitch around, then join with a sl st (12).

Round 3 :

(ch 6, work 3 dc into the 3rd ch from your hook, 1 sc into the next ch, skip 1 stitch on the base circle, sl st into the next stitch) repeat this 6 times to create the petals.

Info :

Fasten off and pull the yarn tail to the back. Steam the petals flat with an iron before assembly.

— 2. Camomile Center :

Round 1 :

ch 2, then work 6 sc into the 2nd ch from your hook, finishing with a sl st.

Round 2 :

Work 1 inc into each of the 6 stitches (12).

Info :

Cut the yarn and pull the tail through. Use your fingers to press the center into a small ball shape before gluing it to the flower base.

— 3. Poppy Outer Corolla :

Round 1 :

ch 2, work 6 sc into the 2nd ch from the hook.

Round 2 :

Work 1 inc into every stitch around, then join with a sl st (12).

Round 3 :

(ch 8, work 7 sc BLO starting from the 2nd ch from the hook, sl st into the next base stitch, turn your work, 7 sc BLO back up the petal, ch 1, turn, 7 sc BLO back down, sl st into the same base stitch, turn) repeat this sequence to create 3 large petals.

— 4. Poppy Inner Corolla :

Round 1 :

ch 2, work 6 sc into the 2nd ch from the hook.

Round 2 :

(1 sc, 1 inc) repeat 3 times, then join with a sl st (9).

Round 3 :

(ch 6, work 5 sc BLO starting from the 2nd ch from the hook, sl st into the next base stitch, turn, 5 sc BLO up, ch 1, turn, 5 sc BLO down, sl st into the same base stitch, turn) repeat to create 3 smaller inner petals.

— 5. Cornflower :

Info :

Start by making a foundation ring by working 4 ch and joining with a sl st.

Round 1 :

(ch 3, work 3 dc into the center of the ring, turn your work, [ch 3, sl st] 4 times across the top of the dc stitches, turn, fold the petal in half and secure with a sl st, then sl st back into the center ring) repeat this 6 times.

— 6. The Leaf :

Info :

Start with a foundation chain of 15 ch.

Row 1 :

Work 3 sc starting from 2nd ch, ch 4, 3 sc from 2nd ch, 2 sc in foundation, ch 6, 3 dc from 3rd ch, 1 sc, 2 sc in foundation, ch 6, 3 dc from 3rd ch, 1 sc, 2 sc in foundation, ch 5, 2 dc from 3rd ch, 1 sc, 4 sc in foundation, 3 sc in the last stitch and turn to work the other side. 4 sc, ch 5, 2 dc from 3rd ch, 1 sc, 2 sc, ch 6, 3 dc from 3rd ch, 1 sc, 2 sc, ch 6, 3 dc from 3rd ch, 1 sc, 2 sc, ch 4, 3 sc from 2nd ch, 3 sc to finish.

— 7. Spikelet :

Step 1 :

Fold a long piece of raffia in half and create a loose slip knot.

Step 2 :

Insert your hook into the knot and work two loops together, then continue inserting the hook into the previous loop and working two together until the chain is 3 inches long.

Step 3 :

Cut short strips of raffia and thread them through every two loops of the chain to create the spikelet 'hairs', trimming them into sharp points and securing with glue.

— 8. Headband Base :

Step 1 :

Slide all 33 zip ties onto your headband, spacing them out evenly across the length.

Step 2 :

Trim the ends of the zip ties at varying lengths to create a sunburst or star-like silhouette.

Step 3 :

Spray the entire base with gold paint or use nail polish for a metallic finish, then let it dry completely.

Assembly Instructions

  • Heat up your glue gun and prepare a clean, protected workspace.
  • Glue the crocheted spikelets onto the tips of the longest golden rays of your headband base.
  • Layer the green leaves over the center of the headband, spreading glue along the middle of each leaf to secure it firmly.
  • Attach the poppies by gluing the small inner corolla into the larger outer one, then fixing them onto the headband in a balanced arrangement.
  • Tuck the blue cornflowers into the gaps between the poppies to add depth and color contrast.
  • Fill any remaining empty spaces with the white camomiles to create a full, lush floral look.
  • Finish by gluing red beads to resemble berries and attaching long ribbons to the ends of the headband for a romantic touch.

Important Notes

  • 💡Always steam your raffia pieces with a warm iron (use a pressing cloth if needed) to help them lay flat and look professional.
  • 💡When making the poppy centers, dip the fringed raffia ends into PVA glue and then glitter while wet for a realistic pollen effect.
  • 💡Ensure your zip ties are pulled as tight as possible so they don't slide around the headband once you start adding the weight of the flowers.
  • 💡If you want a more flexible headband, choose a metal base instead of plastic, though you may need a bit more glue to keep the ties in place.
  • 💡Don't be afraid to customize the flower counts; if your headband feels a bit sparse, just whip up an extra camomile or two!

You've done it! Your gorgeous floral crown is ready to turn heads. Whether you’re wearing it to a garden party, a summer festival, or gifting it to a bride-to-be, this piece is a true labor of love. I hope you enjoyed the process of watching these raffia strands transform into a vibrant meadow. Don't forget to take a photo of your finished work—it deserves to be celebrated! Seeing your creations is the highlight of my day. Happy crafting, and may your days be as bright as these poppies! 🧶✨
You ask,

we answer.

FAQs

Can I use cotton yarn instead of raffia for this pattern?

You can, but keep in mind that raffia provides a unique structural stiffness that helps the petals hold their shape without drooping. If you use cotton, you might need to use a fabric stiffener spray to get the same 3D effect.

How do I keep the zip ties from sliding around the headband?

Make sure to pull them as tight as possible with pliers. If they still move, you can add a tiny drop of superglue or hot glue at the base of each tie where it meets the headband before you paint it.

Is this headband heavy to wear?

Raffia is surprisingly lightweight! Even with the zip ties and all the flowers, the finished piece is very comfortable for all-day wear at events or festivals.

What is the best way to clean the headband if it gets dirty?

Because of the raffia and the glue, you should only spot clean with a slightly damp cloth. Avoid getting the golden painted areas too wet, as it might dull the metallic finish.