About This Harry Potter and Hedwig Amigurumi Pattern
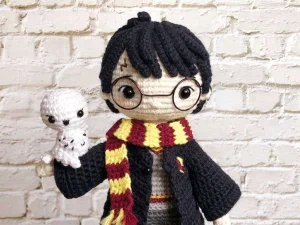
This pattern is the perfect choice for creating a one-of-a-kind keepsake. Style him with his robe and scarf for a classic look that will impress any fan of the series.
Designed for experienced crocheters, these patterns involve intricate designs and complex techniques to challenge and inspire.
A 10-12 hour project—great for savoring the process over several sessions.
Playful characters full of personality, designed to spark imagination and become cherished playtime favorites.
This pattern is the perfect choice for creating a one-of-a-kind keepsake. Style him with his robe and scarf for a classic look that will impress any fan of the series.
I absolutely love the way the layered hair strands give Harry that signature messy look without being impossible to manage. Crocheting Hedwig as a tiny companion is such a sweet bonus, and seeing them together just makes my crafty heart so happy!


There is something truly magical about seeing a character come to life stitch by stitch. When I first sat down to design a wizard doll, I knew I had to get the details just right—the messy hair, the round glasses, and of course, his loyal snowy companion. This pattern is definitely a labor of love, especially when you get to the hair strands, but I promise the result is so worth the extra time.
I recommend using a high-quality cotton yarn for this project. It gives the stitches such great definition, which is exactly what you want for those tiny details like the scar and the glasses. If you are feeling nervous about the wire work for the glasses, just take it slow! It is much easier than it looks, and it really makes the face pop. For Hedwig, try to keep your tension extra tight so she stays nice and perky on Harry's arm. I can't wait to see your finished wizards; they make the most thoughtful gifts for the book lovers in your life. Happy hooking, friends!
Step into the wizarding world with your very own handmade boy who lived. This pattern captures every iconic detail, from the messy black hair and round spectacles to the cozy Gryffindor scarf. You will love watching Harry come to life alongside his faithful snowy companion, Hedwig. It is a rewarding project that brings a touch of magic to any shelf or collection, making it the ultimate gift for the book lovers in your life.
Using skin yarn, 6 sc into a mr (6)
(1 sc, 1 inc) repeat 3 times (9)
1 sc in every st around (9)
3 sc, 1 puff stitch, 1 sc, 1 inv dec, 2 sc (8)
Switch to grey yarn, 1 sc in every st around (8)
Fill the arm with stuffing and finish off, leaving a tail for assembly.
Using skin yarn, 6 sc into a mr (6)
(1 sc, 1 inc) repeat 3 times (9)
1 sc in every st around (9)
1 inv dec, 1 sc, 1 puff stitch, 5 sc (8)
Switch to grey yarn, 1 sc in every st around (8)
Fill the arm with stuffing and finish off, leaving a tail for assembly.
Using skin yarn, 6 sc into a mr (6)
1 sc in every st around (6)
Finish off, stuff firmly, and weave the tail through the front loops to close tightly.
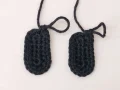
Using black yarn, ch 7. Starting in 2nd ch from hook: 1 inc, 4 sc, 5 sc in the last ch. Work down other side: 4 sc, 1 inc (17)
1 sc, 1 inc, 4 sc, 5 inc, 4 sc, 1 inc, 1 sc (24)
BLO 1 sc in every st around (24)
1 sc in every st around (24)
7 sc, 5 inv dec, 7 sc (19)
5 sc, 2 inv dec, 1 sc, 2 inv dec, 5 sc (15)
3 sc, 2 hdc dec, 1 hdc, 2 hdc dec, 3 sc (11)
Switch to skin yarn.
BLO 1 sc in every st around (11)
1 sc in every st around (11)
1 inc, 10 sc (12)
1 sc in every st around (12)
1 sc, 1 inc, 10 sc (13)
1 sc in every st around (13)
2 sc, 1 inv dec, 9 sc (12)
1 sc in every st around (12)
2 sc, 1 inv dec, 3 sc, 3 inc, 2 sc (14)
2 sc, 1 inc, 3 sc, 3 inv dec, 2 sc (12)
2 sc, 1 inc, 9 sc (13)
1 sc in every st around (13)
5 sc, 1 inc, 4 sc, 1 inc, 2 sc (15)
5 sc, switch to white yarn, 10 sc (15)
Using white yarn, 1 sc in every st around (15)
Finish off and stuff the leg with fiberfill.
Work exactly as the left leg, but do not cut the yarn after Round 24.
Make 2 soles. Using black yarn, ch 7. R1: Start in 2nd ch: 1 inc, 4 sc, 5 sc in same st, 4 sc, 1 inc (17). R2: 1 sc, 1 inc, 4 sc, 5 inc, 4 sc, 1 inc, 1 sc (24).
slst the sole and the base of the shoe together using the FLO of Round 3 of the leg.
On the right leg, 9 sc, ch 3. Join to the 2nd st of the left leg. 15 sc on left leg, 3 sc across chains, 15 sc on right leg, 3 sc across other side of chains (36)
1 sc in every st around (36)
7 sc, 1 inv dec, 16 sc, 1 inv dec, 9 sc (34)
1 sc in every st around (34)
Switch to grey yarn.
1 sc in every st around (34)
BLO 6 sc, 1 inv dec, 15 sc, 1 inv dec, 9 sc (32)
Switch to red yarn.
1 sc in every st around (32)
Switch to grey yarn.
1 sc in every st around (32)
6 sc, 1 inv dec, 14 sc, 1 inv dec, 8 sc (30)
1 sc in every st around (30)
6 sc, 1 inv dec, 13 sc, 1 inv dec, 7 sc (28)
1 sc in every st around (28)
6 sc, 1 inv dec, 11 sc, 1 inv dec, 7 sc (26)
5 sc, 1 inv dec, 11 sc, 1 inv dec, 6 sc (24)
5 sc on body, join left arm: start at 2nd st of arm and 7 sc, skip 1 st on arm, skip 1 st on body. 11 sc on body, join right arm: start at 6th st of arm and 7 sc, skip 1 st on arm, skip 1 st on body, 6 sc on body (36)
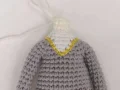
2 sc, 1 inv dec, (4 sc, 1 inv dec) twice, 1 sc, switch to white yarn 2 sc, switch to grey yarn 1 sc, 1 inv dec, (4 sc, 1 inv dec) twice, 2 sc (30)
Using grey yarn 13 sc, switch to white yarn 4 sc, switch to grey yarn 13 sc (30)
Using grey yarn (3 sc, 1 inv dec) twice, 2 sc. Switch to white yarn 1 sc, 1 inv dec, 3 sc. Switch to grey yarn 1 inv dec, (3 sc, 1 inv dec) twice (24)
Using white yarn (2 sc, 1 inv dec) repeat 6 times (18)
Using white yarn (1 sc, 1 inv dec) repeat 6 times (12)
Switch to skin yarn, BLO (4 sc, 1 inv dec) repeat 2 times (10)
1 sc in every st around (10)
FLO 10 inc (20)
(1 sc, 1 inc) repeat 10 times (30)
2 sc, 1 inc, (4 sc, 1 inc) repeat 5 times, 2 sc (36)
(5 sc, 1 inc) repeat 6 times (42)
3 sc, 1 inc, (6 sc, 1 inc) repeat 5 times, 3 sc (48)
(7 sc, 1 inc) repeat 6 times (54)
1 sc in every st around (54)
(7 sc, 1 inv dec) repeat 6 times (48)
3 sc, 1 inv dec, (6 sc, 1 inv dec) repeat 5 times, 3 sc (42)
(5 sc, 1 inv dec) repeat 6 times (36)
2 sc, 1 inv dec, (4 sc, 1 inv dec) repeat 5 times, 2 sc (30)
(3 sc, 1 inv dec) repeat 6 times (24)
1 sc, 1 inv dec, (2 sc, 1 inv dec) repeat 5 times, 1 sc (18)
(1 sc, 1 inv dec) repeat 6 times (12)
6 inv dec (6)
Stuff the head firmly, finish off, and pull the yarn tail through the front loops to close.
Using dark grey yarn, start in front loop of Round 30 on the back of the body. 1 sc in every st around (34)
9 sc, 1 inc, 16 sc, 1 inc, 7 sc (36)
1 sc in every st around (36)
10 sc, 1 inc, 16 sc, 1 inc, 8 sc (38)
1 sc in every st around (38)
11 sc, 1 inc, 18 sc, 1 inc, 7 sc (40)
9 sc, 1 inc, 9 sc (20)
1 sc in every st around (20)
15 sc, 1 inv dec, 3 sc (19)
1 sc, 1 inv dec, 2 sc, 4 inc, 2 sc, 1 inv dec, 6 sc (21)
4 sc, 4 inv dec, 9 sc (17)
1 sc in every st around (17)
13 sc, 1 inc, 3 sc (18)
1 sc in every st around (18)
13 sc, 1 inc, 4 sc (19)
1 sc in every st around (19)
4 dc, 1 hdc, 4 sc, 1 hdc, 9 dc (19)
Repeat steps for Rounds 8-25 for the right leg, starting at the 3rd st of Round 7.
Using black yarn, ch 35. Starting in 3rd ch from hook, 33 hdc, turn (33)
ch 5, starting on 33rd st of Row 1: (1 hdc inc, 15 hdc) twice, 1 hdc inc, turn (36)
ch 2, 1 hdc inc, 31 hdc, switch to yellow 1 hdc, switch to red 1 hdc, switch to black 1 hdc, 1 hdc inc, turn (38)
ch 1, 1 inc, 1 sc, switch to yellow 1 sc, switch to red 1 sc, switch to black 2 sc, ch 6, skip 8 sts, 10 sc, ch 6, skip 8 sts, 5 sc, 1 inc, turn (24)
ch 2, 7 hdc, 6 hdc in chains, 10 hdc, 6 hdc in chains, 7 hdc, turn (36)
ch 2, 1 hdc inc, 34 hdc, 1 hdc inc, turn (38)
ch 2, 1 hdc in every st around, turn (38)
ch 2, 1 hdc inc, 36 hdc, 1 hdc inc, turn (40)
ch 2, 1 hdc in every st around, turn (40)
ch 2, 1 hdc inc, 38 hdc, 1 hdc inc, turn (42)
Continue increasing hdc at each end of even rows until Row 20 (52)
ch 1, 4 sc, 4 hdc, 4 dc, 28 tr, 4 dc, 4 hdc, 4 sc, turn (52)
ch 1, 1 inc, 4 sc, 4 hdc, 3 dc, 1 dc inc, 6 dc, 1 dc inc, 12 dc, 1 dc inc, 6 dc, 1 dc inc, 3 dc, 4 hdc, 4 sc, 1 inc (58)
Using black yarn at the sleeve corner: ch 2, 18 hdc, slst (18)
Continue Rounds of hdc and shaping to reach 24 sts at R10, then slst to finish.
Using red yarn, ch 6. Starting in 3rd ch: 4 hdc, turn (4)
ch 2, 4 hdc, turn (4)
Switch to yellow yarn, ch 2, 4 hdc, turn (4)
Switch to red yarn, ch 2, 4 hdc, turn (4)
Repeat the stripe pattern until you have 50 rounds total (25 stripes).
Using black yarn, 7 sc into a mr (7)
BLO 7 inc (14)
(1 sc, 1 inc) repeat 7 times (21)
1 sc, 1 inc, (2 sc, 1 inc) repeat 6 times, 1 sc (28)
ch 22, start in 3rd ch: 20 hdc, slst to st 28 of R4 (20)
ch 22, start in 3rd ch: 20 hdc, slst to next st of R4 (20)
ch 16, start in 3rd ch: 14 hdc, slst to st 12 of R4 (14)
ch 17, start in 2nd ch: 16 sc, slst to st 11 of R4 (16)
ch 14, start in 2nd ch: 13 sc, slst to st 10 of R4 (13)
ch 12, start in 2nd ch: 11 sc, slst to next st of R4 (11)
ch 17, start in 2nd ch: 16 sc, slst to st 2 of R4 (16)
ch 16, start in 3rd ch: 14 hdc, slst to st 1 of R4 (14)
Using black yarn, start in FLO of Round 2 at the 7th stitch.
ch 24, start in 3rd ch: 22 hdc. Work 2 strands per stitch.
ch 14, start in 2nd ch: 13 sc. Work 2 strands per stitch.
ch 18, start in 2nd ch: 17 sc, slst in next st.
ch 6, start in 2nd ch: 5 sc. slst into the 7th st of Round 2.
Using white yarn, work Rounds 1-10 to reach 12 sts, then BLO for R11, and sc around for R12-13. Push the last rounds into the head.
Using white yarn, work Rounds 1-10 starting with 6 sc in mr, increasing to 18, then decreasing back to 8 sts.
Start with 6 sc in mr, inc to 9, flatten and work across both sides with hdc, dc, and tr to create feathers.
Using black embroidery thread, ch 5 and work sc and slst into chains to create small claw shapes.
Using white yarn, ch 5, work sc across, then ch 3 and slst to create feather tips.
I hope you enjoyed every single stitch of this wizarding journey! There is nothing quite like the feeling of finishing a complex amigurumi project and seeing all those separate pieces finally come together into a character with so much personality. Whether he is destined for a collector's shelf or to be a new best friend for a little fan, your handmade Harry and Hedwig are sure to be cherished. Don't forget to give Hedwig a little squeeze from me! I can't wait to see the magic you've created with your own two hands. Happy crafting! 🧶🧵✨
When using fingering weight yarn and the recommended hooks, Harry stands approximately 9 inches (22.5 cm) tall, while Hedwig is about 1.8 inches (4.5 cm).
Yes, you can use 8 mm safety eyes, but make sure to insert them at Round 60 before you begin decreasing and stuffing the head.
If this is for a young child, I recommend embroidering the glasses with black yarn instead of using wire to avoid any sharp edges or poking hazards.
Absolutely! The robe is designed as a separate accessory with its own sleeves, so you can dress and undress Harry as you like.
