🧶 Beautiful ✨ Detailed 💝 Adorable

Large Spiral Shell Turtle Amigurumi Pattern

Large Spiral Shell Turtle Amigurumi Pattern
4.5★Rating
8-10 HoursTime Needed
1.4KMade This
✂️

Advanced Level

Designed for experienced crocheters, these patterns involve intricate designs and complex techniques to challenge and inspire.

⏱️

All-Day Adventure

Requires 8-10 hours, ideal for a full day of immersive crocheting.

🐥

Charming Critter

Delightful animal designs with sweet details that capture the essence of your favorite woodland and farmyard friends.

About This Large Spiral Shell Turtle Amigurumi Pattern

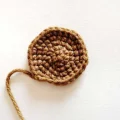
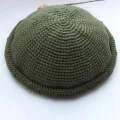
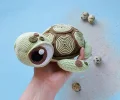
Large Spiral Shell Turtle Amigurumi Pattern crochet pattern - detailed view

Perfect for the seasoned maker who loves a 'slow craft' experience. The finished turtle makes a breath-taking display piece for a nursery or a standout gift for any nature enthusiast in your life.

Why You'll Love This Large Spiral Shell Turtle Amigurumi Pattern

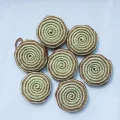
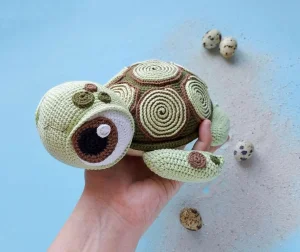
I honestly fell in love with the surface crochet on the shell pieces. Adding those contrasting light green spirals over the brown base makes the whole project pop in a way that regular color changes just can't match. It’s incredibly satisfying to see all those individual components finally join up into a solid, heavy-duty turtle friend.

Large Spiral Shell Turtle Amigurumi Pattern step 1 Large Spiral Shell Turtle Amigurumi Pattern step 2 Large Spiral Shell Turtle Amigurumi Pattern step 3 Large Spiral Shell Turtle Amigurumi Pattern step 4

Switch Things Up

Working on this turtle really reminded me why I love amigurumi so much. There’s a point about halfway through the shell scutes where you might feel like you’re making a million little circles, but once you start adding that light green surface crochet, the whole thing transforms. It’s like watching a drawing come to life in 3D.

I found that the assembly is the part where you really want to take your time. I actually ended up pinning my scutes and then walking away for a cup of coffee before sewing them down. Looking at it with fresh eyes helped me realize I’d placed one of the side pieces a bit wonky!

If you want to vary the look, try using a variegated yarn for the surface spirals. It creates a beautiful, shifting color effect that looks like natural moss or sea-growth on the shell. Also, don't be afraid to get creative with the spots on the head. Nature isn't perfectly symmetrical, so placing them a little randomly actually makes your turtle look more authentic. This project is a marathon, not a sprint, so enjoy the slow process of building his little world stitch by stitch.

Common Mistakes & How to Fix Them

✗ When working the surface sl st on the shell pieces, keep your tension loose or the scutes will curl up too much and won't sit flat against the main carapace.✗ The internal pocket in the shell is designed to hold a small 'egg'—if you stuff the carapace too firmly, you won't leave enough room for the pocket to function properly.✗ Be very careful with the eyelid placement; if you start the rows too far back from the eye detail, the turtle will end up looking surprised rather than sleepy.✗ The face sculpting requires pulling the yarn quite tight to create the eye sockets—ensure you use a strong yarn tail that won't snap under the pressure of the knots.

Large Spiral Shell Turtle Amigurumi Pattern

There is something truly magical about the way these geometric spirals come together to create such a lifelike, artistic turtle. If you have been looking for a project that challenges your assembly skills and rewards you with a sturdy, professional-looking heirloom, you have found it. This isn't just a toy; it is a piece of soft sculpture that will have everyone asking how you managed those intricate shell details. Grab your favorite green and brown yarns, and let's create a slow-moving friend that is full of personality and charm.

Advanced 8-10 Hours

Materials Needed for Large Spiral Shell Turtle Amigurumi Pattern

— Main Fabric

  • 01
    YarnArt Jeans or similar fine weight (2) yarn in Dark Green (Color 82) for the main shell
  • 02
    Light Green (Color 11) for the head, limbs, tail, and shell highlights
  • 03
    Light Yellow (Color 67) for the under-shell and internal pocket
  • 04
    Brown (Color 40) for the shell scutes and eye details
  • 05
    Black (Color 53) for the pupils and mouth embroidery
  • 06
    White (Color 01) for the eye whites and light reflections

— Tools Required

  • 01
    2.25mm crochet hook (or size needed to achieve a tight tension)
  • 02
    Soft stuffing material (Syntepuh or poly-fill)
  • 03
    Tapestry needle for assembly and embroidery
  • 04
    Stitch markers to keep track of spiral rounds
  • 05
    Small beads for extra eye detail (optional)
  • 06
    Sharp scissors

Progress Tracker

0% Complete

— 1. Main Carapace (Dark Green) :

Round 1 :

Start with 8 sc into a mc (8)

Round 2 :

8 x inc (16)

Round 3 :

(1 sc, inc) repeated 8 times (24)

Round 4 :

1 sc, inc, (2 sc, inc) repeated 7 times, 1 sc (32)

Round 5 :

(3 sc, inc) repeated 8 times (40)

Round 6 :

2 sc, inc, (4 sc, inc) repeated 7 times, 2 sc (48)

Round 7 :

(5 sc, inc) repeated 8 times (56)

Round 8-9 :

Work 56 sc around for both rounds (56)

Round 10 :

3 sc, inc, (6 sc, inc) repeated 7 times, 3 sc (64)

Round 11 :

(7 sc, inc) repeated 8 times (72)

Round 12 :

4 sc, inc, (8 sc, inc) repeated 7 times, 4 sc (80)

Round 13-14 :

Work 80 sc around for both rounds (80)

Round 15 :

(9 sc, inc) repeated 8 times (88)

Round 16 :

5 sc, inc, (10 sc, inc) repeated 7 times, 5 sc (96)

Round 17 :

(11 sc, inc) repeated 8 times (104)

Round 18-19 :

Work 104 sc around for both rounds (104)

Round 20 :

6 sc, inc, (12 sc, inc) repeated 7 times, 6 sc (112)

Round 21 :

(13 sc, inc) repeated 8 times (120)

Round 22 :

7 sc, inc, (14 sc, inc) repeated 7 times, 7 sc (128)

Round 23-27 :

Work 128 sc around for these five rounds (128)

Round 28 :

Work 128 sc into the blo (128)

Round 29 :

Work 128 sc into the flo (128)

Round 30 :

(15 sc, inc) repeated 8 times (136)

Round 31 :

Work 136 sc around (136)

Round 32 :

(15 sc, dec) repeated 8 times (128)

Round 33 :

Work 128 sc around (128)

Info :

Fasten off and leave a long tail for sewing.

— 2. Lower Carapace (Light Yellow) :

Round 1 :

Start with 8 sc into a mc (8)

Round 2-20 :

Follow the same increase pattern as the Main Carapace (rounds 2-22), but work every single stitch into the blo only until you reach 128 stitches.

Info :

This piece forms the flat belly of the turtle shell.

— 3. Internal Shell Pocket (Light Yellow) :

Round 1 :

Start with 8 sc into a mc (8)

Round 2 :

8 x hdc inc (16)

Round 3 :

(1 hdc, hdc inc) repeated 8 times (24)

Round 4 :

1 hdc, hdc inc, (2 hdc, hdc inc) repeated 7 times, 1 hdc (32)

Round 5 :

(3 hdc, hdc inc) repeated 8 times (40)

Round 6 :

2 hdc, hdc inc, (4 hdc, hdc inc) repeated 7 times, 2 hdc (48)

Round 7 :

Work 48 hdc around (48)

Round 8 :

(5 hdc, hdc inc) repeated 8 times (56)

Round 9-21 :

Work 56 hdc around for these rounds (56)

Round 22 :

Work 56 sc around (56)

— 4. Shell Scutes (Make 7 - Brown) :

Round 1 :

Start with 8 sc into a mc (8)

Round 2-7 :

Follow standard increase rounds (up to 56 stitches), working every round in the blo (56)

Surface Detail :

Join light green yarn. Starting from the center, work surface sl st into the flo of rounds 1 through 6 to create the spiral effect.

— 5. Tail (Light Green) :

Round 1 :

Start with 6 sc into a mc (6)

Round 2 :

6 x inc (12)

Round 3-6 :

Work 12 sc around (12)

Info :

Flatten the piece and work sc through both layers to close.

— 6. Head (Light Green) :

Round 1 :

Start with 8 sc into a mc (8)

Round 2 :

8 x inc (16)

Round 3 :

(1 sc, inc) repeated 8 times (24)

Round 4 :

1 sc, inc, (2 sc, inc) repeated 7 times, 1 sc (32)

Round 5 :

(3 sc, inc) repeated 8 times (40)

Round 6 :

Work 40 sc around (40)

Round 7 :

2 sc, inc, (4 sc, inc) repeated 7 times, 2 sc (48)

Round 8 :

Work 48 sc around (48)

Round 9 :

Work 48 sc into the blo (48)

Round 10-11 :

Work 48 sc around (48)

Round 12 :

(5 sc, inc) repeated 8 times (56)

Round 13-14 :

Work 56 sc around (56)

Round 15 :

3 sc, inc, (6 sc, inc) repeated 7 times, 3 sc (64)

Round 16-19 :

Work 64 sc around (64)

Round 20 :

(6 sc, dec) repeated 8 times (56)

Round 21-22 :

Work 56 sc around (56)

Round 23 :

(5 sc, dec) repeated 8 times (48)

Round 24 :

Work 48 sc into the blo (48)

Round 25-26 :

Work 48 sc around (48)

Round 27 :

(4 sc, dec) repeated 8 times (40)

Round 28 :

Work 40 sc around (40)

Round 29 :

(3 sc, dec) repeated 8 times (32)

Round 30 :

(2 sc, dec) repeated 8 times (24)

Round 31 :

(1 sc, dec) repeated 8 times (16)

Round 32 :

8 x dec (8)

Info :

Fasten off and pull the opening closed. For the eyelids, return to the flo of Round 9 and Round 46 (if applicable) and work 3 rows of 48 sc.

— 7. Eyes (Make 2) :

White Detail :

Work 8 rounds of sc starting with 8 in a mc, following the standard increase pattern up to 48 stitches.

Dark Detail Round 1 :

In Black: 8 sc in mc (8)

Dark Detail Round 2 :

8 x inc (16)

Dark Detail Round 3 :

(1 sc, inc) repeated 8 times (24)

Dark Detail Round 4 :

Switch to Brown and work in blo: 12 sl st, (1 hdc, hdc inc) repeated 6 times (30)

Dark Detail Round 5 :

12 sc, 18 hdc (30)

— 8. Feet (Make 2 - Light Green) :

Round 1 :

ch 14 (14)

Round 2 :

hdc in 2nd ch from hook, 11 hdc, 3 hdc in last ch. Turn to work other side: 12 hdc, 3 hdc in last st (30)

Round 3 :

12 hdc, 3 hdc inc, 12 hdc, 3 hdc inc (36)

Round 4 :

12 hdc, (1 hdc, hdc inc) x 3, 12 hdc, (1 hdc, hdc inc) x 3 (42)

Round 5 :

12 hdc, (2 hdc, hdc inc) x 3, 12 hdc, (2 hdc, hdc inc) x 3 (48)

Round 6-8 :

Work 48 hdc around (48)

Info :

Fill with fiber, fold in half, and sc through both layers to close.

— 9. Decorative Spots :

Large Brown :

8 sc in mc, then 8 x inc (16). Fasten off.

Large Green :

8 sc in mc, then 8 x inc (16). Fasten off.

Small Spots :

Work 8 sc in a mc. Make two in green and one in brown. Fasten off.

Eye Glare :

In white: 8 sc in a mc. Fasten off.

Assembly Instructions

  • Begin by sewing Round 33 of the main dark green carapace to Round 28 of the same piece to create a rolled edge.
  • Position the seven brown scute pieces onto the dark green carapace, starting with one in the center and surrounding it with the other six; secure them with temporary stitches before sewing permanently.
  • Fold the internal pocket (piece 3) in half and attach the straight edge (Line AB) to the light yellow lower carapace.
  • Join the dark green main carapace to the light yellow lower carapace, leaving a gap to insert the internal pocket and stuffing.
  • Assemble the eyes by sewing the dark detail onto the white circles, then attach them to the head and embroider the mouth and face contractions.
  • Sew the head to the front of the shell, ensuring it is anchored at both the top and bottom for stability.
  • Attach the tail to the back and the two large feet to the sides of the lower shell as indicated in the placement photos.

Important Notes

  • 💡The 'egg' pocket is a unique feature—make sure your stitches are tight so it remains hidden when not in use.
  • 💡When stuffing the head, pay extra attention to the area around the eye sockets to support the face sculpting.
  • 💡Using a slightly smaller hook than recommended for your yarn weight will help prevent the stuffing from showing through the stitches.
  • 💡The spiral surface crochet is easiest to do before you sew the scute pieces onto the main shell.
  • 💡If you find the shell too heavy, you can add a small piece of plastic canvas to the bottom carapace for extra rigidity.

I am so incredibly proud of you for tackling this detailed turtle! It is no small feat to manage all those separate shell components and the face sculpting, but the result is something you can cherish for years. Whether he's sitting on a bookshelf or being tucked into a little one's arms, this turtle carries all the love and patience you put into every single stitch. Don't forget to weave in those ends securely—you've earned a nice break after this 'All-Day Adventure'! Happy crafting, and I can't wait to see your finished spiral-shelled friends. 🧶🐢✨
You ask,

we answer.

FAQs

Can I use a different yarn weight like worsted for this turtle?

You definitely can, but keep in mind that using worsted weight yarn will make your turtle significantly larger. You will also need to increase your hook size to around 3.5mm or 4.0mm to ensure the fabric remains dense enough to hold the stuffing.

What is the 'internal pocket' for in the shell?

This pattern is designed with a clever little hidey-hole! It's meant to hold a small crocheted egg (often containing a tiny baby turtle), making it an interactive toy. If you don't want the pocket, you can simply skip piece 3 and sew the shell pieces together directly.

The surface slip stitches are making my shell pieces buckle. How do I fix this?

This usually happens if the slip stitches are too tight. Try using a slightly larger hook just for the surface detail, or consciously pull up a taller loop for each stitch so the fabric can breathe and lay flat.

How do I make the face look as expressive as the one in the photo?

The secret is in the 'contraction' or face sculpting. When you pull the yarn through the head to create the eye sockets, pull firmly before knotting. This creates the depth needed for the eyelids to sit correctly and gives the turtle that soulful look.