🧶 Beautiful ✨ Detailed 💝 Adorable

Little Bullfinch Bird Amigurumi Pattern

Little Bullfinch Bird Amigurumi Pattern
4.6★Rating
3-5 HoursTime Needed
3.2KMade This
✂️

Intermediate Level

Ideal for those with basic crocheting experience, featuring slightly more advanced stitches and techniques to expand your skills.

⏱️

Quick Craft

Fits nicely into a free afternoon — 2 to 5 hours of focused, enjoyable crocheting.

🐰

Whimsical Buddy

Playful characters full of personality, designed to spark imagination and become cherished playtime favorites.

About This Little Bullfinch Bird Amigurumi Pattern

Little Bullfinch Bird Amigurumi Pattern crochet pattern - detailed view

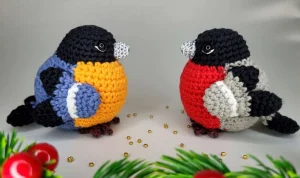
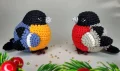
Perfect for nature lovers or as a winter decor piece, these birds look stunning when made in multiples to create a little flock for your mantle or as unique ornaments for your Christmas tree.

Why You'll Love This Little Bullfinch Bird Amigurumi Pattern

I love how this pattern uses a mix of rows and rounds to create the body shape—it's such a satisfying way to build the structure. Plus, using lace yarn for the beak is a total game-changer for getting that fine detail without adding unnecessary bulk to the face!

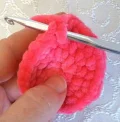
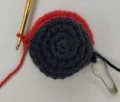
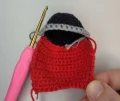
Little Bullfinch Bird Amigurumi Pattern step 1 Little Bullfinch Bird Amigurumi Pattern step 2 Little Bullfinch Bird Amigurumi Pattern step 3 Little Bullfinch Bird Amigurumi Pattern step 4

Switch Things Up

I remember the first time I saw a bullfinch in the garden; that flash of red against the snow was just magical. That’s exactly the feeling I wanted to capture with this pattern. When I was designing the body, I experimented a lot with how to get that perfect 'round' bird shape without it just being a ball. The transition from rounds for the head to rows for the belly was the 'aha!' moment for me.

One thing I’ve learned while making a whole flock of these is that the stuffing makes all the difference. You want him to be firm enough to hold his shape, but not so stuffed that the stitches stretch open. If you’re planning to hang these as ornaments, try adding a little loop of silver thread right between the head and the back. It balances perfectly! Also, if you’re feeling adventurous, try using a variegated yarn for the back section—it gives a wonderful feathered effect without any extra effort. I can't wait to see the colors you choose for your little feathered friends!

Common Mistakes & How to Fix Them

✗ When switching from the black head to the red body rows, make sure not to pull your first row of stitches too tight or the neck area will pinch and look unnatural.✗ If you place the safety eyes too high or too far apart, the bird loses its cute, slightly chubby expression—aim for exactly 6 stitches between them as indicated.✗ Don't skip the white lace stitch around the eyes; it's a tiny detail but it's what really makes the face come alive and look like a real bird.✗ If you stuff the beak, it will look too bulbous—keep it empty as the instructions suggest so it maintains that sharp, triangular bird-like shape.

Little Bullfinch Bird Amigurumi Pattern

I've always found bullfinches to be the most charming winter visitors, and this little guy captures that plump, cheerful spirit perfectly. You'll love how the colors pop, making it a wonderful addition to your holiday tree or a sweet gift for a bird-loving friend. The construction is clever but approachable, keeping things interesting as you watch the bird take shape right before your eyes. It's a satisfying project that brings a bit of the outdoors inside, no matter the season.

Intermediate 3-5 Hours

Materials Needed for Little Bullfinch Bird Amigurumi Pattern

— Main Fabric

  • 01
    Sport weight cotton or acrylic yarn in black for the head and wing tips
  • 02
    Vibrant red sport weight yarn for the chest and belly area
  • 03
    Medium grey sport weight yarn for the back and wing accents
  • 04
    Small amounts of white and brown sport weight yarn for wings and feet
  • 05
    Fine lace weight yarn in white and grey for the eye highlights and beak

— Tools Required

  • 01
    2.5 mm crochet hook for the main bird body
  • 02
    1.5 mm crochet hook for the delicate lace beak
  • 03
    Pair of 5 mm safety eyes or black beads
  • 04
    Soft polyester fiberfill for stuffing
  • 05
    Stitch marker or a simple safety pin to track rounds
  • 06
    Yarn needle and a smaller sewing needle for assembly
  • 07
    Sharp scissors

Progress Tracker

0% Complete

— 1. Head :

Info :

Start with black yarn and work in continuous rounds. Use a marker to track the beginning of each round.

Round 1 :

Create a magic ring and work 6 sc into it (6)

Round 2 :

Work 1 inc in each of the next 6 stitches (12)

Round 3 :

Repeat (1 sc, 1 inc) 6 times (18)

Round 4 :

Repeat (2 sc, 1 inc) 6 times (24)

Round 5 :

Work 1 sc in every stitch around (24)

Round 6 :

Work 1 sc in every stitch around (24)

Round 7 :

Work 1 sc in every stitch around (24)

Info :

Keep the black yarn attached but secure the loop with a marker. Do not use the invisible color change here; simply start the red yarn in the next stitch.

— 2. Front Body (Red Section) :

Info :

Switch to red yarn. This part is worked in rows rather than rounds.

Row 8 :

3 sc, 7 inc, 2 sc (19)

Row 9 :

ch 1, turn, 19 sc (19)

Row 10 :

ch 1, turn, 19 sc (19)

Row 11 :

ch 1, turn, 19 sc (19)

Row 12 :

ch 1, turn, 19 sc (19)

Row 13 :

ch 1, turn, 19 sc (19)

Row 14 :

ch 1, turn, 19 sc (19)

Row 15 :

ch 1, turn, 19 sc (19)

Row 16 :

ch 1, turn, 19 sc (19)

Row 17 :

ch 1, turn, 4 sc, repeat (1 dec, 3 sc) 3 times (16)

Row 18 :

ch 1, turn, 16 sc (16)

Row 19 :

ch 1, turn, repeat (4 sc, 1 dec) 2 times, then 4 sc (14)

Row 20 :

ch 1, turn, 6 sc, 1 dec, 6 sc (13)

Info :

Place a marker in the final loop of the red yarn and do not cut the thread.

— 3. Back Body (Grey Section) :

Info :

Return to the black loop left at the end of the head. Join grey yarn into that same stitch, then cut and tie off the black yarn.

Row 8 :

ch 1, turn, 12 sc (12)

Row 9 :

ch 1, turn, repeat (3 sc, 1 inc) 3 times (15)

Row 10 :

ch 1, turn, 15 sc (15)

Row 11 :

ch 1, turn, repeat (2 sc, 1 inc) 5 times (20)

Row 12 :

ch 1, turn, repeat (3 sc, 1 inc) 5 times (25)

Row 13 :

ch 1, turn, 25 sc (25)

Row 14 :

ch 1, turn, repeat (7 sc, 1 dec) 2 times, then 7 sc (23)

Row 15 :

ch 1, turn, 10 sc, 1 dec, 11 sc (22)

Row 16 :

ch 1, turn, 22 sc (22)

Row 17 :

ch 1, turn, repeat (6 sc, 1 dec) 2 times, then 6 sc (20)

Row 18 :

ch 1, turn, 20 sc (20)

Row 19 :

ch 1, turn, 20 sc (20)

Row 20 :

ch 1, turn, 20 sc (20)

Info :

Keep the grey yarn attached for the next section.

— 4. Body Finishing & Closing :

Info :

Now we join the grey and red sections to work in rounds. Use 1 sl st to connect the edges.

Round 21 :

Work 33 sc around the joined pieces (33)

Round 22 :

23 sc, then repeat (1 dec) 5 times (28)

Round 23 :

Repeat (5 sc, 1 dec) 2 times, then 4 sc, then repeat (1 dec) 5 times (21)

Round 24 :

Repeat (1 dec) 10 times, 1 sc (11)

Round 25 :

Repeat (1 dec) 5 times (5)

Info :

Cut the yarn and use a needle to close the remaining hole at the bottom.

— 5. Wing Base (Make 2) :

Info :

Start with grey yarn. Work in continuous rounds.

Round 1 :

Work 6 sc into a magic ring, then work 1 inc in each stitch (12)

Round 2 :

12 sc (12)

Round 3 :

12 sc (12)

Round 4 :

Switch to white yarn and work 12 sc (12)

Info :

Flatten the piece and leave a long tail for sewing.

— 6. Long Feather (Make 2 for Wings, 2 for Tail) :

Info :

Start with black yarn. Work in continuous rounds.

Round 1 :

Work 6 sc in a magic ring, then repeat (1 sc, 1 inc) 3 times (9)

Round 2 :

9 sc (9)

Round 3 :

9 sc (9)

Round 4 :

9 sc (9)

Round 5 :

Switch to grey yarn and work 9 sc (9)

Round 6 :

Repeat (1 sc, 1 dec) 3 times (6)

— 7. Short Feather (Make 2 for Wings) :

Info :

Start with black yarn. Work in continuous rounds.

Round 1 :

Work 6 sc in a magic ring, then repeat (1 sc, 1 inc) 3 times (9)

Round 2 :

9 sc (9)

Round 3 :

Switch to grey yarn and work 9 sc (9)

Round 4 :

Repeat (1 sc, 1 dec) 3 times (6)

— 8. Beak :

Info :

Use grey lace yarn and the 1.5 mm hook.

Round 1 :

Work 10 sc into a magic ring (10)

Round 2 :

10 sc (10)

Round 3 :

10 sc (10)

Info :

Fasten off and leave a tail. Do not stuff the beak.

— 9. Feet (Make 2) :

Info :

Use brown yarn and a 2.5 mm hook.

Step 1 :

ch 4, then sl st into the 2nd ch from the hook and the following 2 chs to make the first toe.

Step 2 :

ch 4, sl st into the 2nd ch from the hook and the following 2 chs for the second toe.

Step 3 :

ch 4, sl st into the 2nd ch from the hook and the following 2 chs for the third toe.

Step 4 :

sl st into the very first starting ch to join the toes together.

Step 5 :

ch 4, sl st into the 2nd ch from the hook and the following 2 chs for the final toe, then fasten off.

Assembly Instructions

  • Position the 5mm safety eyes on the black head section, placing them three rounds above the red chest line with 6 stitches between them.
  • Use a needle and white lace yarn to add a small highlight stitch next to each eye to give the bird a bright, alert look.
  • Sew the grey back piece and red front piece together along one side, stuff firmly with fiberfill, then close the remaining side with the grey thread.
  • Assemble the wings by sewing the short feather on top and the long feather underneath the main wing base, then attach them symmetrically to the sides of the body.
  • Sew the two tail feathers together and attach them to the lower back of the bird, ensuring they sit centered.
  • Attach the un-stuffed beak centered between the eyes, ensuring the point is facing slightly downward.
  • Finish by sewing the brown feet to the bottom center of the bird so it can sit upright without tipping over.

Important Notes

  • 💡This project is worked in continuous spiral rounds unless the pattern specifically tells you to turn for rows.
  • 💡Keep your tension consistent when moving between the 2.5mm and 1.5mm hooks to ensure the proportions stay correct.
  • 💡The invisible color change technique is best reserved for the wings and tail to keep the stripes looking crisp and clean.
  • 💡Always leave a long yarn tail after finishing each piece; it makes sewing everything together much easier later on.
  • 💡Stuff the body firmly as you go, especially near the neck area, to prevent the head from wobbling once finished.

I really hope you enjoy bringing this little bullfinch to life! There's something so peaceful about working on a project that celebrates nature. Whether he's perched on your desk or hanging from a branch, I know he'll bring a smile to your face every time you see him. Don't be afraid to experiment with different shades of red or even blue for a varied look. Happy crafting, and I can't wait to see your finished birds! 🧶 ✨
You ask,

we answer.

FAQs

What if I don't have lace weight yarn for the beak?

You can use a single ply of split sport weight yarn or even embroidery floss, just make sure to use the smaller 1.5mm hook so the beak stays tiny and sharp.

My bird's body looks a bit lopsided, what happened?

Check your row counts on the red and grey sections. If one side has more rows than the other, the bird will tilt. Make sure both sections reach exactly Row 20 before you start joining them.

Can I use safety eyes instead of beads?

Absolutely! 5mm safety eyes are recommended for durability, especially if this is a toy for a child. Just remember to secure the backings before you start the body rows.

How do I make the 'reverse single crochet' for the edge?

It's also known as the crab stitch. Instead of working forward, you insert your hook into the stitch to the right and complete a normal sc. It creates a lovely corded texture!