🧶 Beautiful ✨ Detailed 💝 Adorable

Plush Beechcraft Bonanza V-Tail Airplane Amigurumi Pattern

Plush Beechcraft Bonanza V-Tail Airplane Amigurumi Pattern
4.3★Rating
5-8 HoursTime Needed
1.6KMade This
✂️

Advanced Level

Designed for experienced crocheters, these patterns involve intricate designs and complex techniques to challenge and inspire.

⏱️

Weekend Treat

Takes 5-7 hours, making it an enjoyable project to finish over a couple of days.

🐰

Whimsical Buddy

Playful characters full of personality, designed to spark imagination and become cherished playtime favorites.

About This Plush Beechcraft Bonanza V-Tail Airplane Amigurumi Pattern

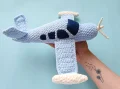
Plush Beechcraft Bonanza V-Tail Airplane Amigurumi Pattern crochet pattern - detailed view

Makes a gorgeous handmade gift for aviation fans, little ones who love planes, or anyone who appreciates a truly unique crochet project that looks like it took real skill — because it did.

Why You'll Love This Plush Beechcraft Bonanza V-Tail Airplane Amigurumi Pattern

I'll be honest — I wasn't sure how a crochet airplane would turn out when I first started mapping this one out. But the double-layer technique for the wings and tail? It's so smart. You end up with these firm, structured panels that hold their shape without any wire, and that moment when you fold the two halves together and crochet them shut is genuinely satisfying. The propeller cord method is also something I hadn't tried before, and now I want to use it everywhere. This one pushed me in the best possible way.

Plush Beechcraft Bonanza V-Tail Airplane Amigurumi Pattern step 1 Plush Beechcraft Bonanza V-Tail Airplane Amigurumi Pattern step 2 Plush Beechcraft Bonanza V-Tail Airplane Amigurumi Pattern step 3 Plush Beechcraft Bonanza V-Tail Airplane Amigurumi Pattern step 4

Switch Things Up

I'll tell you something funny — when I first read through this pattern, my brain kept saying "this is just too specific." A Beechcraft Bonanza. With a V-tail. In plush yarn. And yet the moment I finished it and set it on my desk, I completely understood why someone designed it. It looks exactly like a toy that should exist and somehow doesn't in any shop.

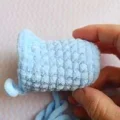
The fuselage construction is the part that surprised me most. Working increases at the center of a triangle rather than evenly around a circle felt strange at first, but by Round 11 you can actually see the triangular cross-section forming and it's one of those crochet moments that makes you laugh out loud. It just works.

The double-layer technique for the wings and tail is something I'm definitely stealing for future projects. Folding two flat panels together and crocheting them shut gives you this rigid, structured piece that holds its shape without any wire or interfacing. For the tail especially — those V-fins stay exactly where you put them.

If I were to make this again (and I probably will), I'd try it in a dusty rose or sage green plush yarn for a more vintage feel. The navy felt windows would still look gorgeous against a softer background color. You could also skip the felt entirely and embroider the windows directly onto the fuselage with a contrasting yarn — a little more work but fully washable.

One practical tip: stuff the fuselage lightly at first. You can always add more through the decreasing rounds, but if you overstuff early the fabric stretches in weird directions and the triangle shape starts to disappear. Gradual stuffing from Round 26 onward gives you much better control over the final silhouette.

Common Mistakes & How to Fix Them

✗ The triangle shape of the fuselage depends entirely on placing your increases at the true center of the triangle — if you eyeball it and get it wrong, the fuselage will twist or bulge to one side rather than forming a clean nose cone shape. Take the time to count and mark the center before Round 11.✗ When crocheting the boundary edge around the paired wing or tail pieces, skipping the corner stitch sequence (sc + hdc + sc in one loop) will cause the corners to curl inward and lose their sharp angle — don't rush through those corner stitches.✗ Stuffing the fuselage too early or too late causes problems at the narrow tail end — add filler gradually as you decrease from Round 26 onward so the shape stays firm without creating lumpy spots near Rounds 40–51.✗ The propeller blades are made using a doubled-thread cord method, and if you don't leave a full 60 cm tail before you start, you'll run out of thread before completing all 9 stitches and have to start over entirely.✗ Pinning the wings in place between Rounds 14 and 22 before sewing is non-negotiable — if you skip the pinning step and sew freehand, one wing almost always ends up sitting higher or at a different angle than the other, and it's nearly impossible to correct once sewn through.✗ The felt windows need to be positioned starting from the front window (above Round 11) and then spaced outward left and right — placing the side windows first and then trying to fit the front window in leads to uneven gaps that are very visible on the finished toy.

Plush Beechcraft Bonanza V-Tail Airplane Amigurumi Pattern

This soft, squishy airplane is the kind of project that stops people in their tracks — the moment you set it on a shelf or hand it to a kid, everyone wants to know where it came from. The triangular fuselage shape is genuinely clever, and watching it take form from a simple magic ring is one of those satisfying crochet moments you don't forget. You'll work through a plush fuselage, double-layered wings and V-tail pieces, tiny torpedo-shaped engines, a textured propeller, and hand-cut felt windows that give the whole thing that realistic cockpit look. It's a full build — and every step is worth it.

Advanced 5-8 Hours

Materials Needed for Plush Beechcraft Bonanza V-Tail Airplane Amigurumi Pattern

— Main Fabric

  • 01
    One full skein (100g / 120m) of plush chenille-style yarn in sky blue for the fuselage, wings, and tail — Yarnart Dolce or a similar bulky plush yarn works well
  • 02
    A smaller amount of the same plush yarn in a milky or off-white shade for the two engines
  • 03
    A lightweight cotton or similarly yardaged thin yarn (approximately 50g / 160m) in both blue and milky tones for sewing pieces together and making the propeller blades — a smooth, strong yarn works best here
  • 04
    A small piece of dark navy or black felt for cutting out the cockpit windows

— Tools Required

  • 01
    4 mm crochet hook for all plush yarn sections
  • 02
    1.5 mm crochet hook for the thin cotton yarn propeller and sewing work
  • 03
    Polyester fiberfill stuffing for the fuselage and engines
  • 04
    Sharp scissors for cutting yarn and trimming felt
  • 05
    Tapestry or yarn needle for weaving in ends and sewing parts together
  • 06
    Sewing needle and black thread (or fabric glue) for attaching the felt windows
  • 07
    Stitch markers for tracking round starts and center points
  • 08
    Straight pins for holding pieces in position before sewing
  • 09
    Paper or cardboard for making window templates before cutting felt

Progress Tracker

0% Complete

— 1. Fuselage :

Info :

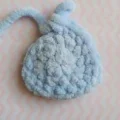
Use blue plush yarn and your 4 mm hook. The fuselage is shaped like a triangle — this effect is achieved by working 3 stitches into one loop at specific increase points. Work in continuous rounds unless otherwise noted.

Round 1 :

9 sc in MR (9)

Round 2 :

(2 sc, 3 sc in next st) * 3 (15)

Round 3 :

(4 sc, 3 sc in next st) * 3 (21)

Round 4 :

Work 21 sc through the back loop only of each stitch (21)

Round 5 :

21 sc (21)

Round 6 :

21 sc (21)

Round 7 :

21 sc (21)

Round 8 :

21 sc (21)

Round 9 :

21 sc (21)

Round 10 :

21 sc (21)

Round 11 :

You need to work 6 inc exactly at the center point of the triangle. Find the center of the triangle top before starting this round. Example placement: 7 sc, 6 inc, 8 sc (27). Your exact sc counts on either side may differ — what matters is that all 6 inc fall at the center.

Round 12 :

27 sc (27)

Round 13 :

27 sc (27)

Info :

For Round 14, the increases again need to sit at the center of the upper triangle edge. Find the center and place increases symmetrically: 1 inc at center, then 2 sc and 1 inc on each side of it. Example: 11 sc, inc, 2 sc, inc, 2 sc, inc, 9 sc. Adjust leading/trailing sc counts if your round start has shifted.

Round 14 :

11 sc, inc, 2 sc, inc, 2 sc, inc, 9 sc (30) — adjust sc counts as needed to keep increases centered

Round 15 :

30 sc (30)

Round 16 :

30 sc (30)

Round 17 :

(4 sc, inc) * 6 (36)

Round 18 :

36 sc (36)

Round 19 :

36 sc (36)

Round 20 :

36 sc (36)

Round 21 :

(10 sc, dec) * 3 (33)

Round 22 :

33 sc (33)

Round 23 :

(9 sc, dec) * 3 (30)

Round 24 :

30 sc (30)

Round 25 :

30 sc (30)

Info :

Begin stuffing the fuselage with fiberfill now and continue adding stuffing gradually as you work the remaining decreasing rounds. Do not stuff all at once.

Round 26 :

(8 sc, dec) * 3 (27)

Round 27 :

27 sc (27)

Round 28 :

27 sc (27)

Round 29 :

(7 sc, dec) * 3 (24)

Round 30 :

24 sc (24)

Round 31 :

24 sc (24)

Round 32 :

(6 sc, dec) * 3 (21)

Round 33 :

21 sc (21)

Round 34 :

21 sc (21)

Round 35 :

19 sc, dec (20)

Round 36 :

9 sc, dec, 9 sc (19)

Round 37 :

17 sc, dec (18)

Round 38 :

8 sc, dec, 8 sc (17)

Round 39 :

17 sc (17)

Round 40 :

15 sc, dec (16)

Round 41 :

16 sc (16)

Round 42 :

14 sc, dec (15)

Round 43 :

6 sc, dec, 7 sc (14)

Round 44 :

12 sc, dec (13)

Round 45 :

5 sc, dec, 6 sc (12)

Round 46 :

10 sc, dec (11)

Round 47 :

4 sc, dec, 5 sc (10)

Round 48 :

8 sc, dec (9)

Round 49 :

7 sc, dec (8)

Round 50 :

6 sc, dec (7)

Round 51 :

5 sc, dec, sl st (6). Fasten off, cut yarn, and close the remaining hole by pulling the tail through tightly.

— 2. Tail (make 4 identical panels, then join in pairs) :

Info :

Use blue plush yarn. You will crochet 4 flat rectangular panels, then pair them up (2 panels per tail fin) and join each pair by crocheting around three sides to create a firm double-layered fin. Work in turning rows; each new row begins with 1 ch. For each pair: fasten off on one panel, leave the yarn live on the other, then use the live yarn to crochet around the perimeter of both stacked panels.

Info :

Start with 6 ch. Beginning in the second ch from the hook, work across the chain.

Row 1 :

5 sc (5)

Row 2 :

Turn, ch 1, 5 sc (5)

Row 3 :

Turn, ch 1, 5 sc (5)

Row 4 :

Turn, ch 1, 5 sc (5)

Row 5 :

Turn, ch 1, 5 sc (5)

Row 6 :

Turn, ch 1, 5 sc (5)

Row 7 :

Turn, ch 1, 5 sc (5)

Row 8 :

Turn, ch 1, 5 sc (5)

Row 9 :

Turn, ch 1, 5 sc (5). Fasten off on this panel if it is the first of the pair; leave yarn live on the second panel.

Info :

Repeat Rows 1–9 to make a second identical panel. Fasten off on one panel only. On the second panel, chain 1 and do not cut the yarn. Stack the two panels flat and use the live yarn to crochet 1 sc in each stitch along three sides. At each corner, work 1 sc + 1 hdc + 1 sc all into the same corner stitch to keep the angle crisp and prevent twisting. Fasten off with a ch at the end and cut yarn. Make a second V-tail fin the same way (another pair of panels joined together).

— 3. Wings (make 4 identical panels, then join in pairs) :

Info :

Use blue plush yarn. Same double-layer construction as the tail fins — crochet 4 flat panels, pair them, and join each pair by crocheting around three sides. Work in turning rows with 1 ch at the start of each row. Start with 8 ch; begin in the second ch from hook.

Row 1 :

7 sc (7)

Row 2 :

Turn, ch 1, 7 sc (7)

Row 3 :

Turn, ch 1, 7 sc (7)

Row 4 :

Turn, ch 1, 7 sc (7)

Row 5 :

Turn, ch 1, 7 sc (7)

Row 6 :

Turn, ch 1, 7 sc (7)

Row 7 :

Turn, ch 1, 7 sc (7)

Row 8 :

Turn, ch 1, 7 sc (7)

Row 9 :

Turn, ch 1, 7 sc (7)

Row 10 :

Turn, ch 1, 7 sc (7)

Row 11 :

Turn, ch 1, 7 sc (7)

Row 12 :

Turn, ch 1, 7 sc (7)

Row 13 :

Turn, ch 1, 7 sc (7)

Row 14 :

Turn, ch 1, 7 sc (7). Fasten off on this panel if it is the first of the pair; leave yarn live on the second.

Info :

Make a second identical panel. Fasten off on one, leave live on the other. Stack flat and join by crocheting along three sides: 1 sc per stitch, and at each corner work 1 sc + 1 hdc + 1 sc in the same corner stitch. Fasten off with a ch and cut. Make a second wing the same way.

— 4. Engines (make 2) :

Info :

Use milky/off-white plush yarn. Make 2 identical pieces.

Round 1 :

5 sc in MR (5)

Round 2 :

2 sc, inc, 2 sc (6)

Round 3 :

inc, 5 sc (7)

Round 4 :

3 sc, inc, 3 sc (8)

Round 5 :

7 sc, inc (9)

Round 6 :

4 sc, inc, 4 sc (10)

Round 7 :

10 sc (10)

Round 8 :

10 sc (10)

Round 9 :

10 sc (10)

Round 10 :

10 sc (10). Begin stuffing with fiberfill and continue adding stuffing as you decrease.

Round 11 :

8 sc, dec (9)

Round 12 :

7 sc, dec (8)

Round 13 :

6 sc, dec (7)

Round 14 :

5 sc, dec (6)

Round 15 :

4 sc, dec (5). Fasten off with sl st and cut yarn. Thread the tail end inside the engine body to hide it.

— 5. Propeller Holder :

Info :

Use thin cotton yarn or any lightweight yarn with approximately 50g / 160m yardage, in milky or off-white. This piece holds the three propeller blades in place.

Round 1 :

5 sc in MR (5)

Round 2 :

4 sc, inc (6)

Round 3 :

5 sc, inc (7)

Round 4 :

6 sc, inc (8)

Round 5 :

(3 sc, inc) * 2 (10)

Round 6 :

(4 sc, inc) * 2 (12)

Round 7 :

(5 sc, inc) * 2 (14). Fasten off with sl st, leave a long tail for sewing, and cut yarn.

— 6. Propeller Blades (make 3) :

Info :

Use thin cotton or lightweight yarn in milky color with your 1.5 mm hook. These blades are made using a crocheted cord technique with a doubled thread.

Info :

Leave a tail of approximately 60 cm (23 inches) at the start. Fold the yarn so you have a doubled strand. Make your starting chain in the middle of the thread — not at the cut end.

Info :

Each stitch is worked as follows: with a loop on the hook, wrap the leaving (folded) thread over the hook, then draw the working thread through both loops to complete one sc. Repeat this action — wrap leaving thread, work sc through two loops — for a total of 9 stitches. Fasten off and cut. Make 3 blades total.

Info :

To assemble: arrange the 3 blades evenly around the center of the propeller holder. Pull both thread tails of each blade through to the inside of the holder and tie each pair of tails into 2 firm knots. Trim the long tails and tuck the short ones inside — the thread tails serve as the internal filler for the holder.

— 7. Windows (no crochet — felt) :

Info :

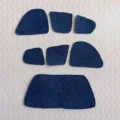
No crocheting required for the windows. Using the template shapes provided in the pattern, cut the following pieces from dark navy or black felt: 1 large front/cockpit window, and 2 copies each of the side window shapes (small and medium). The front window measures approximately 8 cm wide x 3.7 cm tall. Side windows are smaller and tapered. Cut carefully using paper or cardboard templates.

Assembly Instructions

  • Start by finding the center line of the fuselage — locate the midpoint of the increase cluster in Round 11 and use it as your reference line running nose to tail.
  • Pin each wing to the fuselage body so that the wing sits between Rounds 14 and 22, with the inner edge of each wing placed 9 sc out from the center line — meaning the two wings sit 18 sc apart from each other. Pin firmly before sewing. Sew around the full perimeter of each wing using thin blue yarn. Gather all thread ends at one point, tie with 2 knots, and bury the tails inside the fuselage.
  • Pin one engine to the tip of each wing, positioning it at the outermost end. Sew around the entire perimeter of each engine using thin milky yarn. Pull all thread tails through to a single exit point, knot twice, and hide the excess inside the wing or engine.
  • Position the two V-tail fins at the rear of the fuselage, roughly 4–5 rows in from the back tip. Angle them so they meet in the middle and form a V shape when viewed from behind. Pin in place, then sew along the perimeter of each fin using strong thin thread. Knot all thread tails together twice and hide them inside the fuselage.
  • Attach the propeller assembly to the nose of the fuselage at the center point between Rounds 2 and 3. Pin securely, then sew all the way around the holder's edge using the long tail left during construction.
  • Place the large front cockpit window above Round 11 on the nose section of the fuselage. Use it as your anchor point and space the side windows evenly to the left and right. Once satisfied with the spacing, sew all windows in place with black sewing thread, or glue them if the toy is intended for display rather than children's play.

Important Notes

  • 💡This pattern requires you to locate the true visual center of the fuselage triangle for Rounds 11 and 14 — do not rely solely on stitch count from the round start, since the beginning of each round may shift. Mark the center with a pin or marker before working any increase rounds.
  • 💡The back-loop-only round (Round 4) is what creates the ridgeline that defines the triangular nose — do not skip it or work through both loops, or the nose shape will not form correctly.
  • 💡When joining the double-layered wings and tail panels, the corner sequence of sc + hdc + sc worked into a single corner stitch is essential. Without it, the corners will curl and the pieces will lose their flat, structured shape.
  • 💡The propeller blades use a cord technique with a doubled thread — if you have never done this before, practice the motion on scrap yarn first so you understand the rhythm of alternating the leaving thread and the working thread before committing to the final pieces.
  • 💡Use pins generously throughout assembly. With plush yarn, it is very hard to unpick sewn seams cleanly — getting the placement right before the needle goes in saves a lot of frustration.
  • 💡If this toy is intended for a child, always sew the felt windows rather than gluing them. Glued felt can peel away from plush yarn over time. Use a matching or contrasting sewing thread and small, close stitches around the perimeter of each window piece.

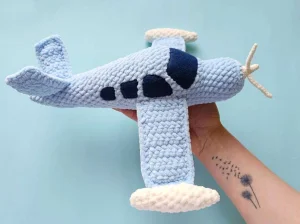
There's something genuinely special about finishing a crochet project that looks this specific — not just a cute round animal, but an actual recognizable aircraft with wings, a V-tail, tiny engines, and cockpit windows. It's the kind of thing that sits on a bookshelf and makes people do a double take. 🛩️ Whether you're making it for a kid who's obsessed with planes, a partner who flies, or just yourself because why not — this little Bonanza is going to be so worth every round. Take your time with the assembly, trust the process, and enjoy every stitch. You've got this! 🧶✨
You ask,

we answer.

FAQs

Can I use regular acrylic yarn instead of plush chenille yarn for this pattern?

You can, but the finished size will be smaller and the look will be quite different — the chunky, cloud-like texture of plush yarn is a big part of what makes this airplane so soft and toylike. If you use DK or worsted acrylic, the fuselage will lose that rounded plushness and the wings will be thinner and floppier. If you do substitute, stick to a similarly bulky yarn and consider sizing up your hook slightly.

The pattern says to find the 'center of the triangle' for the increases — how do I actually do that?

The fuselage forms a triangular cross-section, with one point at the top and a flat base. Before you start Round 11, hold the piece up and look at it from the front — you should be able to see the highest point of the triangle. Count stitches from that peak outward in each direction and mark the center with a stitch marker. All 6 increases need to cluster right at that peak. The pattern gives an example (7 sc, 6 inc, 8 sc) but your count may differ slightly depending on where your round naturally started.

I've never made a crocheted cord before — is the propeller technique difficult?

It has a bit of a learning curve for the first stitch or two, but once you get the rhythm of wrapping the leaving thread and then working through with the live thread, it clicks fast. The blades are only 9 stitches each, so even if your first attempt is wonky, you haven't lost much time. Practice with a scrap piece of thin yarn before starting your actual propeller blades.

How do I get the V-tail to stay in the right angled position once it's sewn on?

Pinning is everything here. Place both tail fins at the rear of the fuselage (4–5 rows from the back tip), angling them outward so they meet in the center when viewed from behind. Use several pins on each fin and step back to check the V-shape from multiple angles before sewing a single stitch. Sewing through both layers of the double-panel fin and into the fuselage with thin, strong yarn will keep them firmly in place.

What's the finished size of this plane and can I make it bigger?

Worked in Yarnart Dolce plush yarn with a 4 mm hook, the fuselage is about 30 cm (11.8 in) long and the wingspan also reaches about 30 cm (11.8 in). To make it larger, you could go up to a 5 mm hook with the same yarn — expect roughly 15–20% more size. Keep in mind the felt window templates would also need to be scaled up accordingly.