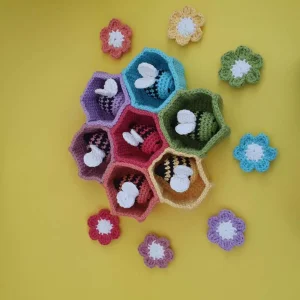
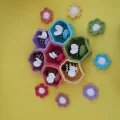
Create a beautiful, interactive learning game for the little ones in your life. This pattern guides you through making seven adorable magnetic bees, matching nesting bowls, and sweet matching flowers. It is a wonderful way to combine your love for crochet with a functional, educational toy that helps toddlers practice color matching and fine motor skills.
Progress Tracker
0% Complete
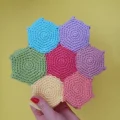
— 1. Nesting Bowls (Make 7) :
Round 1 :
Start with your chosen rainbow color. Work 6 sc into a MR, then sl st to the first sc to join (6)
Round 2 :
Work 1 inc into each of the next 6 stitches (12)
Round 3 :
Repeat 6 times: (1 sc, 1 spInc) (18)
Round 4 :
Repeat 6 times: (2 sc, 1 spInc) (24)
Round 5 :
Repeat 6 times: (3 sc, 1 spInc) (30)
Round 6 :
Repeat 6 times: (4 sc, 1 spInc) (36)
Round 7 :
Repeat 6 times: (5 sc, 1 spInc) (42)
Round 8 :
Work in BLO: sc in each stitch around, including the extra chain from the spInc steps (48)
Round 9-16 :
Work 1 sc in each of the 48 stitches around (48)
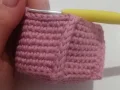
Bowl Edges :
Repeat 6 times to form the structural edges: sl st in next 8 stitches, work 9 sc down the side over rounds 16 to 8 (ensuring the final sc lands in the front loop of round 8), then work 10 sl st back up the back of those single crochets to return to the top edge.
— 2. Magnet Pockets (Make 14) :
Round 1 :
Using your main color, work 6 sc into a MR, sl st to the first sc to join, and leave a long tail for sewing (6)
Info :
If your magnets are larger than 2 cm, add an extra round: work 1 inc in each of the 6 stitches (12)
— 3. Wings (Make 2 per bee) :
Round 1 :
Using white yarn, work 6 sc into a MR (6)
Round 2 :
Work 1 inc in each of the next 6 stitches, sl st to the first sc to join, and leave a sewing tail (12)
Info :
Sew the two wings together at their bases, leaving a tail to attach them to the bee body later.
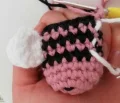
— 4. Bee Body (Make 7) :
Round 1 :
Using the matching rainbow color, work 6 sc into a MR (6)
Round 2 :
Work 1 inc in each of the next 6 stitches (12)
Round 3 :
Repeat 6 times: (1 sc, 1 inc) (18)
Info :
Place a magnet inside one of your pocket supports. Sew this support securely to the inside of the bee head over rounds 1 and 2. Double-check that the polarities of all magnets match before sewing.
Round 4-5 :
Work 1 sc in each of the 18 stitches around (18)
Info :
Embroider the eyes using black yarn between the increases of Round 2, or install 5mm safety eyes if using them.
Round 6 :
Switch to black yarn. Work 1 sc in each of the 18 stitches around (18)
Round 7 :
Switch back to the main color. Work 1 sc in each of the 18 stitches around (18)
Round 8 :
Switch to black yarn. Work 1 sc in each of the 18 stitches around (18)
Round 9 :
Switch back to the main color. Work 1 sc in each of the 18 stitches around (18)
Round 10 :
Switch to black yarn. Repeat 3 times: (4 sc, 1 dec) (15)
Info :
Sew the pair of wings securely between rounds 7 and 9, making sure they are perfectly centered relative to the eyes. Begin stuffing the body firmly with fiberfill.
Round 11 :
Switch to the main color. Repeat 3 times: (3 sc, 1 dec) (12)
Round 12 :
Switch to black yarn. Repeat 3 times: (2 sc, 1 dec) (9)
Round 13 :
Continuing with black yarn, repeat 3 times: (1 sc, 1 dec) (6)
Round 14 :
Thread your yarn tail onto a needle, pass through the front loops of all 6 stitches, pull firmly to close the opening, and weave in your end.
— 5. Magnetic Flowers (Make 7) :
Round 1 :
Using white yarn, work 13 dc into a MR, then sl st into the second dc to join. This leaves 12 active stitches for the petals (12)
Round 2 :
Switch to the matching rainbow color. Repeat 6 times around the white center: [work 2 sc in the current stitch, 3 tc in the next stitch, 2 sc in the current stitch, sl st in the next stitch]
I hope you have the absolute best time bringing these little bees and their colorful homes to life! Watching a child play with something you made with your own two hands is truly the most rewarding feeling in the world. Don't forget to share your finished sorting sets with our crafting community—I cannot wait to see the beautiful rainbow colors you choose for your custom set. Happy stitching, friend! 🧶✨