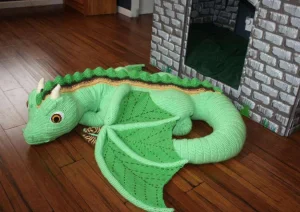
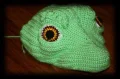
Prepare to embark on the ultimate crafting odyssey with this life-sized dragon. You aren't just making a toy; you're creating an eight-foot-long heirloom that doubles as the most magical floor cushion you've ever seen. It’s a project that requires patience and plenty of yarn, but the look of wonder on anyone's face when they see it curled up in your home is worth every single stitch. Get your largest basket ready for all that yarn!
Progress Tracker
0% Complete
— 1. Body :
Info :
Use two strands of Limelight yarn held together throughout the body.
Round 1 :
Starting in the 2nd ch from the hook, work 6 sc.
Round 2 :
Work 1 inc in every stitch around (12).
Round 3 :
Repeat (1 sc, 1 inc) 6 times (18).
Round 4 :
Repeat (2 sc, 1 inc) 6 times (24).
Round 5 :
Repeat (3 sc, 1 inc) 6 times (30).
Round 6 :
Repeat (4 sc, 1 inc) 6 times (36).
Round 7 :
Repeat (5 sc, 1 inc) 6 times (42).
Round 8 :
Repeat (6 sc, 1 inc) 6 times (48).
Round 9 :
Repeat (7 sc, 1 inc) 6 times (54).
Round 10 :
Repeat (8 sc, 1 inc) 6 times (60).
Round 11 :
Repeat (9 sc, 1 inc) 6 times (66).
Round 12 :
Repeat (10 sc, 1 inc) 6 times (72).
Round 13 :
Repeat (11 sc, 1 inc) 6 times (78).
Round 14 :
Repeat (12 sc, 1 inc) 6 times (84).
Round 15 :
Repeat (13 sc, 1 inc) 6 times (90).
Round 16 :
Repeat (14 sc, 1 inc) 6 times (96).
Round 17 :
Repeat (15 sc, 1 inc) 6 times (102).
Round 18 :
Repeat (16 sc, 1 inc) 6 times (108).
Round 19 :
Repeat (17 sc, 1 inc) 6 times (114).
Round 20 :
Repeat (18 sc, 1 inc) 6 times (120).
Round 21 :
Work 1 sc in each stitch around (120).
Round 22 :
Work 1 sc in each stitch around (120).
Round 23 :
Work 1 sc in each stitch around (120).
Round 24 :
Work 1 sc in each stitch around (120).
Round 25 :
Work 1 sc in each stitch around (120).
Round 26 :
Work 1 sc in each stitch around (120).
Row 27 :
Work 50 sc, then 1 ss. ch 1 and turn your work.
Row 28 :
Part A: Skip the first st, work 2 sc, 45 hdc, 2 sc, 1 ss. ch 1 and turn.
Info :
Part B: Skip the first st, work 2 sc, 45 hdc, 2 sc. Now continue back into the main round with 69 sc (118).
Round 29 :
Work 1 sc in each stitch around (118).
Round 30 :
Work 1 sc in each stitch around (118).
Round 31 :
Work 1 sc in each stitch around (118).
Round 32 :
Work 1 sc in each stitch around (118).
Round 33 :
Work 1 sc in each stitch around (118).
Round 34 :
Work 1 sc in each stitch around (118).
Round 35 :
Work 1 sc in each stitch around (118).
Round 36 :
Work 1 sc in each stitch around (118).
Row 37 :
Work 48 sc, 1 ss. ch 1 and turn.
Row 38 :
Part A: Skip next, 2 sc, 43 hdc, 2 sc, 1 ss. ch 1 and turn.
Info :
Part B: Skip next, 2 sc, 43 hdc, 71 sc (114).
Round 39 :
Repeat (56 sc, 1 sc2tog) twice (114).
Round 40 :
Work 1 sc in each stitch around (114).
Round 41 :
Work 1 sc in each stitch around (114).
Round 42 :
Work 1 sc in each stitch around (114).
Round 43 :
Work 1 sc in each stitch around (114).
Round 44 :
Work 1 sc in each stitch around (114).
Round 45 :
Work 1 sc in each stitch around (114).
Round 46 :
Work 1 sc in each stitch around (114).
Row 47 :
Work 45 sc, 1 ss. ch 1 and turn.
Row 48 :
Part A: Skip next, 2 sc, 40 hdc, 2 sc, 1 ss. ch 1 and turn.
Info :
Part B: Skip next, 2 sc, 40 hdc, 70 sc (110).
Round 49 :
Repeat (54 sc, 1 sc2tog) twice (110).
Round 50 :
Work 1 sc in each stitch around (110).
Round 51 :
Work 1 sc in each stitch around (110).
Round 52 :
Work 1 sc in each stitch around (110).
Round 53 :
Work 1 sc in each stitch around (110).
Round 54 :
Work 1 sc in each stitch around (110).
Round 55 :
Work 1 sc in each stitch around (110).
Round 56 :
Work 1 sc in each stitch around (110).
Round 57 :
Repeat (9 sc, 1 sc2tog) 10 times (100).
Round 58-82 :
Work 1 sc in each stitch around for 25 rounds (100).
Round 83 :
Repeat (8 sc, 1 sc2tog) 10 times (90).
Round 84-93 :
Work 1 sc in each stitch around for 10 rounds (90).
Round 94 :
Repeat (7 sc, 1 sc2tog) 10 times (80).
Round 95-99 :
Work 1 sc in each stitch around for 5 rounds (80).
Round 100 :
Repeat (6 sc, 1 sc2tog) 10 times (70).
Round 101-105 :
Work 1 sc in each stitch around for 5 rounds (70).
Round 106 :
Repeat (5 sc, 1 sc2tog) 10 times (60).
Round 107 :
Repeat (4 sc, 1 sc2tog) 10 times (50).
Round 108 :
Repeat (3 sc, 1 sc2tog) 10 times (40).
Round 109 :
Repeat (2 sc, 1 sc2tog) 10 times (30).
Round 110 :
Repeat (4 sc, 1 sc2tog) 5 times (25). Begin stuffing.
Round 111 :
Repeat (3 sc, 1 sc2tog) 5 times (20).
Round 112 :
Repeat (2 sc, 1 sc2tog) 5 times (15).
Round 113 :
Repeat (1 sc, 1 sc2tog) 5 times (10).
Round 114 :
Work 5 sc2tog. fo and weave in ends (5).
— 2. Back Legs :
Info :
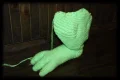
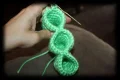
Make 2 using double strands of Limelight. Start with three separate toes for each foot.
Toes R1 :
Work 6 sc into a mr.
Toes R2 :
Work 1 inc in each stitch (12).
Toes R3-4 :
Work 1 sc in each stitch (12).
Toes Row 5 :
Work 1 ss, ch 1, turn. Work 1 ss, 3 sc, 1 ss (5). ch 1 and turn.
Toes Row 6 :
Work 1 ss, 3 sc, 1 ss (5). Place marker.
Toes R7 :
Work 1 sc in each stitch (12).
Toes R8 :
Repeat (1 inc, 2 sc) 4 times (16).
Toes R9 :
Work 1 sc in each stitch (16).
Toes Row 10 :
Work 1 ss, ch 1, turn. Work 1 ss, 6 sc, 1 ss (8). ch 1 and turn.
Toes Row 11 :
Work 1 ss, 6 sc, 1 ss (8). Place marker.
Toes R12 :
Work 1 sc in each stitch (16).
Toes R13 :
Repeat (1 inc, 3 sc) 4 times (20).
Toes R14-15 :
Work 1 sc in each stitch (20). fo the first two toes, but keep the third on your hook.
Round 16 :
Join toes: 10 sc on 3rd toe, 10 sc on 2nd toe, 20 sc around 1st toe, 10 sc on opposite of 2nd toe, 10 sc on opposite of 3rd toe (60).
Round 17-19 :
Work 1 sc in each stitch for 3 rounds (60).
Round 20 :
Work 9 sc, sc2tog, 8 sc, sc2tog, 17 sc, sc3tog, 7 sc, sc3tog, 9 sc (54).
Round 21-22 :
Work 1 sc in each stitch (54).
Round 23 :
Work 8 sc, sc2tog, 7 sc, sc2tog, 15 sc, sc3tog, 7 sc, sc3tog, 7 sc (48).
Round 24-25 :
Work 1 sc in each stitch (48).
Round 26 :
Work 7 sc, sc2tog, 7 sc, sc2tog, 12 sc, sc3tog, 7 sc, sc3tog, 5 sc (42).
Round 27-46 :
Work 1 sc in each stitch for 20 rounds (42).
Info :
Refer to the PDF for the complex heel shaping rows (Rows 47-48) and the subsequent leg rounds up to Round 97. fo and llt.
— 3. Tail :
Info :
Use double strands of Limelight. Begin by making a ring.
Setup :
ch 85 and join with a ss to form a large ring.
Round 1 :
Work 1 sc in each chain stitch (85).
Round 2 :
Work 83 sc, then 1 sc2tog (84).
Round 3 :
Work 82 sc, then 1 sc2tog (83).
Round 4 :
Work 81 sc, then 1 sc2tog (82).
Round 5 :
Work 80 sc, then 1 sc2tog (81).
Round 6 :
Work 79 sc, then 1 sc2tog (80).
Info :
The tail continues with gradual decreases every few rounds for 165 rounds total. Refer to the PDF for exact stitch counts at each stage.
Round 165 :
Work 4 sc2tog, 1 ss. fo and llt (4).
— 4. Head & Face :
Info :
Use double strands of Limelight for the head.
Round 1 :
Work 6 sc into a mr.
Round 2 :
Work 1 inc in each stitch (12).
Round 3-12 :
Continue increasing by 6 stitches every round until you have 72 stitches.
Round 13-22 :
Follow the PDF for the specific increase pattern to reach 96 stitches.
Round 23-28 :
Continue increasing by 6 stitches per round until you reach 132 stitches.
Round 29-34 :
Work 1 sc in each stitch for 6 rounds (132).
Round 35-51 :
Gradually decrease back down to 30 stitches.
Round 52 :
Repeat (3 hdc, 1 sc2tog) 6 times (24).
Round 53 :
Repeat (1 hdc2tog, 1 sc2tog) 6 times (12). Stuff head firmly.
Round 54 :
Work 6 sc2tog. fo (6).
You’ve done it! You’ve brought a sleeping giant to life. This dragon is more than just a crochet project; it’s a companion that will guard your home and provide the coziest spot for many naps to come. I hope you enjoyed every minute of this epic journey, even the parts with the twenty-second skein of yarn! Don't forget to give your new friend a name and a special spot in your house where he can truly shine. Happy crafting, and may your dragon bring a little extra magic to your days! 🧶🐉✨