About This Spooky Cute Voodoo Doll Amigurumi Pattern
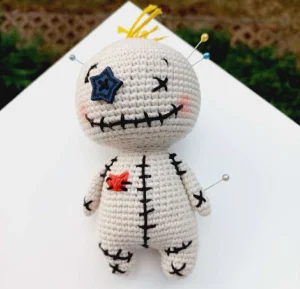
This quirky little doll makes a fantastic conversation piece for your bookshelf, or a wonderfully unique gift for anyone who loves spooky-cute style.
Ideal for those with basic crocheting experience, featuring slightly more advanced stitches and techniques to expand your skills.
Fits nicely into a free afternoon — 2 to 5 hours of focused, enjoyable crocheting.
Playful characters full of personality, designed to spark imagination and become cherished playtime favorites.
This quirky little doll makes a fantastic conversation piece for your bookshelf, or a wonderfully unique gift for anyone who loves spooky-cute style.
I absolutely love how much personality you can pack into such a small project. The base doll is simple and relaxing to crochet, but the real magic happens when you start embroidering the stitches and sewing on the eye patch—it feels like bringing a little character to life with your own hands.
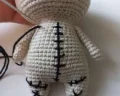
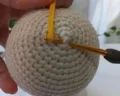
There's something so incredibly charming about a handmade voodoo doll, isn't there? I remember making my very first one years ago during a rainy October afternoon, and it instantly became one of my favorite quirky makes. This pattern is designed to let your creativity run wild, especially when it comes to the finishing details.
One of my favorite ways to customize this little guy is by playing around with different colors for the heart and the eye patch. Instead of the classic red heart, why not try a bright teal or a sunny yellow? You can also use mismatched buttons from your spare button jar to give him an extra dose of rustic, scrap-busting personality.
When you're doing the embroidery, don't worry about making the stitches perfect. In fact, the more uneven and messy the stitches are, the more character your doll will have! It's one of those rare projects where 'imperfect' is actually the goal, which makes it wonderfully relaxing to work on.
Bring a touch of whimsical, gothic charm to your crochet hook with this delightfully quirky little voodoo doll. He is the ultimate project for playing with textures, simple embroidery, and fun button embellishments. You will love how quickly this little character comes together, making him perfect for last-minute gifting or a fun weekend treat.
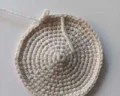
Start with 6 sc into a mr (6)
Work 1 inc in each of the 6 stitches around (12)
Repeat [1 sc, 1 inc] 6 times around (18)
Repeat [1 inc, 2 sc] 6 times around (24)
Repeat [3 sc, 1 inc] 6 times around (30)
Work 2 sc, 1 inc, then repeat [4 sc, 1 inc] 5 times, finishing the round with 2 sc (36)
Repeat [5 sc, 1 inc] 6 times around (42)
Work 3 sc, 1 inc, then repeat [6 sc, 1 inc] 5 times, finishing the round with 3 sc (48)
Repeat [7 sc, 1 inc] 6 times around (54)
Work 4 sc, 1 inc, then repeat [8 sc, 1 inc] 5 times, finishing the round with 4 sc (60)
Work 1 sc in each stitch around for these 13 rounds (60)
Repeat [3 sc, 1 dec] 12 times around (48)
Repeat [2 sc, 1 dec] 12 times around (36)
Work 2 sc, 1 dec, then repeat [4 sc, 1 dec] 5 times, finishing the round with 2 sc (30)
Repeat [3 sc, 1 dec] 6 times around (24)
Work 1 sc in each stitch around (24)
Make a mr and work 7 sc into it (7)
Work 1 inc in each of the 7 stitches around (14)
Work 1 sc in each stitch around for these 3 rounds (14)
After completing the first leg, fasten off and cut the yarn. When you finish the second leg, do not cut the yarn—you will continue directly into the body from here.
Ch 4 from the second leg, then join to the first leg with a sc. Work 2 sc on the first leg, then repeat [1 inc, 5 sc] twice. Next, work along the ch-4 space: 1 inc, 2 sc, 1 inc. Continue onto the second leg: repeat [5 sc, 1 inc] twice, followed by 2 sc. Finally, work 4 sc along the opposite side of the ch-4 (42)
Repeat [13 sc, 1 inc] 3 times around (45)
Work 1 sc in each stitch around for these 5 rounds (45)
Repeat [13 sc, 1 dec] 3 times around (42)
Work 1 sc in each stitch around for these 3 rounds (42)
Repeat [5 sc, 1 dec] 6 times around (36)
Work 1 sc in each stitch around for these 3 rounds (36)
Repeat [4 sc, 1 dec] 6 times around (30)
Work 1 sc in each stitch around for these 3 rounds (30)
Repeat [3 sc, 1 dec] 6 times, then sl st to finish (24)
Fasten off, leaving a generous yarn tail for sewing. Stuff the body firmly with fiberfill, then sew the head and body together securely.
Start with 6 sc into a mr (6)
Repeat [1 sc, 1 inc] 3 times around (9)
Work 1 sc in each stitch around for these 9 rounds (9)
Fasten off, leaving a tail for sewing. Do not put any stuffing inside the arms to keep them floppy and cute.
I absolutely adore how this little voodoo doll turns out, and I hope you do too! He has the perfect mix of spooky charm and sweet whimsy that makes him such a joy to stitch up. Whether you keep him on your desk for a bit of crafty protection or gift him to a friend who loves quirky decor, he's sure to bring a smile. Don't forget to add those colorful pins for the ultimate finishing touch! Happy crocheting, my friends, and may your stitches always be filled with love! 🧶✨
Absolutely! If you want a different look, you can use a 10mm safety eye in place of the button, or even embroider both eyes as 'X's for a more traditional stitched doll appearance.
The key is stuffing! Make sure to pack the neck area of both the head and the body extremely firmly. You can also insert a rolled-up piece of felt or a plastic fabric support inside the neck to keep it upright.
Use a sharp yarn needle and a long strand of black yarn. Keep your tension relaxed when pulling the embroidery stitches; if you pull too tight, it will pucker the crochet fabric and distort the shape.
Yes! You can easily scale this up by using worsted weight yarn with a 3.5mm hook, or even super bulky blanket yarn with an 8.0mm hook for a giant, huggable voodoo plushie.
