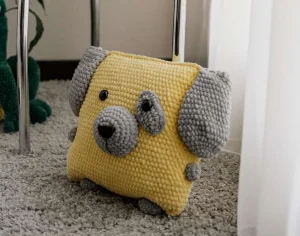
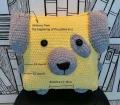
This cuddly little guy is the perfect mix of a snuggly pillow and a loyal pup. I designed him to be super soft using velvet yarn, making him the ultimate naptime buddy for kids or a quirky accent for your sofa. You'll love how quickly the main body comes together, and the final result is just so huggable!
Progress Tracker
0% Complete
— 1. Main Pillow Body :
Round 1 :
Start by making 90 ch and joining them into a circle with a sl st to the very first ch.
Round 2-35 :
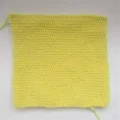
Work 90 sc around for each of these rounds to build the height of your pillow.
Info :
Close the top of the pillow by working 45 sc through both layers at once, or use a needle and yellow acrylic yarn to sew the edge shut. Secure your thread and tuck the end inside.
— 2. Ears (Make 2) :
Round 1 :
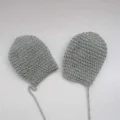
Using the gray plush yarn, create a MR and work 6 sc into it (6).
Round 2 :
Work an inc in every stitch around (12).
Round 3 :
Repeat a pattern of 1 sc followed by an inc 6 times (18).
Round 4 :
Repeat a pattern of 2 sc followed by an inc 6 times (24).
Round 5 :
Repeat a pattern of 3 sc followed by an inc 6 times (30).
Round 6 :
Repeat a pattern of 4 sc followed by an inc 6 times (36).
Round 7-11 :
Work 36 sc evenly around for each of these 5 rounds (36).
Round 12 :
Work 19 sc, then 1 dec, followed by 13 sc and one more dec (34).
Round 13 :
Work 34 sc evenly around (34).
Round 14 :
Work 19 sc, then 1 dec, followed by 11 sc and one more dec (32).
Round 15 :
Work 18 sc, then 1 dec, followed by 10 sc and one more dec (30).
Round 16 :
Work 30 sc evenly around (30).
Round 17 :
Work 17 sc, then 1 dec, followed by 9 sc and one more dec (28).
Round 18-19 :
Work 28 sc evenly around for these final two rounds (28).
Info :
Flatten the ear and sew the opening shut with 14 sc across. Leave a long tail for attaching to the head.
— 3. Legs (Make 2) :
Round 1 :
Using gray yarn, work 6 sc into a MR (6).
Round 2 :
Work an inc in every stitch around (12).
Round 3 :
Repeat a pattern of 1 sc followed by an inc 6 times (18).
Round 4 :
Work 18 sc around and leave a long tail for sewing (18).
— 4. Arms (Make 2) :
Round 1 :
Using gray yarn, work 6 sc into a MR (6).
Round 2 :
Work an inc in every stitch around (12).
Round 3 :
Work 12 sc around and leave a long tail for sewing (12).
— 5. Muzzle :
Round 1 :
In gray yarn, work 6 sc into a MR (6).
Round 2 :
Work an inc in every stitch around (12).
Round 3 :
Repeat a pattern of 1 sc followed by an inc 6 times (18).
Round 4 :
Repeat a pattern of 2 sc followed by an inc 6 times (24).
Round 5 :
Repeat a pattern of 3 sc followed by an inc 6 times (30).
Round 6 :
Repeat a pattern of 4 sc followed by an inc 6 times (36).
Round 7 :
Repeat a pattern of 5 sc followed by an inc 6 times (42).
Info :
Leave a long tail for sewing, then use black acrylic yarn to embroider a nose and mouth onto the center.
— 6. Eye Spot :
Round 1 :
Ch 9. Starting in the 2nd ch from the hook, work 7 sc. In the last ch, work 3 sc. Rotate to work on the other side: 7 sc, then 1 inc (19).
Round 2 :
Work 1 inc, 6 sc, 3 inc in a row, 7 sc, 1 inc, and 1 sc (24).
Round 3 :
Work 1 inc, 9 sc, 1 inc, 2 sc, and finish with a sl st.
I can't wait to see your finished puppy pillows! This is one of those patterns that really comes to life once you add the facial features. Whether you're making this for a nursery or just a fun DIY project for yourself, the result is always so rewarding. Don't forget to give your pup a name once he's all stitched up! Happy hooking, and enjoy every stitch of your new handmade friend. 🧶🐶✨