🧢 Beautiful ✨ Detailed πŸ’ Adorable

Sweet Sit-and-Stay Bunny Amigurumi Pattern

Sweet Sit-and-Stay Bunny Amigurumi Pattern
3.9β˜…Rating
4-5 HoursTime Needed
3.1KMade This
βœ‚οΈ

Intermediate Level

Ideal for those with basic crocheting experience, featuring slightly more advanced stitches and techniques to expand your skills.

⏱️

Quick Craft

Fits nicely into a free afternoon β€” 2 to 5 hours of focused, enjoyable crocheting.

🐰

Whimsical Buddy

Playful characters full of personality, designed to spark imagination and become cherished playtime favorites.

About This Sweet Sit-and-Stay Bunny Amigurumi Pattern

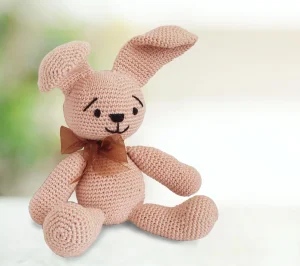
Sweet Sit-and-Stay Bunny Amigurumi Pattern crochet pattern - detailed view

This project makes a wonderful baby shower gift or a thoughtful addition to an Easter basket. It's a classic design that never goes out of style and looks beautiful in any color palette you choose.

Why You'll Love This Sweet Sit-and-Stay Bunny Amigurumi Pattern

I honestly couldn't stop smiling while making this little one. The way the legs are shaped to create that perfect sitting look is so clever, and sewing the ears on is when the bunny's personality really starts to shine through. It's a rhythmic, soothing make that isn't too taxing but keeps you engaged from start to finish.

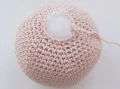
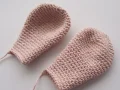
Sweet Sit-and-Stay Bunny Amigurumi Pattern step 1 Sweet Sit-and-Stay Bunny Amigurumi Pattern step 2 Sweet Sit-and-Stay Bunny Amigurumi Pattern step 3 Sweet Sit-and-Stay Bunny Amigurumi Pattern step 4

Switch Things Up

I’ve always found that bunnies are the quintessential crochet projectβ€”there’s just something about those long ears that lets you pack so much personality into a few rounds of stitches. When I was working on this specific design, I really wanted to capture that 'heirloom' feel, which is why I opted for the embroidered face instead of plastic eyes. It gives it such a gentle, soulful look, don't you think?

If you want to add your own flair, try using a variegated yarn for the body to give it a 'calico' effect, or even crochet a tiny bow tie or a flower to tuck behind one of the ears. I actually made one in a dusty lavender yarn recently, and it looked absolutely stunning on a bookshelf. One little tip from my craft room to yours: when you're sewing the head to the body, go around the neck twice. It adds that extra bit of stability so the head doesn't wobble over time. I can't wait to see the colors you choose for your bunnies! It's such a joy to see how the same pattern can look so different in everyone's unique style.

Common Mistakes & How to Fix Them

βœ— When working on the legs at Round 11, the cluster of decreases creates the foot shapeβ€”if you lose count here, the bunny might look like it has two left feet!βœ— It's tempting to stuff the ears, but they actually look best left flat so they can flop naturally; stuffing them makes them stand up too stiffly.βœ— Watch your tension when embroidering the nose and mouthβ€”pulling the black yarn too tight will cause the face to pucker and lose its sweetness.βœ— The arms are quite narrow, so try to stuff them as you go; if you wait until the end, it's very difficult to get the filling all the way to the hands.

Sweet Sit-and-Stay Bunny Amigurumi Pattern

You're going to love bringing this floppy-eared friend to life! It's one of those projects that feels like a warm hug as you work on it. This bunny has a classic sitting pose that makes it perfect for nursery shelves or as a cozy gift. I've designed it to be sturdy yet soft, with just the right amount of personality in those embroidered features. It's a wonderful way to spend a quiet afternoon with your hook and some soft yarn.

Intermediate 4-5 Hours

Materials Needed for Sweet Sit-and-Stay Bunny Amigurumi Pattern

β€” Main Fabric

  • 01
    Approximately 240 meters of Sport weight yarn in a soft cream or peach shade
  • 02
    About 1 meter of black yarn for the facial details

β€” Tools Required

  • 01
    2.5mm to 2.75mm crochet hook (US size C)
  • 02
    Large-eyed sewing needle for assembly
  • 03
    High-quality polyester fiberfill stuffing
  • 04
    Stitch markers to track your spiral rounds
  • 05
    Scissors

Progress Tracker

0% Complete

β€” 1. Head :

Info :

Using your main cream yarn, start with a ch2.

Round 1 :

In the 2nd ch from your hook, work 6sc (6)

Round 2 :

Place 2sc into every st around (12)

Round 3 :

Repeat (1sc, inc) 6 times (18)

Round 4 :

Repeat (2sc, inc) 6 times (24)

Round 5 :

Repeat (3sc, inc) 6 times (30)

Round 6 :

Repeat (4sc, inc) 6 times (36)

Round 7 :

Repeat (5sc, inc) 6 times (42)

Round 8 :

Repeat (6sc, inc) 6 times (48)

Round 9 :

Repeat (7sc, inc) 6 times (54)

Round 10 :

Repeat (8sc, inc) 6 times (60)

Round 11 :

Repeat (9sc, inc) 6 times (66)

Round 12-20 :

sc in every st around (66)

Round 21 :

Repeat (sc2tog, 9sc) 6 times (60)

Round 22 :

Repeat (sc2tog, 8sc) 6 times (54)

Round 23 :

Repeat (sc2tog, 7sc) 6 times (48)

Round 24 :

Repeat (sc2tog, 6sc) 6 times (42)

Round 25 :

Repeat (sc2tog, 5sc) 6 times (36)

Round 26 :

Repeat (sc2tog, 4sc) 6 times (30)

Round 27 :

Repeat (sc2tog, 3sc) 6 times (24)

Round 28 :

Repeat (sc2tog, 2sc) 6 times (18)

Finish :

Fasten off and stuff the head firmly.

β€” 2. Body :

Info :

Using your main cream yarn, start with a ch2.

Round 1 :

In the 2nd ch from your hook, work 6sc (6)

Round 2 :

Place 2sc into every st around (12)

Round 3 :

Repeat (1sc, inc) 6 times (18)

Round 4 :

Repeat (2sc, inc) 6 times (24)

Round 5 :

Repeat (3sc, inc) 6 times (30)

Round 6 :

Repeat (4sc, inc) 6 times (36)

Round 7 :

Repeat (5sc, inc) 6 times (42)

Round 8 :

Repeat (6sc, inc) 6 times (48)

Round 9 :

Repeat (7sc, inc) 6 times (54)

Round 10-17 :

sc in every st around (54)

Round 18 :

Repeat (sc2tog, 7sc) 6 times (48)

Round 19 :

sc in every st around (48)

Round 20 :

Repeat (sc2tog, 6sc) 6 times (42)

Round 21 :

sc in every st around (42)

Round 22 :

Repeat (sc2tog, 5sc) 6 times (36)

Round 23 :

sc in every st around (36)

Round 24 :

Repeat (sc2tog, 4sc) 6 times (30)

Round 25-27 :

sc in every st around (30)

Round 28 :

Repeat (sc2tog, 3sc) 6 times (24)

Round 29 :

Repeat (sc2tog, 2sc) 6 times (18)

Finish :

Fasten off, leave a long tail for sewing, and stuff the body.

β€” 3. Arms :

Info :

Make two. Using cream yarn, start with a ch2.

Round 1 :

In the 2nd ch from your hook, work 6sc (6)

Round 2 :

Place 2sc into every st around (12)

Round 3 :

Repeat (1sc, inc) 6 times (18)

Round 4 :

Repeat (2sc, inc) 6 times (24)

Round 5-9 :

sc in every st around (24)

Round 10 :

Repeat (sc2tog, 4sc) 4 times (20)

Round 11-20 :

sc in every st around (20)

Round 21 :

Repeat (sc2tog, 3sc) 4 times (16)

Info :

Begin stuffing the arm lightly and continue stuffing as you go.

Round 22 :

sc in every st around (16)

Round 23 :

Repeat (sc2tog, 6sc) 2 times (14)

Round 24 :

Repeat (sc2tog, 5sc) 2 times (12)

Round 25 :

Repeat (sc2tog, 2sc) 3 times (9)

Finish :

Fasten off and leave a long tail to attach to the body.

β€” 4. Legs :

Info :

Make two. Using cream yarn, start with a ch2.

Round 1 :

In the 2nd ch from your hook, work 6sc (6)

Round 2 :

Place 2sc into every st around (12)

Round 3 :

Repeat (1sc, inc) 6 times (18)

Round 4 :

Repeat (2sc, inc) 6 times (24)

Round 5 :

Repeat (3sc, inc) 6 times (30)

Round 6 :

Repeat (4sc, inc) 6 times (36)

Round 7-10 :

sc in every st around (36)

Round 11 :

Work 10 sc2tog, then sc in each of the next 16 sts (26)

Round 12-13 :

sc in every st around (26)

Round 14 :

2sc, then 3 sc2tog, and finish with 1sc in each of the next 18 sts (23)

Round 15 :

sc in every st around (23)

Round 16 :

1sc, then perform 3 sc2tog, followed by 1sc in each of the next 16 sts (20)

Info :

Begin stuffing the leg lightly and continue stuffing as you go.

Round 17-20 :

sc in every st around (20)

Round 21 :

Repeat (sc2tog, 8sc) 2 times (18)

Round 22-23 :

sc in every st around (18)

Round 24 :

Repeat (sc2tog, 4sc) 3 times (15)

Round 25 :

sc in every st around (15)

Finish :

Fasten off and leave a long tail to attach to the body.

β€” 5. Ears :

Info :

Make two. Using cream yarn, start with a ch2.

Round 1 :

In the 2nd ch from your hook, work 6sc (6)

Round 2 :

Place 2sc into every st around (12)

Round 3 :

Repeat (1sc, inc) 6 times (18)

Round 4 :

Repeat (2sc, inc) 6 times (24)

Round 5 :

Repeat (3sc, inc) 6 times (30)

Round 6 :

Repeat (4sc, inc) 6 times (36)

Round 7-11 :

sc in every st around (36)

Round 12 :

Repeat (sc2tog, 4sc) 6 times (30)

Round 13-15 :

sc in every st around (30)

Round 16 :

Repeat (sc2tog, 3sc) 6 times (24)

Round 17-22 :

sc in every st around (24)

Round 23 :

Repeat (sc2tog, 4sc) 4 times (20)

Round 24-27 :

sc in every st around (20)

Finish :

Fasten off and leave a long tail for sewing. Do not stuff the ears.

β€” 6. Tail :

Info :

Using cream yarn, start with a ch2.

Round 1 :

In the 2nd ch from your hook, work 6sc (6)

Round 2 :

Place 2sc into every st around (12)

Round 3 :

Repeat (1sc, inc) 6 times (18)

Round 4-6 :

sc in every st around (18)

Round 7 :

Repeat (sc2tog, 1sc) 6 times (12)

Finish :

Fasten off, leave a sewing tail, and stuff the tail.

Assembly Instructions

  • Stuff the head and body firmly, then join them using the long yarn tail from the body, ensuring the neck is stable and centered.
  • Attach the legs to the lower sides of the body at a slight angle so the bunny can sit securely without tipping over.
  • Sew the arms to the sides of the body about two rounds below the neck seam, keeping them symmetrical.
  • Pin the ears to the top of the head between Rounds 4 and 5, then sew them in place securely.
  • Attach the stuffed tail to the lower back of the body, which helps act as a support for the sitting position.
  • Embroider the eyes, nose, and mouth with black yarn to give the bunny its sweet, minimalist face.

Important Notes

  • πŸ’‘Work in continuous spirals; don't join your rounds with a slip stitch unless explicitly told to.
  • πŸ’‘Use invisible decreases throughout the project to keep the surface of your amigurumi smooth and prevent stuffing gaps.
  • πŸ’‘If this is a gift for a baby, double-check that all limbs and the tail are sewn on very tightly for safety.
  • πŸ’‘You can swap the Sport weight yarn for Worsted weight if you want a larger version of this bunny; just use a larger hook.

I hope you enjoy every stitch of this sweet bunny project! There's something so rewarding about seeing those floppy ears come together. Whether you're making this for a special little one or just to add a bit of handmade charm to your own home, it's a pattern that really celebrates the joy of crafting. Once you've finished, give your bunny a little squeeze and a nameβ€”they're officially part of the family! Happy hooking, and I can't wait to see your finished creations. 🧢✨🐰

You ask,

we answer.

FAQs

Can I use safety eyes instead of embroidering the face?

Absolutely! 8mm or 10mm safety eyes would look adorable. Just be sure to insert them between Rounds 14 and 15 of the head before you finish and stuff it.

My bunny won't stay sitting up, it keeps falling backward. What happened?

This usually happens if the tail is sewn too high or the legs are too far forward. Try repositioning the tail lower down to act as a stabilizer.

The legs look a bit wonky after the decreases in Round 11. Is that normal?

Yes, that round creates the 'bend' for the foot. Once you add the stuffing, the shape will fill out and look much more like a proper bunny leg.

Do I need to stuff the ears at all?

The pattern recommends leaving them unstuffed so they have that lovely floppy look seen in the photos, but you can add a tiny bit of fluff at the base if you want them to stand up more.