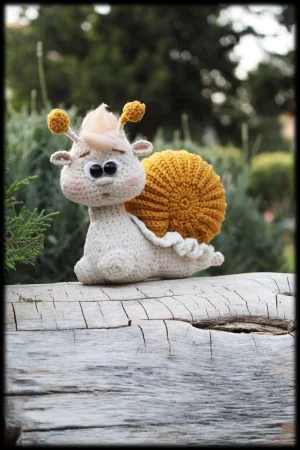
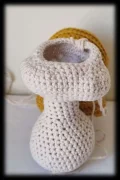
This little snail has so much personality! I love the way the ribbed shell adds such a beautiful texture, and those tiny antennas with their little mustard cups are just the cutest thing. It's a fun project that combines some interesting construction techniques with classic amigurumi shaping. You'll end up with a whimsical friend that's perfect for a nursery shelf or a unique desk buddy.
Progress Tracker
0% Complete
— 1. Shell Circles (Make 2) :
Round 1 :
6 sc into a MR, join with a sl st to the first st, then ch 3 (6)
Round 2 :
Work 3 DC into the first st, then work 3 DC into each of the next 5 sts. Finish by working 2 DC into the same space as the starting ch-3, then sl st to join (20)
Info :
Finish off the first circle and hide the tail. Complete the second circle but do not break the yarn.
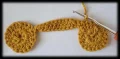
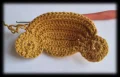
— 2. Shell Ribbed Strip :
Info :
Ch 13 and attach this chain to any stitch on the first circle using a sl st. Ensure you join from the right side. Ch 1 and turn. For all following rounds in this section, start in the 3rd stitch from the hook and work in BLO unless otherwise noted.
Round 1 :
1 sl st, 1 sc, 1 HDC, 7 DC, 1 HDC, 1 sc, 1 sl st. Attach to the next st of the circle with a sl st, ch 1, turn (13)
Round 2 :
BLO: 1 sl st, 11 sc, 1 sl st. Join to the next st of the circle with a sl st, ch 1, turn (13)
Round 3 :
BLO: 1 sl st, 2 sc in one st, 1 HDC, 3 DC, 3 DC in one st, 3 DC, 1 HDC, 2 sc in one st, 1 sl st. Join to the next st of the circle with a sl st, ch 1, turn (17)
Round 4 :
BLO: 1 sl st, 15 sc, 1 sl st. Join to the next st of the circle with a sl st, ch 1, turn (17)
Round 5 :
BLO: 1 sl st, 2 sc in one st, 1 sc, 1 HDC, 9 DC, 1 HDC, 1 sc, 2 sc in one st, 1 sl st. Join to the next st of the circle with a sl st, ch 1, turn (19)
Round 6 :
BLO: 1 sl st, 17 sc, 1 sl st. Join to the next st of the circle with a sl st, ch 1, turn (19)
Round 7 :
BLO: 1 sl st, 2 sc in one st, 2 sc in one st, 1 sc, 1 HDC, 9 DC, 1 HDC, 1 sc, 2 sc in one st, 2 sc in one st, 1 sl st. Join to circle with sl st, ch 1, turn (23)
Round 8 :
BLO: 1 sl st, 21 sc, 1 sl st. Join to the circle with a sl st, ch 1, turn (23)
Round 9 :
BLO: 1 sl st, 5 sc, 1 HDC, 9 DC, 1 HDC, 5 sc, 1 sl st. Join to the circle with a sl st, ch 1, turn (23)
Round 10 :
BLO: 1 sl st, 21 sc, 1 sl st. Join to the circle with a sl st, ch 1, turn (23)
Round 11 :
BLO: 1 sl st, 5 sc, 1 HDC, 9 DC, 1 HDC, 5 sc, 1 sl st. Join to the circle with a sl st, ch 1, turn (23)
Round 12 :
BLO: 1 sl st, 21 sc, 1 sl st. Join to the circle with a sl st, ch 1, turn (23)
Round 13 :
BLO: 1 sl st, 5 sc, 1 HDC, 9 DC, 1 HDC, 5 sc, 1 sl st. Join to the circle with a sl st, ch 1, turn (23)
Round 14 :
BLO: 1 sl st, 21 sc, 1 sl st. Join to the circle with a sl st, ch 1, turn (23)
Round 15 :
BLO: 1 sl st, 5 sc, 1 HDC, 9 DC, 1 HDC, 5 sc, 1 sl st. Join to the circle with a sl st, ch 1, turn (23)
Round 16 :
BLO: 1 sl st, 21 sc, 1 sl st. Join to the circle with a sl st, ch 1, turn (23)
Round 17 :
BLO: 1 sl st, 5 sc, 1 HDC, 9 DC, 1 HDC, 5 sc, 1 sl st. Join to the circle with a sl st, ch 1, turn (23)
Round 18 :
BLO: 1 sl st, 21 sc, 1 sl st. Join to the circle with a sl st, ch 1, turn (23)
Round 19 :
BLO: 1 sl st, 5 sc, 1 HDC, 9 DC, 1 HDC, 5 sc, 1 sl st. Join to the circle with a sl st, ch 1, turn (23)
Round 20 :
BLO: 1 sl st, 21 sc, 1 sl st. Join to the circle with a sl st, ch 1, turn (23)
Round 21 :
BLO: 1 sl st, 5 sc, 1 HDC, 9 DC, 1 HDC, 5 sc, 1 sl st. Join to the circle with a sl st, ch 1, turn (23)
Round 22 :
BLO: 1 sl st, 21 sc, 1 sl st. Join to the circle with a sl st, ch 1, turn (23)
Round 23 :
BLO: 1 sl st, 5 sc, 1 HDC, 9 DC, 1 HDC, 5 sc, 1 sl st. Join to the circle with a sl st, ch 1, turn (23)
Round 24 :
BLO: 1 sl st, 21 sc, 1 sl st. Join to the circle with a sl st, ch 1, turn (23)
Round 25 :
BLO: 1 sl st, 5 sc, 1 HDC, 9 DC, 1 HDC, 5 sc, 1 sl st. Join to the circle with a sl st, ch 1, turn (23)
Round 26 :
BLO: 1 sl st, 21 sc, 1 sl st. Join to the circle with a sl st, ch 1, turn (23)
Round 27 :
BLO: 1 sl st, 5 sc, 1 HDC, 9 DC, 1 HDC, 5 sc, 1 sl st. Join to the circle with a sl st, ch 1, turn (23)
Round 28 :
BLO: 1 sl st, 21 sc, 1 sl st. Join to the circle with a sl st, ch 1, turn (23)
Round 29 :
BLO: 1 sl st, 5 sc, 1 HDC, 9 DC, 1 HDC, 5 sc, 1 sl st. Join to the circle with a sl st, ch 1, turn (23)
Round 30 :
BLO: 1 sl st, 21 sc, 1 sl st. Join to the circle with a sl st, ch 1, turn (23)
Round 31 :
BLO: 1 sl st, 2 sc in one st, 4 sc, 1 HDC, 9 DC, 1 HDC, 4 sc, 2 sc in one st, 1 sl st. Join to circle, ch 1, turn (25)
Round 32 :
BLO: 1 sl st, 23 sc, 1 sl st. Join to circle with sl st, ch 1, turn (25)
Round 33 :
BLO: 1 sl st, 6 sc, 1 HDC, 9 DC, 1 HDC, 6 sc, 1 sl st. Join to circle with sl st, ch 1, turn (25)
Round 34 :
BLO: 1 sl st, 23 sc, 1 sl st. Join to circle with sl st, ch 1, turn (25)
Round 35 :
BLO: 1 sl st, 6 sc, 1 HDC, 4 DC, 3 DC in one st, 4 DC, 1 HDC, 6 sc, 1 sl st. Join to circle, ch 1, turn (27)
Round 36 :
BLO: 1 sl st, 25 sc, 1 sl st. Join to circle with sl st, ch 1, turn (27)
Round 37 :
BLO: 1 sl st, 6 sc, 1 HDC, 11 DC, 1 HDC, 6 sc, 1 sl st. Join to circle with sl st, ch 1, turn (27)
Round 38 :
BLO: 1 sl st, 25 sc, 1 sl st. Join to circle with sl st, ch 1, turn (27)
Round 39 :
BLO: 1 sl st, 6 sc, 1 HDC, 11 DC, 1 HDC, 6 sc, 1 sl st. Join to circle with sl st, ch 1, turn (27)
Round 40 :
BLO: 1 sl st, 25 sc, 1 sl st. Join to circle with sl st, ch 1, turn (27)
Round 41 :
BLO: 1 sl st, 6 sc, 1 HDC, 11 DC, 1 HDC, 6 sc, 1 sl st. Join to circle with sl st, ch 1, turn (27)
Round 42 :
BLO: 1 sl st, 25 sc, 1 sl st. Join to circle with sl st, ch 1, turn (27)
Info :
Attach the final 4 rounds to the first stitch of the circle and finish by following the pattern for rounds 39-40. Fasten off with a long tail and stuff firmly.
— 3. Tail :
Round 1 :
6 sc into a MR (6)
Round 2-3 :
sc in every st around (6)
Round 4 :
(2 sc, 1 inc) repeat twice (8)
Round 5 :
(3 sc, 1 inc) repeat twice (10)
Round 6 :
(4 sc, 1 inc) repeat twice (12)
Round 7 :
(5 sc, 1 inc) repeat twice (14)
Round 8 :
(6 sc, 1 inc) repeat twice (16)
Round 9 :
(7 sc, 1 inc) repeat twice (18)
Round 10 :
(8 sc, 1 inc) repeat twice (20)
Round 11 :
(9 sc, 1 inc) repeat twice (22)
Round 12 :
(10 sc, 1 inc) repeat twice (24)
Round 13-23 :
sc in every st around (24)
Info :
Fasten off and stuff the tail lightly.
— 4. Body Circle & Joining :
Round 1 :
6 sc into a MR (6)
Round 2 :
Work 1 inc into every st (12)
Round 3 :
(1 sc, 1 inc) repeat 6 times (18)
Round 4 :
(2 sc, 1 inc) repeat 6 times (24)
Round 5 :
(3 sc, 1 inc) repeat 6 times (30)
Round 6 :
(4 sc, 1 inc) repeat 6 times (36)
Round 7 :
(5 sc, 1 inc) repeat 6 times (42)
Round 8 :
Hold the tail and body circle together. Crochet 12 sc through both layers to join them, then work 30 sc around the remaining stitches of the body circle (42)
Round 9 :
Work 12 sc around the outer edge of the tail, then work 30 sc around the body circle (42)
Round 10-13 :
sc in every st around (42)
Round 14 :
19 sc, 1 dec, 19 sc, 1 dec (40)
Round 15 :
(8 sc, 1 dec) repeat 4 times (36)
Round 16 :
(7 sc, 1 dec) repeat 4 times (32)
Round 17 :
(6 sc, 1 dec) repeat 4 times (28)
Round 18 :
(5 sc, 1 dec) repeat 4 times (24)
Round 19 :
(4 sc, 1 dec) repeat 4 times (20)
Round 20 :
8 sc, 1 dec, 8 sc, 1 dec (18)
— 5. Neck & Head :
Round 21-23 :
sc in every st around (18)
Info :
Stuff the body firmly and place a marker in the center front of the neck. Prepare your wireframe by folding a 20cm piece in half.
Round 24 :
FLO: (2 sc, 1 inc) repeat 6 times (24)
Round 25 :
(3 sc, 1 inc) repeat 6 times (30)
Round 26 :
(4 sc, 1 inc) repeat 6 times (36)
Round 27 :
2 sc, 6 inc for cheek, 20 sc, 6 inc for cheek, 2 sc (48)
Round 28-33 :
sc in every st around (48)
Round 34 :
2 sc, 6 dec, 20 sc, 6 dec, 2 sc (36)
Round 35-38 :
sc in every st around (36)
Info :
Insert safety eyes between rounds 36 and 37. Insert the wireframe through the neck and into the head area.
Round 39 :
(4 sc, 1 dec) repeat 6 times (30)
Round 40 :
sc in every st around (30)
Round 41 :
(3 sc, 1 dec) repeat 6 times (24)
Round 42 :
sc in every st around. Pull the wire ends out to the sides at this level for the antennas (24)
Round 43 :
(2 sc, 1 dec) repeat 6 times (18)
Round 44 :
(1 sc, 1 dec) repeat 6 times (12)
Info :
Fasten off and cinch the hole closed. Hide the yarn tail inside.
— 6. Antennas & Cups :
Info :
Secure beige yarn to the head, wrap it tightly around the protruding wireframe ends, and tie off at the tips.
Round 1 :
6 sc into a MR (6)
Round 2 :
Work 1 inc into every st (12)
Round 3-5 :
sc in every st around (12)
Round 6 :
(1 sc, 1 dec) repeat 6 times (6)
Info :
Stuff lightly and sew these cups onto the ends of the wire antennas.
— 7. Ears & Paws (Make 2 of each) :
Ears Round 1 :
6 sc into a MR (6)
Ears Round 2 :
Work 1 inc into every st (12)
Paws Round 1 :
6 sc into a MR (6)
Paws Round 2 :
Work 1 inc into every st (12)
Paws Round 3 :
(1 sc, 1 inc) repeat 6 times (18)
Paws Round 4 :
sc in every st around (18)
— 8. Foot & Frill :
Round 1 :
ch 9. Starting in 2nd ch from hook, work 7 sc. Work 5 sc in the last ch to turn. Continue on the other side with 7 sc, then 5 sc in the final ch (24)
Round 2 :
7 sc, 1 inc, 1 sc, 1 inc, 1 sc, 1 inc, 7 sc, 1 inc, 1 sc, 1 inc, 1 sc, 1 inc (30)
Round 3 :
7 sc, 1 inc, 2 sc, 2 inc, 2 sc, 1 inc, 7 sc, 1 inc, 2 sc, 2 inc, 2 sc, 1 inc (38)
Round 4 :
7 sc, 1 inc, 3 sc, 1 inc, 2 sc, 1 inc, 3 sc, 1 inc, 7 sc, 1 inc, 3 sc, 1 inc, 2 sc, 1 inc, 3 sc, 1 inc (46)
Round 5 :
7 sc, 1 inc, 4 sc, 1 inc, 4 sc, 1 inc, 4 sc, 1 inc, 7 sc, 1 inc, 4 sc, 1 inc, 4 sc, 1 inc, 4 sc, 1 inc (54)
Round 6 :
ch 3, *work 2 TR in the next st, ch 2* and repeat from * to * all the way around to create the frill. Fasten off.
I really hope you have a blast bringing this sweet snail to life! There's something so satisfying about watching that ribbed shell come together and seeing that little face peek out at you for the first time. It’s a project that requires a bit of focus, but the result is a sturdy, high-quality toy that feels really special. Whether he's sitting on a bookshelf or being carried around by a little one, he’s sure to bring a smile to everyone's face. Happy hooking, and I can't wait to see your finished creations! 🧶✨🐌