🧢 Beautiful ✨ Detailed πŸ’ Adorable

Sweet Bunny Amigurumi Bag Pattern

Sweet Bunny Amigurumi Bag Pattern
4.7β˜…Rating
3-5 HoursTime Needed
2.8KMade This
βœ‚οΈ

Intermediate Level

Ideal for those with basic crocheting experience, featuring slightly more advanced stitches and techniques to expand your skills.

⏱️

Quick Craft

Fits nicely into a free afternoon β€” 2 to 5 hours of focused, enjoyable crocheting.

🐰

Whimsical Buddy

Playful characters full of personality, designed to spark imagination and become cherished playtime favorites.

About This Sweet Bunny Amigurumi Bag Pattern
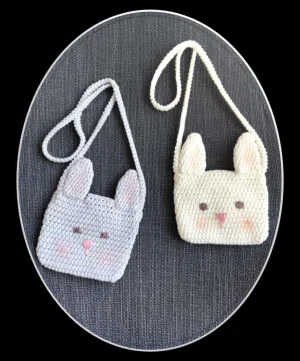
Sweet Bunny Amigurumi Bag Pattern crochet pattern - detailed view

This bag is the ultimate gift for birthdays or holidays. It works up quickly and looks professionally handmade, fitting perfectly into a child's dress-up wardrobe or as a playful nursery decoration.

Why You'll Love This Sweet Bunny Amigurumi Bag Pattern

I absolutely adore how this project combines amigurumi techniques with functional design. The corded strap is a total game-changerβ€”it’s much more durable than a simple chain and looks so much more polished. Plus, there is something so satisfying about embroidering that tiny pink nose at the very end; it's the moment the whole project finally smiles back at you!

Sweet Bunny Amigurumi Bag Pattern step 1 Sweet Bunny Amigurumi Bag Pattern step 2 Sweet Bunny Amigurumi Bag Pattern step 3 Sweet Bunny Amigurumi Bag Pattern step 4

Switch Things Up

I remember the first time I made one of these little bunny bags for a friend's daughter. I was looking for something that wasn't just another stuffed animal but actually had a purpose. The way her eyes lit up when she realized she could hide her 'treasures' inside was the best reward.

When you're working on the body, don't worry if the base looks a bit narrow at first; it rounds out beautifully as you add the height. I personally love using a cotton blend for this because it gives the bag enough structure so it doesn't sag, but it's still soft to the touch.

One little secret I've learned is to be really picky with the button you choose. A rustic wooden button adds such a lovely, earthy vibe that complements the cream yarn perfectly. And don't be afraid of the blush! It might feel strange 'putting makeup' on your crochet, but it adds that soft, kawaii glow that makes the bunny look like it's blushing. It’s those tiny, personal touches that turn a simple project into something truly memorable.

Common Mistakes & How to Fix Them

βœ— If you skip the slst at the end of the body rounds, the seam will start to spiral diagonally, which can make the closure flap sit off-center.βœ— The button hole in Round 7 of the flap is designed for a standard wooden button; if your button is larger, you may need to increase the chain count to ensure it fits.βœ— When sewing the strap, failing to secure it through both the bag wall and the base of the ears can lead to the ears flopping forward or the strap pulling the fabric out of shape.βœ— In Round 1 of the body, it is easy to lose track of the stitches when turning to work the opposite side of the chainβ€”mark that first stitch on the flip side to keep your count at 44.
Sweet Bunny Amigurumi Bag Pattern

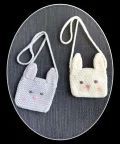
If you're looking for a project that's as practical as it is adorable, this sweet bunny bag is exactly what you need. It’s the perfect size for carrying little treasures, and the soft textures make it a joy to work on from start to finish. I love how the floppy ears and the simple button closure give it so much personality without being a headache to assemble. You'll find yourself wanting to make one in every color once you see how quickly it comes together!

Intermediate 3-5 Hours

Materials Needed for Sweet Bunny Amigurumi Bag Pattern

β€” Main Fabric

  • 01
    Alize Cotton Gold Pratica yarn in Cream (Color 63), approximately 100g/220m
  • 02
    Small amount of Catania yarn in Brown for the eyes
  • 03
    Small amount of Catania yarn in Pink for the nose embroidery

β€” Tools Required

  • 01
    3mm crochet hook for the bag and ears
  • 02
    3.5mm crochet hook for the strap
  • 03
    2.2mm crochet hook for the eyes
  • 04
    Wooden button for the closure
  • 05
    Sewing needle for assembly
  • 06
    Sharp scissors
  • 07
    Powder blush or pink crayon for the cheeks (optional)

Progress Tracker

0% Complete

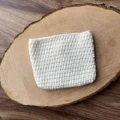
β€” 1. Bunny Body :

Info :

Using the 3mm hook and cream yarn. Finish each round with a slst and start every new round with a ch 2.

Round 1 :

ch 22, then starting in the 3rd ch from the hook: 19 hdc, 4 hdc in the next st. Rotate to work along the other side of the chain: 18 hdc, 3 hdc in the final st (44)

Round 2 :

*20 hdc, 2 hdcinc* repeat 2 times (48)

Round 3 :

48 hdc (48)

Round 4 :

48 hdc (48)

Round 5 :

48 hdc (48)

Round 6 :

48 hdc (48)

Round 7 :

48 hdc (48)

Round 8 :

48 hdc (48)

Round 9 :

48 hdc (48)

Round 10 :

48 hdc (48)

Round 11 :

48 hdc (48)

Round 12 :

48 hdc (48)

Round 13 :

48 hdc (48)

Round 14 :

48 hdc (48)

Info :

Fasten off and cut your yarn.

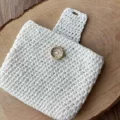
β€” 2. Closure Flap :

Info :

Identify the 15th stitch from where you finished the body. Reattach your yarn there. We will continue with the 3mm hook, using a slst to close and ch 2 to start each round.

Round 1 :

8 hdc (8)

Round 2 :

8 hdc (8)

Round 3 :

8 hdc (8)

Round 4 :

8 hdc (8)

Round 5 :

8 hdc (8)

Round 6 :

8 hdc (8)

Round 7 :

2 hdc, ch 3, skip 3 sts, 3 hdc (8)

Info :

Fasten off and weave in your ends.

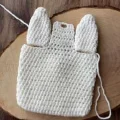
β€” 3. Bunny Ears (Make 2) :

Info :

Use the 3mm hook and cream yarn. Join each round with a slst and begin with a ch 2.

Round 1 :

Into a mr, work 6 hdc (6)

Round 2 :

*2 hdc, 1 hdcinc* repeat 2 times (8)

Round 3 :

*3 hdc, 1 hdcinc* repeat 2 times (10)

Round 4 :

*1 hdc, 1 hdcinc* repeat 5 times (15)

Round 5 :

15 hdc (15)

Round 6 :

15 hdc (15)

Round 7 :

15 hdc (15)

Round 8 :

15 hdc (15)

Round 9 :

15 hdc (15)

Round 10 :

15 hdc (15)

Info :

Fasten off using a slst and leave a long tail for sewing.

β€” 4. Bag Strap :

Info :

Switch to the 3.5mm hook and cream yarn. Leave a long starting tail for attachment.

Step 1 :

ch 2, skip the 1st ch and work 1 sc into the next.

Step 2 :

Rotate the cord and work 1 sc into the side loop.

Step 3 :

Turn again and insert hook under the two side loops, work 1 sc.

Step 4 :

Repeat the previous step, rotating and working into the two loops until the cord reaches 85cm.

β€” 5. Bunny Eyes (Make 2) :

Round 1 :

Using the 2.2mm hook and brown yarn, work 6 sc into a mr (6)

Info :

Fasten off and leave a long tail for sewing.

Assembly Instructions

  • Position the wooden button on the front center of the bag, aligning it with the button hole on the flap, and sew it firmly in place.
  • Take the two ears and pin them to the top edge of the bag, placing one on either side of the closure flap.
  • Sew the ears down using the 7 stitches on each side of the flap, securing the back of the ear to the back loops and the front to the front loops.
  • Attach the ends of the strap to the inside top corners of the bag, sewing through both the bag wall and the base of the ears for extra stability.
  • Place the crocheted eyes on the 7th row from the top, leaving about 7 stitches of space between them, and sew them down.
  • Using pink yarn, embroider a small triangular nose centered between and slightly below the eyes.
  • Optional: Apply a small amount of powder blush to the cheeks and the inner part of the ears for a sweet, rosy finish.

Important Notes

  • πŸ’‘Always start your rounds with a chain 2, but remember that this starting chain does not count as your first half double crochet stitch.
  • πŸ’‘Using a stitch marker at the beginning of every round is the best way to ensure your counts stay accurate, especially when working the body.
  • πŸ’‘When working the cord for the strap, keep your tension consistent so the strap doesn't end up bumpy or uneven.
  • πŸ’‘Leave long yarn tails when finishing the ears and eyes; having extra length makes the assembly process much smoother and more secure.
  • πŸ’‘If you're gifting this to a very young child, ensure the button is sewn on extremely tightly or consider using a velcro closure for safety.

I really hope you enjoy every stitch of this bunny bag journey! There is nothing quite like the feeling of finishing a piece that you know will bring a smile to someone's face. Whether you're keeping it for yourself or giving it away, this little bunny is sure to become a cherished companion. Don't forget to share your finished bags with the communityβ€”I'd love to see the colors and buttons you choose to make yours unique. Happy crocheting, and may your hook always move smoothly! 🧢✨🐰

You ask,

we answer.

FAQs

Is the strap length adjustable for older children?

Absolutely! The pattern suggests 85cm, but you can simply continue the cord technique until it reaches your desired length before fastening off.

Can I use safety eyes instead of crocheted ones?

Yes, you can use 6mm or 8mm safety eyes. Just be sure to install them securely between rounds 7 and 8 before you finish the body if you don't want to sew the crocheted eyes later.

The blush keeps fading; how can I make the pink cheeks permanent?

While makeup blush is great for a soft look, you can use a tiny bit of pink fabric paint or even embroider small pink circles if you want the color to survive a trip through the washing machine.

My bag looks a bit floppy; how can I make it stiffer?

Try using a slightly smaller hook (like 2.5mm) to create a denser fabric, or you can line the inside with a scrap of cotton fabric to help it hold its rectangular shape.