About This Textured Beach Starfish Amigurumi Pattern
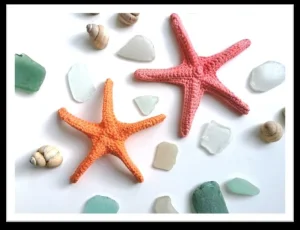
Sprinkle these around your bathroom for a spa-like feel or attach them to a summer wreath. They're the kind of project you can finish while watching your favorite show.
Perfect for those just starting their crocheting journey, with clear instructions and simple techniques
Fits nicely into a free afternoon — 2 to 5 hours of focused, enjoyable crocheting.
Playful characters full of personality, designed to spark imagination and become cherished playtime favorites.
Sprinkle these around your bathroom for a spa-like feel or attach them to a summer wreath. They're the kind of project you can finish while watching your favorite show.
I honestly love how the shaping process transforms these from flat crochet pieces into something that looks like it washed up on the shore. It's like a little bit of craft magic when the glue dries and they hold their form perfectly.
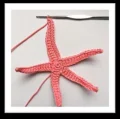
I’ve always felt that there’s something incredibly soothing about beach-inspired crafts. Maybe it’s the colors, or maybe it’s just the thought of the ocean breeze, but making these starfish always puts me in a happy place. When I first started designing these, I played around a lot with which side of the crochet looked better. I actually found that the 'wrong' side—the one with the little bumps—looks way more like a real starfish! It’s funny how sometimes our 'mistakes' or the parts we usually hide can turn out to be the most beautiful features.
If you’re feeling adventurous, try using a variegated yarn in shades of orange and pink. It creates a stunning natural mottled effect without you having to change colors at all. I also love the idea of turning these into a garland. Just string them together with some twine and maybe a few driftwood pieces, and you’ve got the perfect summer mantle piece. It’s a project that doesn’t take much time but leaves you feeling so accomplished once that glue dries and you have a sturdy little piece of art.
You're going to love how these little sea stars turn out! They've got such a realistic feel, especially once you give them that final shape with the glue. I've included two different sizes so you can make a whole little ocean family. They're perfect for summer decor or even as a cute addition to a beach-themed baby mobile.
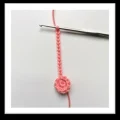
Start by making a MR and work 5 sc into it. (5)
Increase by working 2 sc into every st around. (10)
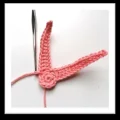
To create the arms: *ch 15, then work a sl st in the 2nd ch from your hook, sl st in the next ch, sc in the next 3 sts, hdc in the next 4 sts, and dc in the last 5 sts. Skip one sc from the previous round and sl st into the next st. Repeat from * 4 more times to get 5 arms total.
Work sc into every st all the way around, but make sure you skip the very first and very last sts of each arm to keep the shape sharp.
Finish up by working a sl st into every st around the entire piece.
Cut your yarn and weave in those ends neatly.
Make a MR and put 5 sc inside. (5)
Work 2 sc into each st around. (10)
Time for arms: *ch 15, sl st in the 2nd ch from hook, sl st in the next ch, sc in the next 3 sts, hdc in the next 4 sts, and dc in the last 5 sts. Skip one sc from the previous round and sl st into the next st. Repeat from * 4 more times.
Work sc into every st around the whole starfish, skipping only the first and last sts of each arm.
Work another round of sc into every single st around.
Complete the piece by working a sl st into every st around.
Fasten off your work and weave in the yarn tails.
I can't wait to see your finished sea stars! Whether you make a whole bucket full for a summer display or just one special starfish to gift to a friend, I hope you enjoyed the process as much as I do. There's something so satisfying about that final shaping step where it all comes to life. Don't forget to play around with colors—nature is full of vibrant starfish, so let your creativity run wild! Happy stitching! 🧶 ✨
You don't have to, but without it, the starfish will remain flat and floppy. The glue gives them that iconic, rigid structure seen in real dried starfish.
Standard white school glue or PVA glue works perfectly. It dries clear and provides a great hold once mixed with water.
Cotton is highly recommended because it absorbs the glue mixture much better and holds the shape more firmly once dry. Acrylic can be a bit too springy.
The easiest way is to change your yarn weight and hook size. A thicker yarn like worsted weight with a 3.5mm hook will result in a much larger sea star.
