About This Textured Bobble Crochet Clutch Pattern
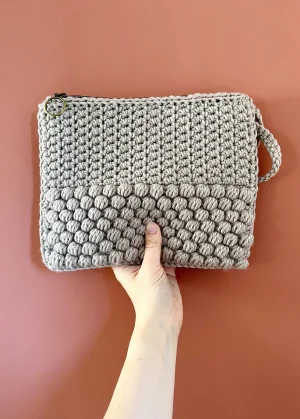
This clutch is the ultimate handmade gift for a friend who loves unique accessories, or a sophisticated treat for yourself to pair with your favorite evening outfit.
Ideal for those with basic crocheting experience, featuring slightly more advanced stitches and techniques to expand your skills.
Fits nicely into a free afternoon — 2 to 5 hours of focused, enjoyable crocheting.
An elegant detail to elevate any look, combining traditional techniques with contemporary design sensibilities.
This clutch is the ultimate handmade gift for a friend who loves unique accessories, or a sophisticated treat for yourself to pair with your favorite evening outfit.
I am absolutely obsessed with how the bobbles feel in this design—it is like a little piece of art you can carry around! As a crafter, I love projects that use chunky yarn because you get that instant gratification of seeing the bag take shape in just a few hours. The transition from the bobbles to the moss stitch keeps the project engaging, so you never feel like you are just doing the same thing over and over.
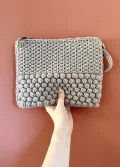
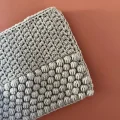
I honestly think there is no better feeling than finishing a project that looks like it came straight out of a high-end boutique. When I first started working on this Bobble Clutch, I was immediately struck by how the Debbie Bliss Cashmerino Chunky just makes those bobbles sing. It is such a soft, luxurious yarn that gives the bag a structured yet squishy feel that you just want to carry everywhere.
One little tip I picked up while making mine: when you get to the moss stitch section, try to keep your spike stitches (the ones worked into the row below) nice and relaxed. If you pull too tight, the top of the bag can start to pinch inward, and we want to keep that lovely rectangular shape consistent with the bobble section below.
I ended up choosing a muted pebble grey for my version because it goes with absolutely everything in my wardrobe, but I can totally imagine this looking stunning in a bold mustard or a deep forest green. It is a relatively quick project, but the finished texture makes it look like you spent weeks on it. I hope you enjoy making this as much as I did—it is pure crochet therapy!
Get ready to create your new favorite accessory! This clutch is all about that incredible, touchable texture that only crochet can provide. Using a chunky yarn and a mix of playful bobbles and sophisticated moss stitch, you will craft a piece that looks like it came straight from a boutique. It is a satisfying project that grows quickly on your hook, leaving you with a stylish bag that is as fun to make as it is to carry. Whether you are making it for a night out or as a special gift, you are going to love the process.
To make a bobble (MB): yarn over, insert hook in st, pull yarn through. Repeat this 5 times until you have 11 loops on your hook. Yarn over and pull through all 11 loops, then ch 1 to secure the bobble.
ch 30.
Work 1 sc into the second chain from your hook, then continue with 1 sc in every remaining chain across. Turn your work. (29 st)
ch 1, 1 sc in the first st, *MB in the next st, 1 sc in the next st; repeat from * to the end of the row. Turn.
ch 1, 1 sc in the first st, *skip the securing ch of the bobble, 1 sc in the next 2 st; repeat from * to the end of the row. Turn.
ch 1, 1 sc in the first 2 st, *MB in the next st, 1 sc in the next st; repeat from * until only 1 st remains, then 1 sc in the final st. Turn.
ch 1, 1 sc in the first 2 st, *skip the securing ch of the bobble, 1 sc in the next 2 st; repeat from * until only 1 st remains, then 1 sc in the final st. Turn.
Repeat the instructions for Row 2.
Repeat the instructions for Row 3.
Repeat the instructions for Row 4.
Repeat the instructions for Row 5.
Repeat the instructions for Row 2.
Repeat the instructions for Row 3.
Repeat the instructions for Row 4.
Repeat the instructions for Row 5.
Repeat the instructions for Row 2.
Repeat the instructions for Row 3.
ch 1, work 1 sc into every stitch across the row. Turn.
ch 1, *1 sc in the next st, 1 sc into the stitch from the row below (spike stitch); repeat from * until 1 st remains, then 1 sc in the final st. Turn.
ch 1, *1 sc into the stitch from the row below, 1 sc in the next st; repeat from * until 1 st remains, then 1 sc into the stitch from the row below. Turn.
Repeat Row 17.
Repeat Row 18.
Repeat Row 17.
Repeat Row 18.
Repeat Row 17.
Repeat Row 18.
Repeat Row 17.
Repeat Row 18.
Repeat Row 17.
Repeat Row 18.
Repeat Row 17.
Repeat Row 18.
Repeat Row 17.
Repeat Row 18.
Repeat Row 17.
Repeat Row 18.
ch 1, work 1 sc BLO in every stitch across. Fasten off.
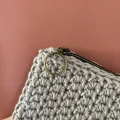
With the zipper fastened and positioned at the right corner, join your yarn at the top left corner of the bag and ch 32.
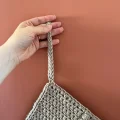
Insert your hook back into the same starting spot on the bag and work a sl st to create the handle loop.
Work 1 sc into every chain stitch around the loop. Fasten off and weave in your ends.
I really hope you enjoy every moment of crafting this textured clutch! There is something so rewarding about seeing those rows of bobbles line up perfectly, and the moss stitch finish adds such a professional touch to the final piece. Once you have added your zipper and handle, you will have a gorgeous, handmade accessory that is ready for any occasion. It is the kind of project that makes you feel proud every time you reach for it. Happy crocheting, and I cannot wait to see your beautiful work! 🧶✨
The pattern recommends an open-ended zipper. You will want to measure the top edge of your finished crochet faces and trim the zipper to match that length before sewing.
You can, but you would need to adjust the foundation chain and the number of rows to reach the 26cm x 21cm size. Using a lighter yarn will also result in smaller, less prominent bobbles.
Instead of inserting your hook into the top loops of the previous row, you insert it into the stitch itself from the row below that. This creates a longer stitch that 'spikes' downward.
Yes, blocking is quite helpful here. The bobble section tends to be a bit bulkier than the moss stitch section, so blocking helps even out the dimensions for a straighter seam.
