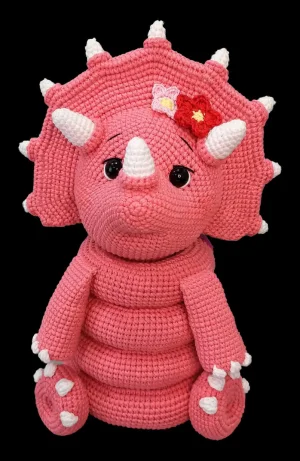
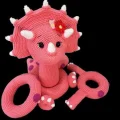
Hey there, fellow makers! I am so excited to share this clever little project with you. It’s not just a cute dino; it’s a functional stacking toy that’s perfect for the nursery. You’ll love seeing the different rings come together to form his body as you work through each piece. It’s such a satisfying build that keeps your hands busy and your heart happy, resulting in a toy that little ones will cherish for years.
Progress Tracker
0% Complete
— 1. Base Cone :
Round 1 :
Start with a MR and work 6 sc into it (6)
Round 2 :
Work 1 inc in every stitch around (12)
Round 3 :
sc in each of the 12 stitches (12)
Round 4 :
Repeat a pattern of 1 sc followed by 1 inc 6 times (18)
Round 5-6 :
sc in each stitch around (18)
Round 7 :
Repeat a pattern of 2 sc followed by 1 inc 6 times (24)
Round 8-10 :
sc in each stitch around (24)
Round 11 :
Repeat a pattern of 3 sc followed by 1 inc 6 times (30)
Round 12-15 :
sc in each stitch around (30)
Round 16 :
Repeat a pattern of 4 sc followed by 1 inc 6 times (36)
Round 17-21 :
sc in each stitch around (36)
Round 22 :
Repeat a pattern of 5 sc followed by 1 inc 6 times (42)
Round 23-28 :
sc in each stitch around (42)
Round 29 :
Repeat a pattern of 6 sc followed by 1 inc 6 times (48)
Round 30-36 :
sc in each stitch around (48)
Round 37 :
Repeat a pattern of 7 sc followed by 1 inc 6 times (54)
Round 38-45 :
sc in each stitch around (54)
Round 46 :
Repeat a pattern of 8 sc followed by 1 inc 6 times (60)
Round 47 :
Working in FLO, repeat a pattern of 9 sc followed by 1 inc 6 times (66)
Round 48 :
Work 5 sc, then 1 inc, then repeat (10 sc, 1 inc) 5 times, finishing with 5 sc (72)
Round 49 :
Repeat a pattern of 11 sc followed by 1 inc 6 times (78)
Round 50 :
Work 6 sc, then 1 inc, then repeat (12 sc, 1 inc) 5 times, finishing with 6 sc (84)
Round 51 :
Repeat a pattern of 13 sc followed by 1 inc 6 times (90)
Round 52 :
Work 7 sc, then 1 inc, then repeat (14 sc, 1 inc) 5 times, finishing with 7 sc (96)
Round 53 :
Repeat a pattern of 15 sc followed by 1 inc 6 times (102)
Round 54 :
Work 8 sc, then 1 inc, then repeat (16 sc, 1 inc) 5 times, finishing with 8 sc (108)
Round 55 :
Repeat a pattern of 17 sc followed by 1 inc 6 times (114)
Round 56-62 :
sc in each stitch around (114)
Round 63 :
Repeat a pattern of 17 sc followed by 1 dec 6 times (108)
Round 64 :
Work 8 sc, then 1 dec, then repeat (16 sc, 1 dec) 5 times, finishing with 8 sc (102)
Round 65 :
Repeat a pattern of 15 sc followed by 1 dec 6 times (96)
Round 66 :
Work 7 sc, then 1 dec, then repeat (14 sc, 1 dec) 5 times, finishing with 7 sc (90)
Round 67 :
Repeat a pattern of 13 sc followed by 1 dec 6 times (84)
Round 68 :
Work 6 sc, then 1 dec, then repeat (12 sc, 1 dec) 5 times, finishing with 6 sc (78)
Round 69 :
Repeat a pattern of 11 sc followed by 1 dec 6 times (72)
Round 70 :
Work 5 sc, then 1 dec, then repeat (10 sc, 1 dec) 5 times, finishing with 5 sc (66)
Round 71 :
Repeat a pattern of 9 sc followed by 1 dec 6 times (60)
Round 72 :
Join the stitches of Round 71 to the BLO of Round 47 using 60 sc (60)
Info :
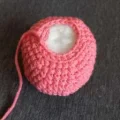
Begin stuffing the base firmly now and continue to add stuffing as you progress through the remaining rounds.
Round 73 :
Repeat a pattern of 8 sc followed by 1 dec 6 times (54)
Round 74 :
Repeat a pattern of 7 sc followed by 1 dec 6 times (48)
Round 75 :
Repeat a pattern of 6 sc followed by 1 dec 6 times (42)
Round 76 :
Repeat a pattern of 5 sc followed by 1 dec 6 times (36)
Round 77 :
Repeat a pattern of 4 sc followed by 1 dec 6 times (30)
Round 78 :
Repeat a pattern of 3 sc followed by 1 dec 6 times (24)
Round 79 :
Repeat a pattern of 2 sc followed by 1 dec 6 times (18)
Round 80 :
Repeat a pattern of 1 sc followed by 1 dec 6 times (12)
Round 81 :
Work 6 dec (6). Fasten off, close the remaining gap, and weave in your end.
— 2. Legs (Make 2) :
Round 1 :
Create a MR and work 6 sc into it (6)
Round 2 :
Work 1 inc in every stitch around (12)
Round 3 :
Repeat (1 sc, 1 inc) 6 times (18)
Round 4 :
Repeat (2 sc, 1 inc) 6 times (24)
Round 5 :
Repeat (3 sc, 1 inc) 6 times (30)
Round 6 :
Repeat (4 sc, 1 inc) 6 times (36)
Round 7 :
In BLO, repeat (2 sc, 1 inc) 4 times, then sc in the next 24 stitches (40)
Round 8 :
Repeat (3 sc, 1 inc) 4 times, then sc in the next 24 stitches (44)
Round 9 :
3 sc, 1 dec, repeat (4 sc, 1 inc) 2 times, 3 sc, 1 dec, 24 sc (44)
Round 10 :
2 sc, 1 dec, repeat (4 sc, 1 dec) 2 times, 2 sc, 1 dec, 24 sc (40)
Round 11 :
3 sc, repeat (3 sc, 1 dec) 2 times, 27 sc (38)
Round 12 :
3 sc, repeat (2 sc, 1 dec) 2 times, 27 sc (36)
Round 13 :
sc in every stitch around (36)
Round 14 :
Repeat (4 sc, 1 dec) 6 times (30)
Round 15 :
Repeat (3 sc, 1 dec) 6 times (24). Stuff the leg firmly.
Round 16 :
In BLO, repeat (2 sc, 1 dec) 6 times (18)
Round 17 :
Repeat (1 sc, 1 dec) 6 times (12). Fasten off and leave a long tail for sewing.
— 3. Foot Nails (4 per foot) :
Info :
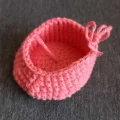
Join white yarn into a single crochet on the foot. ch 3 and work 3 tr into that same stitch. Crochet the tops of the tr together. Fasten off and tie a secure knot, hiding the yarn tails inside the foot.
— 4. Large Ring :
Round 1 :
ch 60 and join with a sl st to the first chain to form a large loop (60)
Round 2 :
Repeat (9 sc, 1 inc) 6 times (66)
Round 3 :
5 sc, 1 inc, repeat (10 sc, 1 inc) 5 times, 5 sc (72)
Round 4 :
Repeat (11 sc, 1 inc) 6 times (78)
Round 5 :
6 sc, 1 inc, repeat (12 sc, 1 inc) 5 times, 6 sc (84)
Round 6 :
Repeat (13 sc, 1 inc) 6 times (90)
Round 7 :
7 sc, 1 inc, repeat (14 sc, 1 inc) 5 times, 7 sc (96)
Round 8 :
Repeat (15 sc, 1 inc) 6 times (102)
Round 9-15 :
sc in each stitch around (102)
Round 16 :
Repeat (15 sc, 1 dec) 6 times (96)
Round 17 :
7 sc, 1 dec, repeat (14 sc, 1 dec) 5 times, 7 sc (90)
Round 18 :
Repeat (13 sc, 1 dec) 6 times (84)
Round 19 :
6 sc, 1 dec, repeat (12 sc, 1 dec) 5 times, 6 sc (78)
Round 20 :
Repeat (11 sc, 1 dec) 6 times (72)
Round 21 :
5 sc, 1 dec, repeat (10 sc, 1 dec) 5 times, 5 sc (66)
Round 22 :
Repeat (9 sc, 1 dec) 6 times (60)
Info :
Sew the edges of Round 22 to Round 1 to close the ring, stuffing it as you go to maintain a donut shape.
— 5. Middle Ring :
Round 1 :
ch 48 and join with a sl st to the first chain (48)
Round 2 :
Repeat (7 sc, 1 inc) 6 times (54)
Round 3 :
4 sc, 1 inc, repeat (8 sc, 1 inc) 5 times, 4 sc (60)
Round 4 :
Repeat (9 sc, 1 inc) 6 times (66)
Round 5 :
5 sc, 1 inc, repeat (10 sc, 1 inc) 5 times, 5 sc (72)
Round 6 :
Repeat (11 sc, 1 inc) 6 times (78)
Round 7 :
6 sc, 1 inc, repeat (12 sc, 1 inc) 5 times, 6 sc (84)
Round 8 :
Repeat (13 sc, 1 inc) 6 times (90)
Round 9-15 :
sc in each stitch around (90)
Round 16 :
Repeat (13 sc, 1 dec) 6 times (84)
Round 17 :
6 sc, 1 dec, repeat (12 sc, 1 dec) 5 times, 6 sc (78)
Round 18 :
Repeat (11 sc, 1 dec) 6 times (72)
Round 19 :
5 sc, 1 dec, repeat (10 sc, 1 dec) 5 times, 5 sc (66)
Round 20 :
Repeat (9 sc, 1 dec) 6 times (60)
Round 21 :
4 sc, 1 dec, repeat (8 sc, 1 dec) 5 times, 4 sc (54)
Round 22 :
Repeat (7 sc, 1 dec) 6 times (48)
Info :
Sew Round 22 to Round 1 and stuff the ring firmly.
— 6. Small Ring :
Round 1 :
ch 36 and join with a sl st to the first chain (36)
Round 2 :
Repeat (5 sc, 1 inc) 6 times (42)
Round 3 :
3 sc, 1 inc, repeat (6 sc, 1 inc) 5 times, 3 sc (48)
Round 4 :
Repeat (7 sc, 1 inc) 6 times (54)
Round 5 :
4 sc, 1 inc, repeat (8 sc, 1 inc) 5 times, 4 sc (60)
Round 6 :
Repeat (9 sc, 1 inc) 6 times (66)
Round 7 :
5 sc, 1 inc, repeat (10 sc, 1 inc) 5 times, 5 sc (72)
Round 8 :
Repeat (11 sc, 1 inc) 6 times (78)
Round 9-15 :
sc in each stitch around (78)
Round 16 :
Repeat (11 sc, 1 dec) 6 times (72)
Round 17 :
5 sc, 1 dec, repeat (10 sc, 1 dec) 5 times, 5 sc (66)
Round 18 :
Repeat (9 sc, 1 dec) 6 times (60)
Round 19 :
4 sc, 1 dec, repeat (8 sc, 1 dec) 5 times, 4 sc (54)
Round 20 :
Repeat (7 sc, 1 dec) 6 times (48)
Round 21 :
3 sc, 1 dec, repeat (6 sc, 1 dec) 5 times, 3 sc (42)
Round 22 :
Repeat (5 sc, 1 dec) 6 times (36)
Info :
Sew Round 22 and Round 1 together while stuffing.
— 7. Arms (Make 2) :
Round 1 :
Start with 6 sc in a MR (6)
Round 2 :
Work 1 inc in every stitch around (12)
Round 3 :
Repeat (1 sc, 1 inc) 6 times (18)
Round 4 :
Repeat (2 sc, 1 inc) 6 times (24)
Round 5 :
sc in BLO of every stitch around (24)
Round 6-9 :
sc in each stitch around (24)
Round 10 :
Repeat (10 sc, 1 dec) 2 times (22)
Round 11-15 :
sc in each stitch around (22)
Round 16 :
Repeat (9 sc, 1 dec) 2 times (20)
Round 17-21 :
sc in each stitch around (20)
Round 22 :
Repeat (8 sc, 1 dec) 2 times (18)
Round 23 :
sc in every stitch around (18). Add a small amount of stuffing.
Round 24 :
Repeat (7 sc, 1 dec) 2 times (16)
Round 25 :
Flatten the top and crochet across both layers with 8 sc to close. Fasten off and leave a tail.
— 8. Hand Nails (3 per hand) :
Info :
Join white yarn to a stitch on the hand. ch 2 and work 2 dc in the same stitch. Crochet the tops together and fasten off, knotting the ends inside the arm.
— 9. Head - Main Part :
Round 1 :
Work 6 sc into a MR (6)
Round 2 :
Work 1 inc in every stitch around (12)
Round 3 :
Repeat (1 sc, 1 inc) 6 times (18)
Round 4 :
Repeat (5 sc, 1 inc) 3 times (21)
Round 5 :
Repeat (6 sc, 1 inc) 3 times (24)
Round 6 :
Repeat (7 sc, 1 inc) 3 times (27)
Round 7 :
Repeat (8 sc, 1 inc) 3 times (30)
Round 8 :
Repeat (9 sc, 1 inc) 3 times (33)
Round 9 :
Repeat (10 sc, 1 inc) 3 times (36)
Round 10 :
Repeat (11 sc, 1 inc) 3 times (39)
Round 11 :
Repeat (12 sc, 1 inc) 3 times (42)
Round 12 :
Repeat (13 sc, 1 inc) 3 times (45)
Round 13 :
Repeat (14 sc, 1 inc) 3 times (48)
Round 14 :
Repeat (15 sc, 1 inc) 3 times (51)
Round 15 :
Repeat (16 sc, 1 inc) 3 times (54)
Round 16 :
Repeat (8 sc, 1 inc) 4 times, then 17 sc, 1 inc (59)
Round 17 :
Repeat (9 sc, 1 inc) 4 times, then 18 sc, 1 inc (64)
Round 18 :
Repeat (10 sc, 1 inc) 4 times, then 19 sc, 1 inc (69)
Round 19 :
Repeat (5 sc, 1 inc) 8 times, then 21 sc (77)
Round 20 :
Repeat (6 sc, 1 inc) 7 times, then 28 sc (84)
Round 21-26 :
sc in every stitch around (84)
Round 27 :
Work 60 sc in BLO, then 3 sc, ch 18, skip 18 stitches, 3 sc (84)
Round 28 :
sc in every stitch around, including the chains (84)
Round 29 :
Work 60 sc in BLO, then sc in the remaining 24 stitches (84)
Round 30-33 :
sc in every stitch around (84)
Round 34 :
Repeat (12 sc, 1 dec) 6 times (78)
Round 35 :
Repeat (11 sc, 1 dec) 6 times (72)
Round 36 :
Repeat (10 sc, 1 dec) 6 times (66)
Round 37 :
Repeat (9 sc, 1 dec) 6 times (60)
Round 38 :
Repeat (8 sc, 1 dec) 6 times (54)
Round 39 :
Repeat (7 sc, 1 dec) 6 times (48)
Round 40 :
Repeat (6 sc, 1 dec) 6 times (42)
Round 41 :
Repeat (5 sc, 1 dec) 6 times (36)
Round 42 :
Repeat (4 sc, 1 dec) 6 times (30)
Round 43 :
Repeat (3 sc, 1 dec) 6 times (24)
Round 44 :
Repeat (2 sc, 1 dec) 6 times (18)
Round 45 :
Repeat (1 sc, 1 dec) 6 times (12)
Round 46 :
Work 6 dec (6). Fasten off and close the hole.
— 10. Head - Inner Part :
Info :
Go back to the opening made between Round 26 and 27 to start the inner head.
Round 1 :
In BLO, work 36 sc around the opening (36)
Round 2-4 :
sc in each stitch around (36)
Round 5 :
Repeat (4 sc, 1 dec) 6 times (30)
Round 6-7 :
sc in each stitch around (30)
Round 8 :
Repeat (3 sc, 1 dec) 6 times (24)
Round 9-10 :
sc in each stitch around (24)
Round 11 :
Repeat (2 sc, 1 dec) 6 times (18)
Round 12 :
sc in each stitch around (18)
Round 13 :
Repeat (1 sc, 1 dec) 6 times (12)
Round 14 :
Work 6 dec (6). Fasten off and weave in ends.
— 11. Head - Large Bony Frill :
Round 1 :
Attach pink yarn to the 60 FLO of Round 26. Work: 5 sc, (2 inc, 10 sc) 4 times, 2 inc, 5 sc. Turn and work in the FLO of Round 28: 5 sc, (2 inc, 10 sc) 4 times, 2 inc, 5 sc (140)
Round 2 :
sc in every stitch around (140)
Round 3 :
Sew the back loops to the head, then in FLO work: 1 dec, 4 sc, (2 inc, 12 sc) 4 times, 2 inc, 4 sc, 2 dec, 4 sc, (2 inc, 12 sc) 4 times, 2 inc, 4 sc, 1 dec (156)
Round 4 :
sc in every stitch around (156)
Round 5 :
Sew back loops, then in FLO work: 1 dec, 4 sc, (2 inc, 14 sc) 4 times, 2 inc, 4 sc, 2 dec, 4 sc, (2 inc, 14 sc) 4 times, 2 inc, 4 sc, 1 dec (172)
Round 6 :
sc in every stitch around (172)
Round 7 :
Sew back loops, then in FLO work: 1 dec, 4 sc, (2 inc, 7 sc) 8 times, 2 inc, 4 sc, 2 dec, 4 sc, (2 inc, 7 sc) 8 times, 2 inc, 4 sc, 1 dec (204)
Round 8 :
sc in every stitch around (204)
Round 9 :
Sew back loops, then in FLO work: 2 dec, 2 sc, (2 inc, 9 sc) 8 times, 2 inc, 2 sc, 4 dec, 2 sc, (2 inc, 9 sc) 8 times, 2 inc, 2 sc, 2 dec (232)
Round 10 :
sc in every stitch around (232). Fasten off.
— 12. Head - Points on Edges (Make 9) :
Round 1 :
In white yarn, work BLO 4 sc, turn and work 4 sc (8)
Round 2 :
sc in all 8 stitches (8)
Round 3 :
Repeat (2 sc, 1 dec) 2 times (6)
Round 4 :
sc in all 6 stitches (6). Stuff lightly and fasten off.
Detail :
Using pink yarn, work (1 sc, 1 inc) 4 times (12) in the front loops around the base of each white point.
— 13. Tail :
Round 1 :
Work 6 sc into a MR (6)
Round 2 :
Work 1 inc in every stitch around (12)
Round 3 :
sc in each stitch (12)
Round 4 :
Repeat (2 inc, 4 sc) 2 times (16)
Round 5 :
sc in each stitch (16)
Round 6 :
1 sc, 2 inc, 6 sc, 2 inc, 5 sc (20)
Round 7 :
sc in each stitch (20)
Round 8 :
2 sc, 2 inc, 8 sc, 2 inc, 6 sc (24)
Round 9 :
sc in each stitch (24)
Round 10 :
3 sc, 2 inc, 10 sc, 2 inc, 7 sc (28)
Round 11 :
sc in each stitch (28)
Round 12 :
4 sc, 2 inc, 12 sc, 2 inc, 8 sc (32)
Round 13 :
sc in each stitch (32)
Round 14 :
5 sc, 2 inc, 14 sc, 2 inc, 9 sc (36)
Round 15 :
sc in each stitch (36)
Round 16 :
6 sc, 2 inc, 16 sc, 2 inc, 10 sc (40)
Round 17 :
sc in each stitch (40)
Round 18 :
7 sc, 2 inc, 18 sc, 2 inc, 11 sc (44)
Round 19 :
sc in each stitch (44)
Round 20 :
8 sc, 2 inc, 20 sc, 2 inc, 12 sc (48)
Round 21 :
sc in each stitch (48)
Round 22 :
9 sc, 2 inc, 22 sc, 2 inc, 13 sc (52)
Round 23 :
sc in each stitch (52)
Round 24 :
10 sc, 2 inc, 24 sc, 2 inc, 14 sc (56)
Round 25 :
sc in each stitch (56)
Round 26 :
11 sc, 2 inc, 26 sc, 2 inc, 15 sc (60)
Round 27 :
sc in each stitch (60)
Round 28 :
12 sc, 2 inc, 28 sc, 2 inc, 16 sc (64)
Round 29 :
sc in each stitch (64). Fasten off and leave a tail for sewing.
— 14. Spots :
Large (x3) :
R1: 6 sc in MR. R2: 6 inc (12). R3: (1 sc, inc)*6 (18). R4: (2 sc, inc)*6 (24). Fasten off.
Medium (x6) :
R1: 6 sc in MR. R2: 6 inc (12). R3: (1 sc, inc)*6 (18). Fasten off.
Small (x8) :
R1: 6 sc in MR. R2: 6 inc (12). Fasten off.
— 15. Brow Horns (Make 2) :
Round 1 :
With white, 6 sc in MR (6)
Round 2 :
Repeat (1 sc, 1 inc) 3 times (9)
Round 3 :
sc in each stitch (9)
Round 4 :
Repeat (2 sc, 1 inc) 3 times (12)
Round 5 :
sc in each stitch (12)
Round 6 :
Repeat (3 sc, 1 inc) 3 times (15)
Round 7-10 :
sc in each stitch around (15)
Round 11 :
Switch to pink. In FLO, repeat (1 sc, 1 inc) 6 times (18)
Round 12 :
sc in each stitch (18). Fasten off.
— 16. Short Horn :
Round 1 :
With white, 6 sc in MR (6)
Round 2 :
Repeat (1 sc, 1 inc) 3 times (9)
Round 3 :
sc in each stitch (9)
Round 4 :
Repeat (2 sc, 1 inc) 3 times (12)
Round 5 :
sc in each stitch (12)
Round 6 :
Repeat (3 sc, 1 inc) 3 times (15)
Round 7-8 :
sc in each stitch around (15)
Round 9 :
Switch to pink. In FLO, repeat (1 sc, 1 inc) 6 times (18)
Round 10 :
sc in each stitch (18). Fasten off.
I hope you have as much fun making this little triceratops as I did! It’s such a rewarding project to see fully assembled. Whether it’s sitting on a shelf or being played with by tiny hands, it’s sure to be a hit. Don't forget to take your time with the assembly—that's where the magic really happens. This is one of those projects that people will cherish for years because of the love you put into every stitch. Happy hooking, and enjoy your new prehistoric pal! 🦖✨💖