About This Zoey the Boho Chic Doll Amigurumi Pattern

This heirloom-quality doll makes an incredibly special gift for birthdays or holidays, and she looks absolutely stunning sitting on a nursery shelf or mantelpiece.
Ideal for those with basic crocheting experience, featuring slightly more advanced stitches and techniques to expand your skills.
A 10-12 hour project—great for savoring the process over several sessions.
Playful characters full of personality, designed to spark imagination and become cherished playtime favorites.
This heirloom-quality doll makes an incredibly special gift for birthdays or holidays, and she looks absolutely stunning sitting on a nursery shelf or mantelpiece.
I absolutely love how this pattern combines classic amigurumi with gorgeous, miniature garment construction! Making the tiny granny squares for her coat felt like such a fun, bite-sized creative outlet, and seeing all those vibrant layers of her dress come together was incredibly satisfying. It's the kind of project where you never get bored because every single section brings a fresh technique and a new splash of color.
There is something so incredibly magical about creating a doll with her own complete wardrobe, and Zoey is the perfect example of why I fell in love with amigurumi in the first place! When I first saw her layered dress and tiny patchwork coat, I knew I was in for a beautiful stitching adventure. Designing her clothes felt like putting together a miniature fashion collection, and mixing and matching the cozy shades of coral, lavender, and turquoise was pure joy.
My biggest tip as you work through this pattern is to embrace the process of thread jointing. It might feel a bit intimidating if you haven't tried it before, but it gives her legs and arms the most wonderful, poseable movement. It makes her feel so much more lifelike and interactive! Also, don't be afraid to put your own spin on her color palette—she would look just as stunning in earthy autumn tones or bright, sunny spring pastels. I hope she brings a little bit of boho magic to your crafting space!
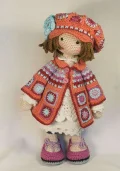
Meet Zoey! She's a gorgeous, vintage-inspired boho doll who is absolutely bursting with personality. With her layered, flowing lace dress, cozy patchwork granny square coat, and adorable matching beanie, she’s the ultimate dream project for any dedicated crafter. If you love detailed designs, playing with a rich palette of colors, and watching a character come to life stitch by stitch, you are going to fall head over heels for this project. Grab your favorite cotton yarns and let's create a keepsake that will be treasured for years!
Using a 2.5 mm hook and yarn color A, start with a magic ring: 1 ch (does not count as st), 6 sc in magic ring (6)
6 inc (12)
*1 sc, 1 inc* repeat 6 times (18)
*1 sc, 1 inc, 1 sc* repeat 6 times (24)
*3 sc, 1 inc* repeat 6 times (30)
*2 sc, 1 inc, 2 sc* repeat 6 times (36)
*1 inc, 5 sc* repeat 6 times (42)
*5 sc, 1 inc, 1 sc* repeat 6 times (48)
*3 sc, 1 inc, 4 sc* repeat 6 times (54)
54 sc (54)
*3 sc, 1 inv-sc2tog, 4 sc* repeat 6 times (48)
*5 sc, 1 inv-sc2tog, 1 sc* repeat 6 times (42)
*1 inv-sc2tog, 5 sc* repeat 6 times (36)
*2 sc, 1 inv-sc2tog, 2 sc* repeat 6 times (30)
*3 sc, 1 inv-sc2tog* repeat 6 times (24)
Place safety eyes (6 mm) between Rounds 12 and 13, keeping them 8 stitches apart. Secure with washers. Stuff the head firmly.
*1 sc, 1 inv-sc2tog, 1 sc* repeat 6 times (18)
*7 sc, 1 inv-sc2tog* repeat twice (16)
Work 1 slst in the next stitch, fasten off leaving a 20-inch (50 cm) tail, skip 1 stitch, and make 1 NJ in the next stitch. Stuff the remaining space with fiberfill. Do not weave in the tail; keep it to sew the head onto the body later.
Using a 2.5 mm hook and yarn color A, start with a magic ring: 1 ch (does not count as st), 8 sc in magic ring (8)
8 inc (16)
16 sc (16)
Work 1 slst in the next stitch, fasten off, skip 1 stitch, and work 1 NJ in the next stitch. This slst marks the center back of the body. Switch to yarn color B and work an uncounted round of slip stitches: insert your hook into the NJ, yarn over, pull through loop, then work 1 slst in each remaining stitch, with the final slst worked in the same stitch where the yarn was first attached.
Work in the stitches of Round 10: *3 sc, 1 inc* repeat 4 times (20)
20 sc (20)
1 sc, 1 inc, *4 sc, 1 inc* repeat 3 times, 3 sc (24)
24 sc (24)
*3 sc, 1 inc* repeat 6 times (30)
30 sc (30)
1 sc, 1 inc, *4 sc, 1 inc* repeat 5 times, 3 sc (36)
36 sc (36)
*1 inc, 5 sc* repeat 6 times (42)
42 sc (42)
5 sc, *1 inc, 6 sc* repeat 5 times, 1 inc, 1 sc (48)
48 sc (48)
Work the first layer of the dress in spiral rounds using yarn color B. The chains are included in the stitch counts.
Work FLO: *1 sc, 1 ch, sk 2 sts, [1 inc, 1 ch, 1 inc], 1 ch, sk 2 sts* repeat 8 times (64)
*1 sc in the next sc, 1 ch, [1 inc, 2 ch, 1 inc] in the next ch1-sp, 1 ch* repeat 8 times (72)
*1 sc in the next sc, 1 ch, [3 sc, 2 ch, 3 sc] in the next ch2-sp, 1 ch* repeat 8 times (88)
*1 sc in the next sc, 2 ch, [3 sc, 2 ch, 3 sc] in the next ch2-sp, 2 ch* repeat 8 times (104)
*1 sc in the next sc, 1 ch, [3 dc, 2 ch, 3 dc] in the next ch2-sp, 1 ch* repeat 8 times, fasten off, and work 1 NJ in the next sc (88)
Fasten on yarn color B in any stitch at the back of the body to continue working the body. Work in spiral rounds.
Work BLO in the stitches of Round 23 of the body: 1 s-sc, 47 sc (48)
48 sc (48)
Now work the second layer of the dress in spiral rounds.
Work FLO: *2 sc, 1 inc* repeat 16 times (64)
64 sc (64)
*3 sc, 1 inc* repeat 16 times (80)
80 sc (80)
Work FLO: 80 slst (80)
Work BLO in the stitches of Layer II, Round 10: *4 slst, 3 ch* repeat 20 times, fasten off, and work 1 NJ in the first slst (80)
Fasten on yarn color B in any stitch at the back of the body to continue working the body. Work in spiral rounds.
Work BLO in the stitches of Round 26 of the body: 1 s-sc, 47 sc (48)
48 sc (48)
Now work the third layer of the dress in joined rounds. The beginning '1 sc, 1 ch' and the ending slst count together as 1 dc.
Work FLO: 1 sc, 1 ch, 4 dc, [2 dc], *5 dc, [2 dc]* repeat 7 times, 1 slst in first dc (56)
1 ch (does not count as st), 1 sc in the same stitch where the slst of the previous round was made, 1 ch, 2 dc, [2 dc], *6 dc, [2 dc]* repeat 7 times, 3 dc, 1 slst in first dc (64)
1 ch (does not count as st), 1 sc in the same stitch where the slst of the previous round was made, 1 ch, 6 dc, [2 dc], *7 dc, [2 dc]* repeat 7 times, 1 slst in first dc (72)
Continue working in spiral rounds.
1 ch (does not count as st), *1 sc, 1 ch, sk 2 sts, [2 dc, 1 ch, 2 dc], 1 ch, sk 2 sts* repeat 12 times (96)
*1 sc in the next sc, 1 ch, [3 dc, 1 ch, 3 dc] in the next ch1-sp, 1 ch* repeat 12 times (120)
*1 sc in the next sc, [5 dc, 1 ch, 5 dc] in the next ch1-sp* repeat 12 times, fasten off, and work 1 NJ in the next sc (144)
Fasten on yarn color B in any stitch at the back of the body to continue working the body. Work in spiral rounds.
Work BLO in the stitches of Round 29 of the body: 1 s-sc, 47 sc (48)
48 sc (48)
Now work the fourth layer of the dress in joined rounds. The beginning '1 sc, 1 ch' and the ending slst count together as 1 dc.
Work FLO: 1 sc, 1 ch, 4 dc, [2 dc], *5 dc, [2 dc]* repeat 7 times, 1 slst in first dc (56)
1 ch (does not count as st), 1 sc in the same stitch where the slst of the previous round was made, 1 ch, 1 dc, [2 dc], *6 dc, [2 dc]* repeat 7 times, 4 dc, 1 slst in first dc (64)
1 ch (does not count as st), 1 sc in the same stitch where the slst of the previous round was made, 1 ch, 6 dc, [2 dc], *7 dc, [2 dc]* repeat 7 times, 1 slst in first dc (72)
1 ch (does not count as st), 1 sc in the same stitch where the slst of the previous round was made, 1 ch, 4 dc, [2 dc], *8 dc, [2 dc]* repeat 7 times, 3 dc, 1 slst in first dc (80)
Continue working in spiral rounds.
Work FLO: 1 ch (does not count as st), 80 sc (80)
80 sc (80)
Work FLO: 80 slst (80)
Work BLO in the stitches of Layer IV, Round 13: *4 slst, 3 ch* repeat 20 times, fasten off, and work 1 NJ in the first slst (80)
Now work the fifth layer of the dress. Work in joined rounds. The beginning '1 sc, 1 ch' and the ending slst count together as 1 dc. Fasten on yarn color B in any stitch at the back of the body.
Work BLO in the stitches of Layer IV, Round 4: 1 s-sc, 1 ch, 79 dc, 1 slst in first dc (80)
1 ch (does not count as st), 1 sc in the same stitch where the slst of the previous round was made, 1 ch, 79 dc, 1 slst in first dc (80)
Continue working in spiral rounds.
1 ch (does not count as st), 80 sc (80)
80 sc (80)
*9 sc, 1 inc* repeat 8 times (88)
88 sc (88)
Work FLO: 88 slst (88)
Work BLO in the stitches of Layer V, Round 9: *4 slst, 3 ch* repeat 22 times, fasten off, and work 1 NJ in the first slst (88)
Ensure the neck of the body is pointing towards you. Work in rows into the BLO of the uncounted round of slip stitches worked after finishing Round 10 of the body. Mark a stitch at the front of the body, lining up with the lace. Attach yarn color B in the BLO of the stitch to the left of the marked stitch. Turning chains do not count as stitches.
1 ch, *1 sc, 1 inc* repeat 7 times, 1 sc, 1 ch, turn (22)
sk 1 st, 2 sc, *1 inc, 2 sc* repeat 5 times, 1 inc, 1 sc, sk 1 st, 1 sc, 1 ch, turn (26)
sk 1 st, 23 sc, sk 1 st, [3 sc], (work sidewise in the edge stitches of Row 1) 1 sc, 1 slst in the same stitch where the last stitch of Row 1 was made, 1 slst in the next free slip stitch of the body's uncounted round, 1 slst in the same stitch where the first stitch of Row 1 was made, (work sidewise in the edge stitches of Rows 1-2) 2 sc, [1 sc, 1 slst] in the next stitch, fasten off, skip 1 stitch, and work 1 NJ in the next stitch (34)
Now work the leggings. Switch to yarn color C. Attach yarn in any BLO stitch at the center back of Round 32 of the body.
Work BLO: 1 s-sc, 47 sc (48)
48 sc (48)
*6 sc, 1 inv-sc2tog* repeat 6 times (42)
2 sc, 1 inv-sc2tog, *5 sc, 1 inv-sc2tog* repeat 5 times, 3 sc (36)
*4 sc, 1 inv-sc2tog* repeat 6 times (30)
1 sc, *1 inv-sc2tog, 3 sc* repeat 5 times, 1 inv-sc2tog, 2 sc (24)
Stuff the body, neck, and upper body firmly to ensure the neck has enough stability to support the head.
*2 sc, 1 inv-sc2tog* repeat 6 times (18)
*1 inv-sc2tog, 1 sc* repeat 6 times (12)
6 inv-sc2tog (6)
Fasten off leaving a 12-inch (30 cm) tail. Stuff the remaining body space with fiberfill and close the hole securely.
Make 2. Worked in spiral rounds. Stuff as you go. Start with yarn color A.
Magic ring: 1 ch (does not count as st), 6 sc in magic ring (6)
6 inc (12)
*1 sc, 1 inc* repeat 6 times (18)
18 sc (18)
16 sc, 1 inv-sc2tog (17)
7 sc, 1 inv-sc2tog, 7 sc, 1 CL-6 (16)
14 sc, 1 inv-sc2tog (15)
1 inv-sc2tog, 13 sc (14)
6 sc, 1 inv-sc2tog, 6 sc (13)
11 sc, 1 inv-sc2tog (12)
4 sc, 1 inv-sc2tog, 6 sc (11)
9 sc, 1 inv-sc2tog (10)
10 sc (10)
10 sc, 1 slst in next stitch, fasten off, skip 1 stitch, and work 1 NJ in the next stitch (10)
Switch to yarn color B to work the sleeve. Before starting, cut a 10-meter (11-yard) length of color B and keep it aside for the cuff. Attach color B in any stitch of Round 18 at the back of the arm (opposite the thumb).
1 s-sc, 9 sc (10)
Work BLO: 10 sc (10)
10 sc (10)
Place the working yarn loop on a locking stitch marker. Use the extra length of color B to crochet the cuff. Make sure the hand points away from you. Rejoin the yarn in any FLO stitch of Round 19 opposite the thumb. Work in spiral rounds.
Work FLO in the stitches of Round 19: *1 sc (the first stitch is s-sc), 1 inc* repeat 5 times (15)
15 sc (15)
*2 sc, 1 inc* repeat 5 times (20)
20 sc (20)
*4 sc, 1 inc* repeat 4 times (24)
24 sc (24)
*5 sc, 1 inc* repeat 4 times (28)
28 sc (28)
Work BLO: *4 slst, 3 ch* repeat 7 times (28)
Work FLO in the stitches of Round 11: 28 slst, fasten off, and work 1 NJ in the next stitch (28)
Place the main loop of yarn color B back on the hook to finish the arm/sleeve.
10 sc (10)
*3 sc, 1 inv-sc2tog* repeat twice (8)
*1 sc, 1 inv-sc2tog, 1 sc* repeat twice (6)
Stuff the remaining sleeve with fiberfill. Fasten off leaving a 12-inch (30 cm) tail and close the opening.
Make 2. Worked in spiral rounds. Start at the sole using a 2.5 mm hook and yarn color A.
Work all sc in the BB of the chains: 6 ch, 1 sc in 2nd ch from hook, 3 sc, [3 sc] in the last chain, then work along the bottom side of the chain: 3 sc, 1 inc (12)
1 inc, 3 sc, 3 inc, 3 sc, 2 inc (18)
1 sc, 1 inc, 4 sc, *1 inc, 1 sc* repeat 3 times, 3 sc, 1 inc, 1 sc, 1 inc (24)
1 sc, 1 inc, 6 sc, 1 inc, 1 sc, 2 inc, 1 sc, 1 inc, 6 sc, 1 inc, 1 sc, 2 inc (32)
1 sc, 1 inc, 4 sc, 1 inc, 3 sc, *1 inc, 1 sc* repeat twice, *1 sc, 1 inc* repeat twice, 4 sc, 1 inc, 3 sc, *1 inc, 1 sc* repeat twice, 1 sc, 1 inc (42)
Cut two pieces of cardboard or plastic in the shape of the sole (Rounds 1-5) and set them aside. Stuff the leg as you go.
42 sc (42)
12 sc, *1 inv-sc2tog, 2 sc* repeat 3 times, 1 inv-sc2tog, 16 sc (38)
8 sc, *1 inv-sc2tog, 1 sc* repeat 3 times, *1 sc, 1 inv-sc2tog* repeat 3 times, 12 sc (32)
Place the cardboard or plastic sole insert inside the foot.
7 sc, 7 inv-sc2tog, 11 sc (25)
8 sc, 2 hdc, 1 hdc2tog, 1 hdc, 12 sc (24)
*4 sc, 1 sc2tog* repeat 4 times (20)
20 sc (20)
*3 sc, 1 inv-sc2tog* repeat 4 times (16)
16 sc (16)
16 sc, 1 slst in next stitch, fasten off, skip 1 stitch, and work 1 NJ in the next stitch (16)
Switch to yarn color C. Cut a 3-meter (3-yard) piece of color C and keep it aside for the turn-up. Attach color C to the NJ of Round 22.
Work BLO: 16 sc (16)
16 sc (16)
Place the working yarn loop on a locking stitch marker. Crochet the turn-up of the leggings. Ensure the foot points towards you. Use the extra length of color C. Rejoin yarn C in any FLO stitch of Round 22 at the back of the leg. Work in spiral rounds.
Work FLO in the stitches of Round 22: 1 s-sc, 15 sc (16)
16 sc (16)
16 sc, 1 slst, fasten off, skip 1 stitch, and work 1 NJ in the next stitch (16)
Switch to yarn color D. Attach the yarn in any stitch at the back of the leg: 1 ch (counts as 1st stitch), 15 sc, fasten off, and work 1 NJ in the next stitch (16)
Place the main color C loop back on the hook to finish the leggings.
16 sc (16)
*2 sc, 1 inv-sc2tog* repeat 4 times (12)
*1 sc, 1 inv-sc2tog* repeat 4 times (8)
Fasten off leaving a 12-inch (30 cm) tail. Stuff the remaining leg with fiberfill and close the hole.
Make 2. Worked in spiral rounds, turned rounds, and rows. Start at the sole using a 3.5 mm hook and yarn color E. Work in spiral rounds.
Repeat Rounds 1-5 of the Leg (42)
42 sc, 1 slst in the next stitch (42)
1 ch (does not count as st), 42 bpsc (for the first bpsc, insert hook from back to front in the same stitch where the slst of the previous round was made), fasten off, skip 1 stitch, and work 1 NJ in the next stitch (42)
Count 9 stitches to the right of the NJ and place a marker in this 9th stitch. Switch to yarn color F. Work in joined rounds. Attach yarn F in any stitch at the back of the heel. When you reach the marker, place it 1 round higher in the same stitch.
1 ch (counts as st), 41 sc, fasten off, and work 1 NJ in the first sc (the NJ and the underlying chain count together as 1 sc) (42)
Switch to yarn color G and a 2.5 mm hook. Attach yarn in the marked stitch. Work in turned (joined) rounds. The turning chain does not count as a stitch.
1 ch (counts as st), 41 sc, 1 slst in the first sc (the slst and underlying chain count together as 1 sc), 1 ch, turn (42)
42 sc, 1 slst in the first sc, 1 ch, turn (42)
Now work in rows. Turning chains do not count as stitches. (Note: If working an inv-sc2tog on the WS, insert hook through the BLO instead of FLO of the next two stitches).
13 sc, 1 ch, turn (13)
6 sc, 1 inv-sc2tog, 5 sc, 1 ch, turn (12)
12 sc, 1 ch, turn (12)
1 inc, 1 sc, 1 inv-sc2tog, 4 sc, 1 inv-sc2tog, 1 sc, 1 inc, 1 ch, turn (12)
12 sc, 1 ch, turn (12)
Now work 2 rounds around the entire shoe in spiral rounds.
11 sc, 1 inc, 1 sc in each edge stitch of Rows 5 to 1 (= 5 sc), 8 sc, 3 inv-sc2tog, 1 sc, 3 inv-sc2tog, 8 sc, 1 sc in each edge stitch of Rows 1 to 4 (= 4 sc), 1 inc sidewise in the edge of Row 5 (47)
12 slst, sk 2 sts, [3 dc, 1 ch, 3 dc], sk 2 sts, 23 slst, sk 2 sts, [3 dc, 1 ch, 3 dc], sk 2 sts, fasten off, and work 1 NJ in the next stitch (49)
Weave in all loose ends. Using a 2.5 mm hook and yarn color L, work approximately 75 chains to create the shoelace. Thread it through the shoe, tie the ends, and make a bow.
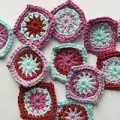
Make 20. Use a 2.5 mm hook. Use any 3 colors of your choice from G, H, K, and L for each square. Finish each round with a NJ.
Start with your first color choice. Magic ring: 1 ch (does not count as st), 1 sc, 1 ch (this sc and ch count together as 1st dc), 11 dc in magic ring, fasten off, and work 1 NJ in the first dc (12)
Switch to your second color choice. Fasten on between any 2 dc: 1 ch (counts as 1st sc), 1 ch, *1 sc between the next 2 dc, 1 ch* repeat 11 times, fasten off, and work 1 NJ in the 2nd chain (24)
Switch to your third color choice. Fasten on in any stitch. Work BLO in the sc and ch of the previous round: 1 ch (counts as 1st sc), 2 sc, [1 sc, 2 ch, 1 sc], *5 sc, [1 sc, 2 ch, 1 sc]* repeat 3 times, 2 sc, fasten off, and work 1 NJ in the first sc (36)
Make 6. Use a 2.5 mm hook and yarn color M.
20 ch (the last 2 ch count as 1st dc). Work in the BB of the chains: 1 dc in the 4th ch from hook, 4 dc, 1 hdc, 5 sc, 6 slst, 1 ch. Now work along the bottom side of the chain: 5 slst, 5 sc, 1 hdc, 7 dc, 1 ch. Do not cut the yarn (36)
Arrange 2 rows of 7 granny squares and the triangles into a strip to coordinate colors. Join them with the triangles using the flat surface slip stitch join with yarn color M. Join the 2 strips of 7 granny squares as well.
Use the 14 joined granny squares and 6 triangles. The RS should face you. Work in rows. Turning chains do not count as stitches. If working an inv-sc2tog on the WS, insert hook through the BLO instead of FLO of the next two stitches.
With yarn color M, attach in the corner-ch of the first square. Work BLO: 1 ch (does not count as st), *1 sc in each of the 9 stitches of the granny square, 1 sc in the triangle* repeat 6 times, 1 sc in each of the 9 stitches of the last granny square, 1 ch, turn (69)
69 sc, 1 ch, turn (69)
3 sc, 1 inv-sc2tog, *8 sc, 1 inv-sc2tog* repeat twice, 19 sc, 1 inv-sc2tog, *8 sc, 1 inv-sc2tog* repeat twice, 3 sc, 1 ch, fasten off (63)
Switch to yarn color K. Fasten on in the first sc of Row 3: 1 s-sc (counts as 1st hdc), 1 hdc, *sk 1 st, [2 hdc]* repeat 29 times, sk 1 st, 2 hdc, 1 ch, fasten off (62)
Switch to yarn color H. Fasten on in the first sc of Row 4: 1 ch (does not count as st), 2 sc, *1 SPsc in the next stitch one row below (do not skip the stitch behind the SPsc), 1 sc* repeat 29 times, 1 SPsc in the next stitch one row below, 2 sc, 1 ch, turn (63)
*5 sc, 1 inv-sc2tog* repeat 3 times, 6 sc, 1 inv-sc2tog, 5 sc, 1 inv-sc2tog, 6 sc, 1 inv-sc2tog, *5 sc, 1 inv-sc2tog* repeat twice, 5 sc, 1 ch, fasten off, turn (55)
Switch to yarn color K. Fasten on in the first sc of Row 6: 1 s-sc (counts as 1st hdc), 1 hdc, *sk 1 st, [2 hdc]* repeat 25 times, sk 1 st, 2 hdc, 1 ch, fasten off (54)
Switch to yarn color G. Fasten on in the first sc of Row 7: 1 ch (does not count as st), 2 sc, *1 SPsc in the next stitch one row below (do not skip the stitch behind the SPsc), 1 sc* repeat 25 times, 1 SPsc in the next stitch one row below, 2 sc, 1 ch, turn (55)
4 sc, 1 inv-sc2tog, 5 sc, 1 inv-sc2tog, *4 sc, 1 inv-sc2tog* repeat twice, 5 sc, 1 inv-sc2tog, *4 sc, 1 inv-sc2tog* repeat twice, 5 sc, 1 inv-sc2tog, 4 sc, 1 ch, fasten off, turn (47)
Switch to yarn color K. Fasten on in the first sc of Row 9: 1 s-sc (counts as 1st hdc), 1 hdc, *sk 1 st, [2 hdc]* repeat 21 times, sk 1 st, 2 hdc, 1 ch, fasten off (46)
Switch to yarn color L. Fasten on in the first sc of Row 10: 1 ch (does not count as st), 2 sc, *1 SPsc in the next stitch one row below (do not skip the stitch behind the SPsc), 1 sc* repeat 21 times, 1 SPsc in the next stitch one row below, 2 sc, 1 ch, turn (47)
*3 sc, 1 inv-sc2tog, 4 sc, 1 inv-sc2tog* repeat 4 times, 3 sc, 1 ch, fasten off, turn (39)
Switch to yarn color K. Fasten on in the first sc of Row 12: 1 s-sc (counts as 1st hdc), 1 hdc, *sk 1 st, [2 hdc]* repeat 17 times, sk 1 st, 2 hdc, 1 ch, fasten off (38)
Switch to yarn color M. Fasten on in the first sc of Row 13: 1 ch (does not count as st), 2 sc, *1 SPsc in the next stitch one row below (do not skip the stitch behind the SPsc), 1 sc* repeat 17 times, 1 SPsc in the next stitch one row below, 2 sc, 1 ch, turn (39)
*3 sc, 1 inv-sc2tog, 2 sc, 1 inv-sc2tog* repeat 4 times, 3 sc, 1 ch, turn (31)
31 sc, 1 ch, turn (31)
*2 sc, 1 inv-sc2tog* repeat 3 times, 3 sc, 1 inv-sc2tog, *2 sc, 1 inv-sc2tog* repeat 3 times, 2 sc, 1 ch, turn (24)
1 sc, 1 inc, *2 sc, 1 inc* repeat 7 times, 1 sc, 1 ch, turn (32)
32 sc, 1 ch, turn (32)
Work 2 final rounds around the entire coat. Work in spiral rounds.
In the 32 sts of Row 19: 1 inc, *3 sc, 1 inc* repeat 7 times, 2 sc, [3 sc]. Rotate the piece 90 degrees clockwise and work along the side edge: 1 sc each sidewise in the edge stitches of Rows 19 to 1, (work BLO into granny squares) 9 sc, 1 sc in the joining slst, 8 sc, 2 inc (in the 2 ch of the corner), 8 sc in the next square, *6 sc in the triangle, 9 sc in the next square* repeat 5 times, 6 sc in the triangle, 8 sc, 2 inc (in the corner), 8 sc, 1 sc in the joining slst, 9 sc, 1 sc each sidewise in the edge stitches of Rows 1 to 19, 1 sc in the same stitch where the beginning inc was made (222)
[3 sc], 39 sc, [3 sc] (in the 2nd sc of the [3 sc] of the previous round), 40 sc, 1 inc (in the 1st stitch of the 2nd inc of the previous round), 100 sc, 1 inc (in the 1st stitch of the 2nd inc of the previous round), 39 sc (228)
Work additional stitches on top of the coat to create the collar.
1 sc, 1 inc, 40 sc, 1 inc, 1 sc, 1 slst in next stitch, fasten off, skip 1 stitch, and work 1 NJ in the next stitch (46)
Switch to yarn color H. Work a final round around the whole coat. Attach yarn in any BLO stitch at the back of the coat.
Work BLO: 1 ch (counts as 1st sc), sc around the entire piece, making additional chains between 2 sc in the chest area to create 2 buttonholes, fasten off, and work 1 NJ in the first sc (230)
Arrange 3 granny squares into a strip for each sleeve and join them using the flat surface slip stitch join with yarn color M (from corner to corner: 1 ch, 7 sc, 1 ch = 9 sts). Join the ends to form a ring. Attach color M in any stitch at the back of the sleeve. Work in joined rounds.
Work BLO: 1 ch (does not count as st), 30 sc, 1 slst in first sc (30)
1 ch (does not count as st), *3 sc, 1 sc2tog* repeat 6 times, 1 slst in first sc (24)
1 ch (does not count as st), 24 sc, 1 NJ in first sc (24)
Switch to yarn color K. Fasten on in any stitch at the back of the sleeve: *[2 hdc] (the first hdc of the round will be a s-sc), sk 1 st* repeat 12 times, 1 slst in the first hdc, 1 SFO (24)
Switch to yarn color H. Fasten on in the 2nd hdc of any [2 hdc] at the back: 1 ch (does not count as st), *1 sc, 1 SPsc in the stitch one round below* repeat 12 times, 1 slst in first sc (24)
1 ch (does not count as st), *2 sc, 1 sc2tog* repeat 6 times, fasten off, and work 1 NJ in first sc (18)
Switch to yarn color K. Fasten on in any stitch above the SFO of Round 4: *[2 hdc] (the first hdc of the round will be a s-sc), sk 1 st* repeat 9 times, 1 slst in the first hdc, 1 SFO (18)
Switch to yarn color G. Fasten on in the 2nd hdc of any [2 hdc] at the back: 1 ch (does not count as st), *1 sc, 1 SPsc in the stitch one round below* repeat 9 times, 1 slst in first sc (18)
1 ch (does not count as st), 18 sc, fasten off, and work 1 NJ in first sc (18)
Switch to yarn color K. Fasten on in any stitch above the SFO of Round 7: Repeat Round 7 (18)
Switch to yarn color L. Repeat Round 8 (18)
Repeat Round 9 (18)
Switch to yarn color K. Fasten on in any stitch above the SFO of Round 10: Repeat Round 7 (18)
Now work in spiral rounds.
Switch to yarn color M. Fasten on in any stitch at the back of the sleeve: 1 sc (the first stitch of the round will be a s-sc), 1 SPsc in the stitch one round below* repeat 9 times (18)
*1 sc, 1 inv-sc2tog* repeat 6 times (12)
12 sc (12)
*1 sc, 1 inv-sc2tog* repeat 4 times (8)
Fasten off leaving a 12-inch (30 cm) tail and close the hole. Now work on the other edge of the joined granny squares in spiral rounds.
With yarn color M, attach in any stitch at the back of the sleeve. Work BLO: *4 sc (the first stitch of the round will be a s-sc), 1 inc* repeat 6 times (36)
36 sc, 1 slst in next stitch, fasten off, skip 1 stitch, and work 1 NJ in the next stitch (36)
Switch to yarn color H. Attach BLO at the back: Work BLO: 1 ch (counts as st), 35 sc, fasten off, and work 1 NJ in the next stitch (36)
Worked in joined rounds and then in rows. Use a 2.5 mm hook and yarn color N. The beginning ch/ch2 and ending slst count together as 1 sc/dc.
Magic ring: 1 ch (counts as st), 5 sc in magic ring, 1 slst in first sc (6)
Work BLO: 1 ch (counts as st), 1 sc in the same stitch where the slst of the previous round was made, 5 inc, 1 slst in first sc (12)
Work BLO: 2 ch (counts as st), 1 dc in the same stitch where the slst of the previous round was made, *[2 dc]* repeat 11 times, 1 slst in first dc (24)
Now work in rows.
Work BLO: 2 ch (counts as st), [2 dc] in the next stitch, *1 dc, [2 dc]* repeat 10 times, 2 dc, turn (35)
Work FLO: 2 ch (counts as st), 1 dc2tog, 2 dc, *[2 dc], 3 dc* repeat 7 times, 1 dc2tog, turn (40)
Work in both loops: 2 ch (counts as st), 1 dc2tog, 3 dc, *[2 dc], 3 dc* repeat 8 times, 1 dc2tog, turn (46)
Work FLO: 2 ch (counts as st), 1 dc2tog, 41 dc, 1 dc2tog, turn (44)
Work in both loops: 2 ch (counts as st), 1 dc2tog, 39 dc, 1 dc2tog, 12 ch, turn (42)
Work the hair strands of the wig. Slip stitches in chain stitches are worked BLO.
1 slst in 2nd ch from hook, 1 slst in each of the next 10 ch, skip the next stitch of Row 5, 1 slst in the next stitch of Row 5, *12 ch, 1 slst in 2nd ch from hook, 1 slst in each of the next 11 ch, skip the next stitch of Row 5, 1 slst in the next stitch of Row 5* repeat to the end of Row 5.
Work slip stitches sidewise in the edge stitches of Rows 5 and 4 to reach the FL of the 1st stitch of Row 3. Work the next row FLO in Row 3.
Work FLO: *16 ch, 1 slst in 2nd ch from hook, 1 slst in each of the next 14 ch, skip the next stitch of Row 3, 1 slst in the next stitch of Row 3* repeat to the end of Row 3.
Work slip stitches sidewise in the edge stitches of Rows 3 and 2 to reach the FL of the 1st stitch of Row 1. Work the next row FLO in Row 1.
Work FLO: *20 ch, 1 slst in 2nd ch from hook, 1 slst in each of the next 18 ch, skip the next stitch of Row 1, 1 slst in the next stitch of Row 1* repeat to the end of Row 1 (if there is one FL remaining, work a slst in this FL).
Work slip stitches sidewise in the edge stitch of Row 1 to reach the FL of the 1st stitch of Round 3. Work FLO in Round 3.
Work FLO: *22 ch, 1 slst in 2nd ch from hook, 1 slst in each of the next 20 ch, skip the next stitch of Round 3, 1 slst in the next stitch of Round 3* repeat to the end of Round 3.
Work 1 or 2 ch to reach the FL of Round 2. Work FLO in Round 2.
Work FLO: *24 ch, 1 slst in 2nd ch from hook, 1 slst in each of the next 22 ch, skip the next stitch of Round 2, 1 slst in the next stitch of Round 2* repeat to the end of Round 2.
Work 1 ch to reach the FL of Round 1. Work FLO in Round 1.
Work FLO: *26 ch, 1 slst in 2nd ch from hook, 1 slst in each of the next 24 ch, skip the next stitch of Round 1, 1 slst in the next stitch of Round 1* repeat to the end of Round 1, fasten off, and work 1 NJ in the next stitch. Weave in all loose ends.
Make 13. Use a 2.5 mm hook and any 3 colors of your choice from G, H, K, and L. Finish each round with a NJ.
Start with your first color. Magic ring: 1 ch (does not count as st), 1 sc, 1 ch (sc and ch count as 1st dc), 11 dc in magic ring, fasten off, and work 1 NJ in first dc (12)
Switch to your second color. Fasten on between any 2 dc: 1 ch (counts as 1st sc), 1 ch, *1 sc between next 2 dc, 1 ch* repeat 11 times, fasten off, and work 1 NJ in 2nd ch (24)
Switch to your third color. Fasten on in any ch1-sp: 1 ch (counts as 1st sc), 1 ch, *1 sc in next ch1-sp, 1 ch* repeat 11 times, fasten off, and work 1 NJ in 2nd ch (24)
Make 6. Use a 2.5 mm hook and any 3 colors of your choice from G, H, K, and L.
Start with your first color. Magic ring: 4 ch (counts as 1st dc), 6 dc in magic ring, 1 ch, fasten off (7)
Switch to your second color. Fasten on in the 4th ch of Row 1: [1 ch, 1 sc], *1 sc between next 2 dc, 1 ch* repeat 5 times, 1 sc between next 2 dc, 1 sc in next stitch, 1 ch, fasten off (13)
Switch to your third color. Fasten on in the 1st sc of Row 2: [1 ch, 1 sc], 1 ch, *1 sc in next ch1-sp, 1 ch* repeat 5 times, 1 sc in next stitch, 1 ch, fasten off (13)
Arrange the circles and half circles using the join-as-you-go method with yarn color M.
Fasten on yarn M in any ch1-sp of Round 3 of Circle 1: 1 ch (counts as sc), 3 ch, *1 sc in next ch1-sp, 5 ch, 1 sc in next ch1-sp, 3 ch* repeat 5 times, 1 sc in next ch1-sp, 5 ch, fasten off, and work 1 NJ in 2nd ch (6 ch3-sp and 6 ch5-sp)
Fasten on yarn M in any ch1-sp of Round 3 of Circle 2: 1 ch (counts as sc), 3 ch, 1 sc in next ch1-sp, 2 ch, 1 sc in any ch5-sp of Circle 1, 2 ch, 1 sc in next ch1-sp of Circle 2, 1 ch, 1 sc in next ch3-sp of Circle 1, 1 ch, 1 sc in next ch1-sp of Circle 2, 2 ch, 1 sc in next ch5-sp of Circle 1, 2 ch, 1 sc in next ch1-sp of Circle 2, *3 ch, 1 sc in next ch1-sp, 5 ch, 1 sc in next ch1-sp* repeat 3 times, 3 ch, 1 sc in next ch1-sp, 5 ch, fasten off, and work 1 NJ in 2nd ch.
Fasten on yarn M in any ch1-sp of Round 3 of Circle 3: 1 ch (counts as sc), 3 ch, 1 sc in next ch1-sp, 2 ch, 1 sc in ch5-sp of Circle 2, 2 ch, 1 sc in next ch1-sp of Circle 3, 1 ch, 1 sc in next ch3-sp of Circle 2, 1 ch, 1 sc in next ch1-sp of Circle 3, 2 ch, 1 sc in joined sc of Circle 1 & 2, 2 ch, 1 sc in next ch1-sp of Circle 3, 1 ch, 1 sc in next ch3-sp of Circle 1, 1 ch, 1 sc in next ch1-sp of Circle 3, 2 ch, 1 sc in next ch5-sp of Circle 1, 2 ch, 1 sc in next ch1-sp of Circle 3, *3 ch, 1 sc in next ch1-sp, 5 ch, 1 sc in next ch1-sp* repeat twice, 3 ch, 1 sc in next ch1-sp, 5 ch, fasten off, and work 1 NJ in 2nd ch.
Join Circles 4 to 6 in the same way. Join Circle 7 with Circle 2. Join Circle 8 to Circles 2 and 3. Join Circles 9 to 13 in the same way. Join the half circles (Circle 14 to Circle 13, 2, and 8, and Circles 15 to 19 in the same way). Once all motifs are joined, pick up stitches along the outer edge of the whole piece using yarn M. Work in spiral rounds.
*sc (the first sc will be a s-sc) in magic ring of half circle, 3 sc sidewise in edge of half circle, 1 sc in next loop, 1 sc in next joining sc, 1 sc each in next 2 loops of circle, 1 inc in next loop, 1 sc each in next 2 loops, 1 sc in joining sc, 1 sc in next loop, 3 sc sidewise in edge of half circle* repeat 6 times (102)
*4 sc, 1 inv-sc2tog* repeat 17 times (85)
1 sc, 1 inv-sc2tog, *3 sc, 1 inv-sc2tog* repeat 16 times, 2 sc (68)
**(*4 sc, 1 inv-sc2tog, 3 sc, 1 inv-sc2tog* repeat twice, 4 sc, 1 inv-sc2tog, 4 sc, 1 inv-sc2tog)** repeat twice, 1 slst in next stitch, fasten off, and work 1 NJ in next stitch (56)
Switch to yarn color K. Attach in any stitch at the back: *[2 hdc] (the first hdc of the round will be a s-sc), sk 1 st* repeat 28 times, fasten off, and work 1 NJ in first hdc (56)
Switch to yarn color H. Fasten on in the 2nd hdc of any [2 hdc] at the back: 1 ch (counts as st), *1 SPsc in next stitch one round below, 1 sc* repeat 27 times, 1 SPsc in next stitch one round below, fasten off, and work 1 NJ in first SPsc (56)
Switch to yarn color M. Attach at the back: 1 ch (counts as st), 55 sc, fasten off, and work 1 NJ in first sc (56)
Use yarn color M and a 3.0 mm hook. Mark a stitch at the front of the beanie, lining up with the motifs. Count 10 stitches forward and attach yarn M in this stitch from the WS. Work the brim over the next 21 stitches in rows.
Pull up a loop (counts as 1st slst), 20 slst, turn (21)
(Work through both Row 1 and Round 7 of the beanie to create a thick fabric) 1 ch (does not count as st), 5 sc, 1 inc, 4 sc, 1 inc, 4 sc, 1 inc, 5 sc, turn (24)
1 ch (counts as 1st slst), 23 slst, turn (24)
(Work through both Rows 3 and 2) 1 ch (does not count as st), sk 1 st, 21 sc, 1 sc2tog, turn (22)
1 ch (counts as 1st slst), 23 slst, turn (22)
(Work through both Rows 5 and 4) 1 ch (does not count as st), sk 1 st, 6 sc, 1 inc, 5 sc, 1 inc, 6 sc, 1 sc2tog, turn (22)
1 ch (counts as 1st slst), 21 slst, turn (22)
(Work next 22 stitches through both Rows 7 and 6) 1 ch (does not count as st), 21 sc, 1 inc, 1 sc each sidewise in the edge of Rows 6, 4, and 2, 1 sc each in the next 35 stitches of Round 7 of the beanie, 1 sc each sidewise in the edge of Rows 2, 4, and 6, fasten off, and work 1 NJ in the first sc (64)
Worked in joined rounds. Use a 3.0 mm hook and yarn color K.
Magic ring: 1 ch (does not count as st), 8 sc in magic ring, 1 slst in first sc (8)
1 ch (does not count as st), *1 inc* repeat 8 times, 1 slst in first sc (16)
1 ch (counts as slst), *3 ch, sk 1 st, 1 slst in next stitch* repeat 8 times, 1 slst in first ch3-sp (8 ch3-sp)
[1 ch, 1 dc, 1 ch, 1 slst] in same ch3-sp, *[1 ch, 1 dc, 1 ch, 1 slst] in next ch3-sp* repeat 7 times (8 petals)
(From behind) 1 slst around next slst of Round 3, 3 ch, *1 slst around next slst of Round 3, 3 ch* repeat 7 times, 1 slst in first ch3-sp (8 ch3-sp)
[1 ch, 3 dc, 1 ch, 1 slst] in same ch3-sp, *[1 ch, 3 dc, 1 ch, 1 slst] in next ch3-sp* repeat 7 times (8 petals)
(From behind) 1 slst around next slst of Round 5, 5 ch, *1 slst around next slst of Round 5, 5 ch* repeat 7 times, 1 slst in first ch5-sp (8 ch5-sp)
[1 ch, 5 dc, 1 ch, 1 slst] in same ch5-sp, *[1 ch, 5 dc, 1 ch, 1 slst] in next ch5-sp* repeat 7 times, fasten off, and work 1 NJ in the first stitch (8 petals)
Weave in all ends. Sew a button in the center and attach the flower to the beanie.
Using a 2.5 mm hook and yarn color L: 5 ch, 4 tr in the 1st chain, 4 ch, 1 slst in the same chain, 4 ch, 4 tr in the same chain, 4 ch, 1 slst in the same chain. Fasten off leaving a long tail, wrap it 5-6 times around the center of the bow, and sew it onto the wig.
I hope you have the absolute best time bringing sweet Zoey to life! This project is such a wonderful labor of love, and every single stitch is worth it when you see her fully dressed in her gorgeous boho layers. Don't forget to take your time, play around with your favorite color combinations, and really enjoy the process of crafting each tiny detail. Once she's finished, she is sure to bring a huge smile to everyone who sees her. Happy crocheting, my lovely friend! 🧶✨
While you can use acrylic, cotton is highly recommended for the body, head, and limbs because it has very little stretch. Acrylic yarn tends to expand when stuffed, which can cause the doll to lose its shape and make the clothes fit too tightly.
Using different hook sizes helps accommodate the thickness of overlapping layers. For example, a larger hook is used for the shoes and wig so they slide easily over the feet and head, while a smaller hook keeps the body stitches tight and secure.
A wobbly head usually means the neck wasn't stuffed firmly enough. To fix this, make sure to pack the fiberfill very tightly into the neck and upper body during assembly. You can also insert a rolled piece of felt or a thick fabric tube inside the neck to act as a support column.
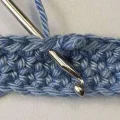
To do this join, hold your pieces flat next to each other with the right sides facing up. Insert your hook into the back loop of the stitch on the first piece, then into the back loop of the corresponding stitch on the second piece. Yarn over and pull through all loops on your hook, keeping your tension relaxed so the seam doesn't pucker.
