🧶 Beautiful ✨ Detailed 💝 Adorable

Adorable BB-8 Amigurumi Pattern

Adorable BB-8 Amigurumi Pattern
4.9★Rating
3-5 HoursTime Needed
3.9KMade This
✂️

Intermediate Level

Ideal for those with basic crocheting experience, featuring slightly more advanced stitches and techniques to expand your skills.

⏱️

Quick Craft

Fits nicely into a free afternoon — 2 to 5 hours of focused, enjoyable crocheting.

🎁

Tiny Treasure

Small, sweet, and gift-worthy creations that fit perfectly in the palm of your hand with detailed charm.

About This Adorable BB-8 Amigurumi Pattern

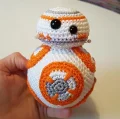
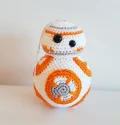
Adorable BB-8 Amigurumi Pattern crochet pattern - detailed view

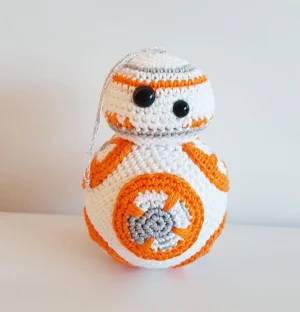
Perfect for intermediate makers looking to practice color changes and multi-piece construction. The finished droid stands about 11cm tall, making him an ideal size for shelf display or as a festive holiday ornament.

Why You'll Love This Adorable BB-8 Amigurumi Pattern

I honestly love how this pattern uses different types of circles to create the droid's complex exterior panels. It feels like putting together a little 3D puzzle as you sew the pieces on! Plus, seeing his little 'face' come to life once you add the two different-sized safety eyes is just the cutest moment.

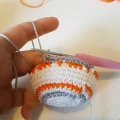
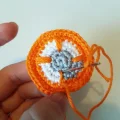
Adorable BB-8 Amigurumi Pattern step 1 Adorable BB-8 Amigurumi Pattern step 2 Adorable BB-8 Amigurumi Pattern step 3 Adorable BB-8 Amigurumi Pattern step 4

Switch Things Up

I've always felt that there's something so special about making characters from our favorite stories, and BB-8 is definitely at the top of that list. When I first sat down to work through this design, I wanted to make sure he had that perfect 'roly-poly' vibe without being too difficult to assemble. One thing I discovered while making my prototype is that the tension on the circles really matters. If you crochet them too loosely, they can look a bit floppy when you sew them onto the body. I recommend using a slightly smaller hook than you might normally use for this yarn weight just to keep everything crisp and clean.

Another fun tip: if you want your BB-8 to have a bit more personality, try sewing the head on at a slight tilt. It gives him that inquisitive, 'listening' look that we all love from the films. I also spent a lot of time playing with the grey embroidery details at the end. Don't feel like you have to follow the photos exactly—adding your own little 'mechanical' lines and dots is what makes your version unique. It's those tiny details that really bring a droid to life! I hope you enjoy every stitch of this galactic journey.

Common Mistakes & How to Fix Them

✗ When working the color changes in Round 12 of the head, it's easy to pull the carried yarn too tight, which will cause the head to pucker and lose its round shape.✗ Be careful not to miss the Back Loop Only instruction on Round 14 of the head; this specific row creates the flat base that allows the head to sit correctly on the body.✗ If you don't use a stitch marker at the start of the continuous spirals, your color transitions on the head panels will shift out of alignment.✗ Placement of the safety eyes is crucial—if they aren't placed between the exact rounds specified, BB-8 can end up looking a bit 'off' rather than having his signature inquisitive expression.

Adorable BB-8 Amigurumi Pattern

Get ready to bring the galaxy's most charming droid into your craft room! This project is a absolute joy for any Star Wars enthusiast, capturing all the personality of BB-8 in a soft, huggable form. You'll love the way his spherical body comes together with those iconic orange panels, making him the perfect companion for your desk or a thoughtful gift for a fellow fan.

Intermediate 3-5 Hours

Materials Needed for Adorable BB-8 Amigurumi Pattern

— Main Fabric

  • 01
    Scheepjes Catona mercerized cotton in White (Shade #106)
  • 02
    Scheepjes Catona mercerized cotton in Orange (Shade #281)
  • 03
    Scheepjes Catona mercerized cotton in Grey (Shade #074)

— Tools Required

  • 01
    2.50 mm crochet hook
  • 02
    Tapestry needle for sewing pieces together
  • 03
    Polyester fiberfill stuffing
  • 04
    One 9 mm safety eye
  • 05
    One 8 mm safety eye
  • 06
    Black embroidery floss for detailing
  • 07
    Locking stitch marker

Progress Tracker

0% Complete

— 1. Head :

Info :

Work in a continuous spiral using white yarn.

Round 1 :

sc 6 into a MR (6)

Round 2 :

inc in every stitch around (12)

Round 3 :

(sc 1, inc 1) repeat 6 times (18)

Round 4 :

sc 1, inc 1, (sc 2, inc 1) repeat 5 times, sc 1 (24)

Round 5 :

Switch to grey: (sc 3, inc 1) repeat 6 times (30)

Round 6 :

Switch to white: sc 2, inc 1, (sc 4, inc 1) repeat 5 times, sc 2 (36)

Round 7 :

Switch to orange: sc 36 (36)

Round 8 :

Switch to white: (sc 5, inc 1) repeat 6 times (42)

Round 9-11 :

sc 42 (42)

Round 12 :

In orange: sc 1. In white: sc 1. In orange: sc 3. In white: sc 1. In orange: sc 1. In white: sc 1. In orange: sc 3. In white: sc 1. In orange: sc 1. In white: sc 1. In orange: sc 3. In white: sc 1. In orange: sc 1. In white: sc 7. In orange: sc 3. In white: sc 1. In orange: sc 1. In white: sc 1. In orange: sc 3. In white: sc 1. In orange: sc 1. In white: sc 1. In orange: sc 3. In white: sc 1 (42)

Round 13 :

Switch to grey: sc 42 (42)

Info :

Install the 9mm safety eye between rounds 8 and 9. Place the 8mm safety eye between rounds 10 and 11.

Round 14 :

Switch to white and work in BLO: (sc 5, dec 1) repeat 6 times (36)

Round 15 :

(sc 4, dec 1) repeat 6 times (30)

Round 16 :

(sc 3, dec 1) repeat 6 times (24)

Info :

Begin stuffing the head firmly with fiberfill.

Round 17 :

(sc 2, dec 1) repeat 6 times (18)

Round 18 :

(sc 1, dec 1) repeat 6 times (12)

Round 19 :

dec 6 times (6)

Info :

Fasten off and sew the remaining opening closed. Leave a long tail for attaching to the body later.

— 2. Body :

Info :

Using white yarn, work in a continuous spiral.

Round 1 :

sc 6 into a MR (6)

Round 2 :

inc in every stitch (12)

Round 3 :

(sc 1, inc 1) repeat 6 times (18)

Round 4 :

sc 1, inc 1, (sc 2, inc 1) repeat 5 times, sc 1 (24)

Round 5 :

(sc 3, inc 1) repeat 6 times (30)

Round 6 :

sc 2, inc 1, (sc 4, inc 1) repeat 5 times, sc 2 (36)

Round 7 :

(sc 5, inc 1) repeat 6 times (42)

Round 8 :

sc 3, inc 1, (sc 6, inc 1) repeat 5 times, sc 3 (48)

Round 9 :

sc 48 (48)

Round 10 :

(sc 7, inc 1) repeat 6 times (54)

Round 11-20 :

sc 54 (54)

Round 21 :

(sc 7, dec 1) repeat 6 times (48)

Round 22 :

sc 48 (48)

Round 23 :

sc 3, dec 1, (sc 6, dec 1) repeat 5 times, sc 3 (42)

Round 24 :

(sc 5, dec 1) repeat 6 times (36)

Round 25 :

sc 2, dec 1, (sc 4, dec 1) repeat 5 times, sc 2 (30)

Round 26 :

(sc 3, dec 1) repeat 6 times (24)

Info :

Stuff the body firmly, continuing as you close the hole.

Round 27 :

sc 1, dec 1, (sc 2, dec 1) repeat 5 times, sc 1 (18)

Round 28 :

(sc 1, dec 1) repeat 6 times (12)

Round 29 :

dec 6 times (6)

Info :

Fasten off and sew the hole shut.

— 3. Circle Type 1 (Make 2) :

Round 1 :

Using white: sc 6 in MR (6)

Round 2 :

inc in every stitch (12)

Round 3 :

(sc 1, inc 1) repeat 6 times (18)

Round 4 :

sc 1, inc 1, (sc 2, inc 1) repeat 5 times, sc 1 (24)

Round 5 :

Switch to orange: (sc 3, inc 1) repeat 6 times (30)

Round 6 :

sc 2, inc 1, (sc 4, inc 1) repeat 5 times, sc 2 (36)

Round 7 :

sl st 1, fasten off leaving a long tail for sewing.

— 4. Circle Type 2 (Make 2) :

Round 1 :

Using grey: sc 6 in MR (6)

Round 2 :

inc in every stitch (12)

Round 3 :

Switch to white: (sc 1, inc 1) repeat 6 times (18)

Round 4 :

sc 1, inc 1, (sc 2, inc 1) repeat 5 times, sc 1 (24)

Round 5 :

Switch to orange: (sc 3, inc 1) repeat 6 times (30)

Round 6 :

sc 2, inc 1, (sc 4, inc 1) repeat 5 times, sc 2 (36)

Round 7 :

sl st 1, fasten off leaving a long tail for sewing.

— 5. Circle Type 3 (Make 2) :

Round 1 :

Using grey: sc 6 in MR (6)

Round 2 :

inc in every stitch (12)

Note :

Stitch count in Round 3 may require adjustment to match the base of 12 stitches—verify and repeat as needed to reach 18.

Round 3 :

Using grey: sc 1, inc 1, sc 1. Switch to white: inc 1, (sc 1, inc 1) repeat 5 times (18)

Round 4 :

Using grey: sc 1, inc 1, sc 2, inc 1. Switch to white: (sc 2, inc 1) repeat 4 times, sc 1 (24)

Round 5 :

Switch to orange: (sc 3, inc 1) repeat 6 times (30)

Round 6 :

sc 2, inc 1, (sc 4, inc 1) repeat 5 times, sc 2 (36)

Round 7 :

sl st 1, fasten off leaving a long tail for sewing.

Assembly Instructions

  • Before attaching the circles, use orange yarn to embroider a simple cross shape in the center of each of the six panels.
  • Place the six finished circles onto the body, ensuring they are spaced evenly around the sphere, and pin them in place.
  • Sew each circle panel onto the body using the long yarn tails, keeping your stitches neat and close to the edge.
  • Take some grey yarn and add small decorative embroidery stitches around the panels to enhance the droid's mechanical look.
  • Center the head on top of the body and use pins to hold it steady before sewing it on firmly with the white yarn tail.
  • Check that the head is secure and doesn't wobble; add a few extra hidden stitches if needed for stability.
  • Optional: Braid a length of silver cord or yarn and attach it to the top of the head if you wish to hang your BB-8.

Important Notes

  • 💡Always use a stitch marker at the beginning of your rounds since this pattern is worked in a continuous spiral.
  • 💡When changing colors, make sure to pull the new color through the last two loops of the previous stitch for a clean transition.
  • 💡Stuff both the head and body very firmly to ensure the droid maintains its iconic round shape even after assembly.
  • 💡The 9mm eye is the main sensor and the 8mm eye is the secondary one; double-check their placement rounds before securing the backs.
  • 💡If you find the circles are curling, you can lightly steam block them before pinning them to the body.

I truly hope you enjoy every moment of creating your very own little droid! BB-8 has such a cheerful, adventurous spirit, and having a handmade version sitting on your shelf is sure to bring a bit of that galactic magic into your home. Don't be afraid to get creative with the final embroidery details—that's where his personality really shines through. If you're making this as a gift, I just know it will be cherished for years to come. Happy crocheting, and may the Force be with your hook! 🧶✨🤖
You ask,

we answer.

FAQs

How do I keep the color changes on the head from looking messy?

The best way to get crisp color changes is to carry the yarn you aren't using behind your work (tapestry crochet style). Just be sure not to pull the carried yarn too tight, or the fabric will bunch up and the head won't be perfectly round.

Can I use a larger hook and thicker yarn for this pattern?

Absolutely! If you use worsted weight yarn and a 3.5mm or 4.0mm hook, your BB-8 will just turn out significantly larger. Just remember to increase your safety eye sizes accordingly so they don't look too small on the bigger head.

The stitch counts for Circle Type 3 Round 3 seem a bit confusing. Any tips?

It's a tricky round! If you find the count isn't matching up, the goal is to increase from 12 to 18 stitches while incorporating the grey section. As long as you end the round with 18 stitches and the grey part is centered, the next rounds will work out perfectly.

What is the best way to ensure the circles are centered on the body?

I recommend pinning all six circles onto the body at the same time before you start sewing. This allows you to adjust their spacing and make sure they are perfectly symmetrical before anything is permanent.