About This Adorable Little Elephant Amigurumi Pattern
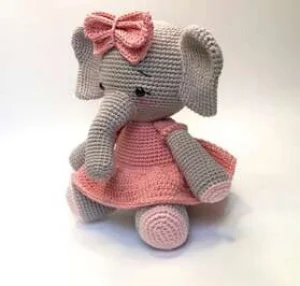
Perfect for anyone who loves making heirloom-quality toys, this elephant looks stunning on a nursery shelf or as a centerpiece in a handmade gift basket.
Ideal for those with basic crocheting experience, featuring slightly more advanced stitches and techniques to expand your skills.
Takes 5-7 hours, making it an enjoyable project to finish over a couple of days.
Playful characters full of personality, designed to spark imagination and become cherished playtime favorites.
Perfect for anyone who loves making heirloom-quality toys, this elephant looks stunning on a nursery shelf or as a centerpiece in a handmade gift basket.
I honestly couldn't stop smiling while making the tiny bow for this girl! The way the skirt is crocheted directly onto the body makes assembly so much easier than sewing separate clothes. It's those little details that make the process feel really rewarding and professional.
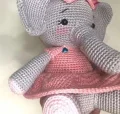
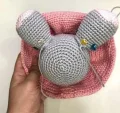
There is something truly magical about the moment an amigurumi starts to develop its own personality. I remember the first time I made this elephant; I was a bit nervous about the trunk curvature, but as soon as I added that tiny pink bow, everything just clicked. She went from a pile of grey and pink rounds to a little character with a story to tell.
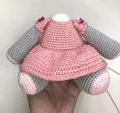
I love how the skirt is worked directly into the body. It’s a technique I use often because it gives the toy a much cleaner finish than trying to sew a separate garment on later. Plus, it makes the whole piece feel more cohesive and durable, especially if it’s going to be played with by little hands. If you want to make her even more unique, try using a variegated yarn for the skirt or adding a tiny bit of lace trim to the edge. It’s those small, personal touches that make our handmade gifts stand out. Take your time with the facial embroidery—it’s the 'soul' of the toy, and even a single stitch can change her whole expression! Happy stitching, friends.
You're going to love bringing this sweet little elephant to life! She's got the most charming personality, complete with a dainty pink dress and a matching bow. I've designed this to be a relaxing project that results in a truly special handmade friend for your collection or a lucky little one.
Start with grey yarn.
Work 8 sc into a MR (8)
Work 1 inc in every stitch around (16)
(1 sc, 1 inc) repeat 8 times (24)
1 sc, 1 inc, (2 sc, 1 inc) repeat 7 times, 1 sc (32)
(3 sc, 1 inc) repeat 8 times (40)
Work 1 sc in each stitch around (40)
2 sc, 1 inc, (4 sc, 1 inc) repeat 7 times, 2 sc (48)
Work 1 sc in each stitch around (48)
(5 sc, 1 inc) repeat 8 times (56)
Work 1 sc in each stitch around (56)
3 sc, 1 inc, (6 sc, 1 inc) repeat 7 times, 3 sc (64)
Work 1 sc in each stitch around (64)
(7 sc, 1 inc) repeat 8 times (72)
Work 72 sc in each of these 10 rounds (72)
(7 sc, 1 dec) repeat 8 times (64)
Work 1 sc in each stitch around (64)
3 sc, 1 dec, (6 sc, 1 dec) repeat 7 times, 3 sc (56)
Work 56 sc in each of these 2 rounds (56)
Insert safety eyes between Round 22 and Round 23, leaving 15 stitches of space between them.
(5 sc, 1 dec) repeat 8 times (48)
Work 1 sc in each stitch around (48)
2 sc, 1 dec, (4 sc, 1 dec) repeat 7 times, 2 sc (40)
Work 1 sc in each stitch around (40)
(3 sc, 1 dec) repeat 8 times (32)
(2 sc, 1 dec) repeat 8 times (24)
Stuff the head firmly, fasten off, and hide the yarn tail.
Use grey yarn.
Work 6 sc into a MR (6)
Work 1 inc in every stitch around (12)
(1 sc, 1 inc) repeat 6 times (18)
1 sc, 1 inc, (2 sc, 1 inc) repeat 5 times, 1 sc (24)
(3 sc, 1 inc) repeat 6 times (30). Do not cut yarn. ch 11, then work 10 sc starting from the second ch from hook.
Work 30 sc around the original circle, then work 9 sc, 1 inc, and 9 sc along the chain section (50)
Place your stitch marker here.
Work 50 sc in each of these 3 rounds (50)
4 sc, 1 dec, (8 sc, 1 dec) repeat 4 times, 4 sc (45)
Work 45 sc in each of these 2 rounds (45)
(7 sc, 1 dec) repeat 5 times (40)
3 sc, 1 dec, (6 sc, 1 dec) repeat 4 times, 3 sc (35)
(5 sc, 1 dec) repeat 5 times (30)
Work 1 sc in each stitch around (30)
Do not stuff. Fasten off leaving a long tail for sewing.
Use grey yarn.
Work 6 sc into a MR (6)
Work 1 inc in every stitch around (12)
(1 sc, 1 inc) repeat 6 times (18)
Work 18 sc in blo (18)
Work 18 sc in each of these 9 rounds (18)
Work 1 inc, 8 sc, 1 dec, 7 sc in each of these 6 rounds (18)
(2 sc, 1 inc) repeat 6 times (24)
Work 24 sc in each of these 4 rounds (24)
Stuff the trunk and leave a long tail for assembly.
Use pink yarn.
ch 17, start in 2nd ch from hook: 16 sc, ch 1, turn (16)
Work 16 sc, ch 1, turn for 11 rows (16)
Work sl st all the way around the edges of the rectangle.
Use pink yarn.
ch 17, start in 2nd ch from hook: 16 sc, ch 1, turn (16)
Work 16 sc, ch 1, turn for 4 rows (16)
Work sl st all the way around the edges.
Use pink yarn.
Leave a long tail, ch 12, leave another long tail to wrap around the center.
Start with grey yarn.
Work 6 sc into a MR (6)
Work 1 inc in every stitch around (12)
(1 sc, 1 inc) repeat 6 times (18)
1 sc, 1 inc, (2 sc, 1 inc) repeat 5 times, 1 sc (24)
(3 sc, 1 inc) repeat 6 times (30)
2 sc, 1 inc, (4 sc, 1 inc) repeat 5 times, 2 sc (36)
(5 sc, 1 inc) repeat 6 times (42)
3 sc, 1 inc, (6 sc, 1 inc) repeat 5 times, 3 sc (48)
(7 sc, 1 inc) repeat 6 times (54)
4 sc, 1 inc, (8 sc, 1 inc) repeat 5 times, 4 sc (60)
(9 sc, 1 inc) repeat 6 times (66)
Work 66 sc in each of these 9 rounds (66)
(9 sc, 1 dec) repeat 6 times (60)
Work 60 sc in each of these 2 rounds (60)
4 sc, 1 dec, (8 sc, 1 dec) repeat 5 times, 4 sc (54)
Switch to pink yarn.
Work 1 sc in each stitch around (54)
Work 1 sc in each stitch around in blo (54)
(7 sc, 1 dec) repeat 6 times (48)
Work 1 sc in each stitch around (48)
3 sc, 1 dec, (6 sc, 1 dec) repeat 5 times, 3 sc (42)
Work 42 sc in each of these 2 rounds (42)
(5 sc, 1 dec) repeat 6 times (36)
Work 1 sc in each stitch around (36)
2 sc, 1 dec, (4 sc, 1 dec) repeat 5 times, 2 sc (30)
Work 1 sc in each stitch around (30)
(3 sc, 1 dec) repeat 6 times (24)
Stuff the body and leave a long tail for sewing.
Start with light pink yarn.
Work 6 sc into a MR (6)
Work 1 inc in every stitch around (12)
(1 sc, 1 inc) repeat 6 times (18)
1 sc, 1 inc, (2 sc, 1 inc) repeat 5 times, 1 sc (24)
Switch to grey yarn.
Work 24 sc in blo (24)
Work 24 sc in each of these 5 rounds (24)
(4 sc, 1 dec) repeat 4 times (20)
Work 20 sc in each of these 7 rounds (20)
(3 sc, 1 dec) repeat 4 times (16)
Work 16 sc in each of these 3 rounds (16)
Switch to pink yarn.
Work 1 sc in each stitch around (16)
Work 16 sc in blo (16)
Work 16 sc in each of these 3 rounds (16)
Stuff the arm only halfway up. Work sc in the flo of Round 24 using pink yarn for a decorative edge.
Flatten the top of the arm and work 8 sc through both layers to close.
Start with light pink yarn.
ch 7, starting in the second ch from hook work: 5 sc, 1 inc, then 5 sc along the other side of the chain (12)
(1 sc, 1 inc) repeat 6 times (18)
1 sc, 1 inc, (2 sc, 1 inc) repeat 5 times, 1 sc (24)
(3 sc, 1 inc) repeat 6 times (30)
2 sc, 1 inc, (4 sc, 1 inc) repeat 5 times, 2 sc (36)
Switch to grey yarn.
Work 36 sc in blo (36)
Work 36 sc in each of these 5 rounds (36)
14 sc, 4 dec, 14 sc (32)
14 sc, 2 dec, 14 sc (30)
Work 30 sc in each of these 2 rounds (30)
(3 sc, 1 dec) repeat 6 times (24)
Work 24 sc in each of these 2 rounds (24)
Stuff the foot and leave a long tail for sewing.
Attach light pink yarn to the flo of Round 26 on the body.
Work 1 hdc inc in every stitch around (108)
1 sl st in the first hdc, ch 1, work 108 hdc around (108)
Work 108 hdc around in a spiral (108)
Work sl st into every stitch around for a finished edge (108)
I'm so excited for you to finish your little elephant! There's something so special about the moment you add the blush and she finally 'wakes up.' I hope she brings a lot of joy to whoever receives her, whether that's a new baby or just a spot on your own craft shelf. Don't forget to take a photo of your finished work—it's such a great feeling to see all those stitches come together into a friend! 🧶 ✨
You can, but it will give her a much smaller, more 'poker-face' look; 9mm really helps capture that cute, wide-eyed amigurumi style.
In this design, the skirt is crocheted directly into the front loops of the body, so it's a permanent part of the toy, making it safer for small children.
Any DK weight cotton yarn will work beautifully, just make sure to use a hook size that creates a tight fabric so the stuffing doesn't peek through.
The curve comes from the specific increase and decrease placement in rounds 14-19; make sure your stitch count is exact there to get the right shape.
