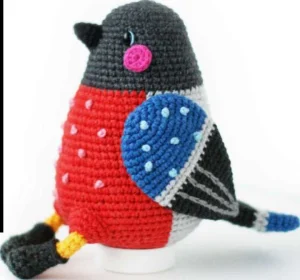
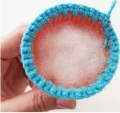
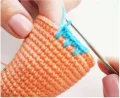
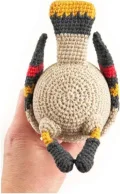
Get ready to create your very own flock of feathered friends with this delightful winter collection! You'll find instructions for a vibrant Kingfisher, a sophisticated Waxwing, a cheerful Chickadee, and a festive Snowbird. Each little bird has its own unique personality, complete with tiny hats, scarves, and accessories that make them feel so alive. Whether you're making these to brighten up a winter window sill or as a thoughtful handmade gift, you'll find the process as cozy as a warm cup of cocoa on a snowy afternoon.
Progress Tracker
0% Complete
— 1. Kingfisher — Head :
Info :
Begin with Turquoise yarn and stuff as you progress.
Round 1 :
Start with 6 sc into a MR (6)
Round 2 :
Work 2 sc into every st around (12)
Round 3 :
Repeat [1 sc, inc] 6 times (18)
Round 4 :
1 sc, then [inc, 2 sc] 5 times, then inc and 1 sc (24)
Round 5 :
Repeat [3 sc, inc] 6 times (30)
Round 6 :
2 sc, then [inc, 4 sc] 5 times, then inc and 2 sc (36)
Round 7 :
Repeat [5 sc, inc] 6 times (42)
Round 8 :
3 sc, then [inc, 6 sc] 5 times, then inc and 3 sc (48)
Round 9 :
Repeat [7 sc, inc] 6 times (54)
Round 10 :
sc in every st (54)
Round 11 :
sc in every st (54)
Round 12 :
sc in every st (54)
Colour Change :
Switch to Orange yarn but do not cut the Turquoise.
Round 13 :
sc in every st (54)
Round 14 :
sc in every st (54)
Colour Change :
Switch back to Turquoise and cut the Orange.
Round 15 :
sc in every st (54)
Colour Change :
Switch to White and cut the Turquoise.
Round 16 :
sc in every st (54)
Round 17 :
sc in every st (54)
Round 18 :
12 sc, [3 sc, dec] 6 times, 12 sc (48)
Round 19 :
12 sc, [2 sc, dec] 6 times, 12 sc (42)
Round 20 :
12 sc, [1 sc, dec] 6 times, 12 sc (36)
Round 21 :
12 sc, 6 dec, 12 sc (30)
Round 22 :
Repeat [3 sc, dec] 6 times (24)
Round 23 :
Working in blo, repeat [2 sc, dec] 6 times (18)
Round 24 :
Repeat [1 sc, dec] 6 times (12)
Info :
Secure the end, leaving a 10cm tail. Use a needle to thread through the front loops and pull shut.
— 2. Kingfisher — Body :
Info :
Attach Orange yarn to the flo of Round 22 on the head. Stuff as you go.
Round 1 :
In flo, repeat [3 sc, inc] 6 times (30)
Round 2 :
12 sc, 6 inc, 12 sc (36)
Round 3 :
12 sc, [1 sc, inc] 6 times, 12 sc (42)
Round 4 :
3 sc, [inc, 6 sc] 5 times, inc, 3 sc (48)
Round 5 :
sc in every st (48)
Round 6 :
Repeat [7 sc, inc] 6 times (54)
Round 7 :
sc in every st (54)
Round 8 :
4 sc, [inc, 8 sc] 5 times, inc, 4 sc (60)
Round 9 :
sc in every st (60)
Round 10 :
Repeat [9 sc, inc] 6 times (66)
Round 11 :
sc in every st (66)
Round 12 :
sc in every st (66)
Round 13 :
sc in every st (66)
Round 14 :
sc in every st (66)
Round 15 :
sc in every st (66)
Round 16 :
12 sc, [5 sc, dec] 6 times, 12 sc (60)
Round 17 :
sc in every st (60)
Round 18 :
sc in every st (60)
Round 19 :
sc in every st (60)
Round 20 :
sc in every st (60)
Round 21 :
sc in every st (60)
Round 22 :
12 sc, [4 sc, dec] 6 times, 12 sc (54)
Round 23 :
sc in every st (54)
Round 24 :
Repeat [7 sc, dec] 6 times (48)
Round 25 :
3 sc, [dec, 6 sc] 5 times, dec, 3 sc (42)
Round 26 :
Repeat [5 sc, dec] 6 times (36)
Round 27 :
2 sc, [dec, 4 sc] 5 times, dec, 2 sc (30)
Round 28 :
Repeat [3 sc, dec] 6 times (24)
Round 29 :
1 sc, [dec, 2 sc] 5 times, dec, 1 sc (18)
Round 30 :
Repeat [1 sc, dec] 6 times (12)
Info :
Close the bottom of the body using a needle through the front loops and pull tight.
— 3. Kingfisher — Right Wing :
Info :
Start with White yarn. Do not stuff.
Round 1 :
6 sc in a MR (6)
Round 3 :
[1 sc, inc] x 6 (18)
Round 4 :
1 sc, [inc, 2 sc] x 5, inc, 1 sc (24)
Round 5 :
12 sc, [1 sc, inc] x 6 (30)
Round 6 :
sc in every st (30)
Round 7 :
12 sc, [2 sc, inc] x 6 (36)
Colour Change :
Switch to Turquoise and cut the White.
Round 8 :
sc in every st (36)
Round 9 :
sc in every st (36)
Round 10 :
sc in every st (36)
Round 11 :
sc in every st (36)
Round 12 :
sc in every st (36)
Round 13 :
12 sc, [6 sc, dec] x 3 (33)
Round 14 :
sc in every st (33)
Round 15 :
sc in every st (33)
Round 16 :
sc in every st (33)
Round 17 :
sc in every st (33)
Colour Change :
Switch to Orange and cut the Turquoise.
Round 18 :
sc in every st (33)
Round 19 :
12 sc, [5 sc, dec] x 3 (30)
Colour Change :
Switch to Dark Turquoise and cut the Orange.
Round 20 :
sc in every st (30)
Round 21 :
sc in every st (30)
Round 22 :
sc in every st (30)
Round 23 :
12 sc, [1 sc, dec] x 6 (24)
Round 24 :
sc in every st (24)
Round 25 :
1 sc, [dec, 2 sc] x 5, dec, 1 sc (18)
Round 26 :
sc in every st (18)
Round 27 :
[1 sc, dec] x 6 (12)
Round 28 :
sc in every st (12)
Info :
Fasten off and pull the end through the front loops to close.
— 4. Kingfisher — Left Wing :
Info :
Start with White yarn. Do not stuff.
Round 1 :
6 sc in a MR (6)
Round 3 :
[1 sc, inc] x 6 (18)
Round 4 :
1 sc, [inc, 2 sc] x 5, inc, 1 sc (24)
Round 5 :
[1 sc, inc] x 6, 12 sc (30)
Round 6 :
sc in every st (30)
Round 7 :
[2 sc, inc] x 6, 12 sc (36)
Colour Change :
Switch to Turquoise and cut the White.
Round 8-12 :
sc in every st (36)
Round 13 :
[6 sc, dec] x 3, 12 sc (33)
Round 14-17 :
sc in every st (33)
Colour Change :
Switch to Orange and cut the Turquoise.
Round 18 :
sc in every st (33)
Round 19 :
[5 sc, dec] x 3, 12 sc (30)
Colour Change :
Switch to Dark Turquoise and cut the Orange.
Round 20-22 :
sc in every st (30)
Round 23 :
[1 sc, dec] x 6, 12 sc (24)
Round 24 :
sc in every st (24)
Round 25 :
1 sc, [dec, 2 sc] x 5, dec, 1 sc (18)
Round 26 :
sc in every st (18)
Round 27 :
[1 sc, dec] x 6 (12)
Round 28 :
sc in every st (12)
Info :
Fasten off and close the tip.
— 5. Kingfisher — Beak :
Info :
Use Dark Gray yarn. Stuff lightly as you go.
Round 1 :
4 sc into a MR (4)
Round 2 :
sc in every st (4)
Round 3 :
Repeat [1 sc, inc] 2 times (6)
Round 4 :
sc in every st (6)
Round 5 :
Repeat [2 sc, inc] 2 times (8)
Round 6 :
sc in every st (8)
Round 7 :
sc in every st (8)
Round 8 :
Repeat [3 sc, inc] 2 times (10)
Round 9 :
sc in every st (10)
Round 10 :
Repeat [4 sc, inc] 2 times (12)
Info :
Finish with a sl st and leave a long tail for sewing.
— 6. Kingfisher — Tail :
Info :
Alternate Turquoise and Orange yarn. Do not stuff the first 9 rounds.
Round 1 :
With Turquoise sc 3, with Orange sc 3 into a MR (6)
Round 2 :
With Turquoise inc, 2 sc; with Orange inc, 2 sc (8)
Round 3 :
With Turquoise 3 sc, inc; with Orange 3 sc, inc (10)
Round 4 :
With Turquoise 5 sc; with Orange 5 sc (10)
Round 5 :
With Turquoise inc, 4 sc; with Orange inc, 4 sc (12)
Round 6 :
With Turquoise 5 sc, inc; with Orange 5 sc, inc (14)
Round 7 :
With Turquoise 7 sc; with Orange 7 sc (14)
Round 8 :
With Turquoise inc, 6 sc; with Orange inc, 6 sc (16)
Round 9 :
With Turquoise 8 sc; with Orange 8 sc (16)
Round 10 :
With Turquoise 7 sc, inc; with Orange 7 sc, inc (18)
Round 11 :
With Turquoise 9 sc; with Orange 9 sc (18)
Round 12 :
With Turquoise inc, 8 sc; with Orange inc, 8 sc (20)
Round 13 :
With Turquoise 10 sc; with Orange 10 sc (20)
Round 14 :
With Turquoise 9 sc, inc; with Orange 9 sc, inc (22)
Round 15 :
With Turquoise 11 sc; with Orange 11 sc (22)
Round 16 :
With Turquoise inc, 10 sc; with Orange inc, 10 sc (24)
Round 17 :
With Turquoise 12 sc; with Orange 12 sc (24)
Info :
Fasten off both colors, leaving tails for sewing.
— 7. Kingfisher — Legs :
Info :
Make 2. Start in Yellow and stuff as you go.
Round 1 :
Ch 7, starting in 2nd ch: inc, 4 sc, 4 sc in last ch, then 4 sc and inc on other side (16)
Round 2 :
Repeat [1 sc, inc] 8 times (24)
Round 3 :
In blo, sc in every st (24)
Round 4 :
sc in every st (24)
Round 5 :
4 sc, 9 dec, 2 sc (15)
Round 6 :
5 sc, 3 dec, 4 sc (12)
Info :
Stuff the foot firmly now. Switch to White but keep the Yellow yarn on the outside.
Round 7 :
In blo, 6 dec (6)
Round 8-14 :
sc in every st (6)
Info :
Work 1-2 more sc, then switch to Orange and cut White.
Round 15 :
In flo, 6 inc (12)
Round 16 :
Repeat [1 sc, inc] 6 times (18)
Round 17 :
Repeat [2 sc, inc] 6 times (24)
Round 18-20 :
sc in every st (24)
Info :
Fasten off. Now return to Round 7 and the Yellow yarn to finish the boot top.
Part 2 - R1 :
In flo, sc in every st (12)
Part 2 - R2 :
sc in every st (12)
Part 2 - R3 :
sl st in every st (12)
— 8. Kingfisher — Hat & Scarf :
Info :
Hat: Use Dark Turquoise. Ch 26, start in 2nd ch from hook.
Row 1 :
25 sl st, ch 1, turn (25)
Row 2 :
In blo 20 sc, then 5 sl st, ch 1, turn (25)
Row 3 :
In blo 25 sl st, ch 1, turn (25)
Info :
Repeat Rows 2-3 until the hat fits the head (approx 74 rows total). Sew the back seam.
Hat Edge :
Along the bottom: In blo 1 sc, [2 sc, dec] x 6, [dec, 2 sc] x 6, 1 sc (38)
Scarf :
Peach yarn. Ch 91, start in 2nd ch.
Row 1-6 :
90 sl st, ch 1, turn (90)
I hope you enjoyed bringing these little winter birds to life as much as I did! There’s something so satisfying about seeing a simple ball of yarn transform into a character with so much personality. Don't forget to play around with different color combinations — maybe a bright red cardinal or a soft gray sparrow would be a lovely addition to your flock. I'd love to see your finished birds perched in their new homes, so keep on crafting and sharing the joy. Happy crocheting, and may your winter be filled with cozy stitches! 🧶 🧵 ✨