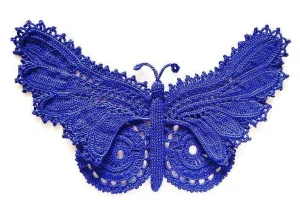
You are going to absolutely fall in love with the delicate, heirloom quality of this lace butterfly. It is a true testament to the beauty of traditional Irish lace techniques, brought into the modern world of amigurumi. I’ve designed this to be a slow, meditative project where you can really appreciate the tiny details and the way the wings take shape under your hook. It’s the perfect piece for when you want to challenge yourself and create something that looks like it belongs in a vintage collection.
Progress Tracker
0% Complete
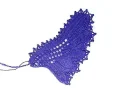
— 1. Small Wing (Make 2) :
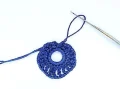
Round 1 :
Make 10 ch and join into a circle with a slst.
Round 2 :
Work 21 sc into the ring and join with a slst to the first stitch.
Round 3 :
Work the following sequence around the ring, adding a 1 ch space between every stitch: 2 ch, 1 hdc, 3 dc, 4 tc, 3 dc, 4 tc, 3 dc, 1 hdc, 1 sc.
Round 4 :
Work into the arches and loops: *2 sc into the ch-space, 1 sc into the loop of the PR*. rep this around until you have 56 sc.
Round 5 :
1 ch, turn, and work 56 sc using the BLO.
Round 6 :
1 ch, turn, and work another 56 sc in the BLO.
Round 7 :
Turn your work. 3 ch, 3 dc in the base loop, then *1 ch, skip 2 loops, 4 dc in the next loop*. rep this 19 times and join with a slst to the 3rd ch.
Round 8 :
Create the arch base: *1 sc in the 1 ch space of the PR, 5 ch*. rep this around and join with a slst to the first arch.
Round 9 :
Place 6 sc into every ch-5 arch around the wing.
Round 10 :
Finish the edge by working: *1 sc, 3 ch, 2 sc, 3 ch* rep this sequence all the way to the end.
Info :
Fasten off the thread. Hide the first tail in the center of the motif, but leave the second tail long enough to sew the wing to the body later.
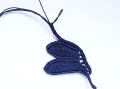
— 2. Big Right Wing :
Row 1 :
Crochet 43 sc over your 65cm length of 4-thread cord.
Row 2 :
Turn and work in BLO without the cord: 1 sc, 1 hdc, 1 dc, 15 tc, 5 dc, 1 hdc, 4 sc.
Row 3 :
Turn and work: 1 ch, 3 sc, 2 hdc, 17 dc, 2 hdc, 3 sc, then 1 sc over the cord.
Row 4 :
Turn and pick up the cord. Work 21 sc in BLO over the cord to attach it, then 1 sc over the cord by itself. Straighten the cord to align the wing.
Row 5 :
Turn and work 12 sc over the cord into the FLO to attach it, then work 8 sc over the cord only.
Row 6 :
Turn and work in BLO without the cord: 1 ch, 1 sc, 1 hdc, 1 dc, 10 tc, 5 dc, 1 hdc, 1 sc.
Row 7 :
Turn and work: 1 ch, 2 sc, 3 hdc, 4 dc, 7 tc, 1 dc, 1 hdc, 2 sc, then 1 sc over the cord only.
Row 8 :
Turn and work 16 sc in BLO over the cord. Drop the cord and create arches on the wing side: 1 sc, 2 ch, 1 hdc, 2 ch, *1 sc, 2 ch* rep twice, 1 hdc, 2 ch, 1 sc into the 3rd loop of the lower cord (6 arches total).
Row 9 :
Turn and work 3 sc in each arch. 1 sc into the first wing loop, then pick up the cord and work 11 sc in FLO over the cord, followed by 13 sc over the cord only.
Row 10 :
Turn and work in BLO without the cord: 1 ch, 1 sc, 1 hdc, 1 dc, 13 tc, 4 dc, 1 hdc, 1 sc.
Row 11 :
Turn and work: 1 ch, 2 sc, 1 hdc, 4 dc, 10 tc, 1 dc, 1 hdc, 3 sc, then 1 sc over the cord only.
Row 12 :
Turn and work 14 sc in BLO over the cord. Drop the cord and work arches: 1 sc, 2 ch, *1 hdc, 2 ch* rep once, *1 dc, 2 ch* rep 7 times, 1 hdc, 2 ch, 1 sc into the 3rd loop of the lower cord (11 arches total).
Row 13 :
Turn and work 3 sc in each arch. 1 sc into the first wing loop, then pick up the cord and work 8 sc in FLO over the cord, followed by 15 sc over the cord only.
Row 14 :
Turn and work in BLO without the cord: 1 ch, 1 sc, 1 hdc, 1 dc, 17 tc, 7 dc, 2 hdc, 2 sc.
Row 15 :
Turn and work: 1 ch, 4 sc, 3 hdc, 4 dc, 15 tc, 2 dc, 1 hdc, 2 sc, then 1 sc over the cord only.
Row 16 :
Turn and work 21 sc in BLO over the cord. Drop the cord and work arches: 1 sc, 2 ch, *1 hdc, 2 ch* rep 2 times, *1 dc, 2 ch* rep 9 times, *1 hdc, 2 ch* rep 1 time, 1 sc into the last loop of the lower cord (15 arches total).
Row 17 :
Turn and work 3 sc in each arch. 1 sc into the first wing loop, then pick up the cord and work 16 sc in FLO over the cord, followed by 11 sc over the cord only.
Row 18 :
Turn and work in BLO without the cord: 1 ch, 1 sc, 1 hdc, 1 dc, 16 tc, 3 dc, 4 hdc, 1 sc.
Row 19 :
Turn and work: 1 ch, 2 sc, 3 hdc, 5 dc, 13 tc, 1 dc, 1 hdc, 2 sc, then 1 sc over the cord only.
Row 20 :
Turn and work 26 sc in BLO over the cord. Drop the cord and work arches: 1 sc, 2 ch, *1 dc, 2 ch* rep 11 times, 1 dc, 1 sc (13 arches total).
Row 21 :
Turn and work 3 sc in each arch. 1 sc into the first wing loop, pick up the cord and work 24 sc in FLO over the cord, then 1 sc over the cord only.
Row 22 :
Turn and work sc in BLO over the cord until the end of the row. Fasten off the cord as it is no longer needed.
Row 23 :
Turn and work 1 slst into the 2nd loop, then sc in FLO until the lower end of the wing. Add 2-3 extra sc at the wing tips for shaping.
Row 24 :
Turn and work the border: *3 ch, 1 dc into the 2nd loop, 3-ch picot, 3 ch, 1 dc into the 2nd loop*. rep this around the entire wing, finishing with a slst about 0.5 cm before the end.
— 3. Big Left Wing :
Info :
Follow the instructions for the right wing exactly, but mirror the techniques: whenever the pattern says BLO, work in FLO instead, and vice versa. When making arches, leave the cord in front of the work rather than behind it.
— 4. Butterfly Body :
Round 1 :
Start with a magic ring. 1 ch and 6 sc into the ring. Join with a slst and pull tight. From here, work all stitches in the BLO.
Round 2 :
Work 1 row of 6 sc around.
Round 3 :
inc in every other stitch: (2 sc in next loop, 1 sc in next) rep around for a total of 9 sc.
Round 4 :
inc again: *1 sc, 2 sc in next* rep around until you have 13 sc.
Round 5 :
Work in a continuous spiral of 13 sc until the body is long enough to fit between the wings. Stuff the body lightly with fiberfill or thread scraps as you go.
Round 6 :
To shape the neck, dec by working: (2 unfinished sc joined together, 1 sc) rep until only 3 loops remain. To start the head, inc by working 2 sc in every loop until you reach 15 sc. Work 1 row of 15 sc, then dec by working pairs of sc together until the head is closed.
— 5. Antennae :
Right Antenna :
ch 20. slst into the 8th loop from your hook to form a tiny ring. Work slst anticlockwise around the ring, then slst back down the chain to the head. Join with a slst at the base.
Left Antenna :
ch 20. slst into the 8th loop from your hook. Work slst clockwise around the ring this time, then slst back down the chain to the head and join.
I am so incredibly proud of you for tackling this intricate project! There is something so special about Irish lace, and seeing it come together in this butterfly form is just magical. I hope you enjoyed the slow pace and the detailed work as much as I do. Don't forget to give your butterfly a gentle steam once you're done—it really makes those picots pop and brings the whole design to life. I can't wait to see where you decide to display your new handmade heirloom! 🧶🦋✨