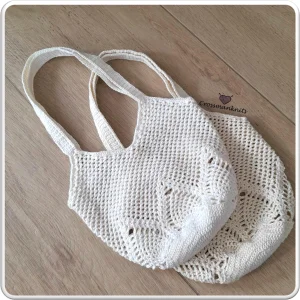
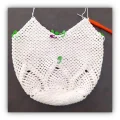
Get ready to create your new favorite accessory for the farmers' market or a sunny day at the beach. This pattern guides you through crafting a stunning tote featuring the classic, intricate pineapple lace motif. You will love how the delicate stitches come together to form a sturdy, expandable bag that is as functional as it is beautiful. It is the perfect project to practice your lace-work while making something truly useful for your daily adventures.
Progress Tracker
0% Complete
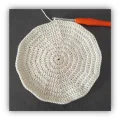
— 1. Circular Base :
Info :
The first dc of every round is made by working a ch2. To start an inc at the beginning of a round, ch2 and work 1 dc into the same st. Always close each round by working a sl into the first dc.
Round 1 :
Create a mr and work 12 dc into the center. (12)
Round 2 :
Work 1 inc in every st around. (24)
Round 3 :
Repeat (1 inc, 1 dc) 12 times. (36)
Round 4 :
Repeat (1 inc, 2 dc) 12 times. (48)
Round 5 :
Repeat (1 inc, 3 dc) 12 times. (60)
Round 6 :
Repeat (1 inc, 4 dc) 12 times. (72)
Round 7 :
Repeat (1 inc, 5 dc) 12 times. (84)
Round 8 :
Repeat (1 inc, 6 dc) 12 times. (96)
Round 9 :
Repeat (1 inc, 7 dc) 12 times. (108)
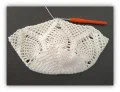
— 2. Pineapple Side Design :
Info :
For this section, the initial ch2 counts as a st. At the end of every round, sl into the first dc and then sl into the next ch1 space to position your hook for the next round.
Round 10 :
Repeat *(2 dc, ch1, 2 dc) into the 1st st, ch3, sk 3 sts, 1 sc into the 4th st, ch3, sk 4 sts, 9 tr into the 5th st, ch3, sk 4 sts, 1 sc into the 5th st, ch3, sk 3 sts* a total of 6 times.
Round 11 :
Repeat *(2 dc, ch1, 2 dc) into the ch1 space, ch3, (1 dc, ch1) into each of the 9 tr from the previous round, ch2* a total of 6 times.
Round 12 :
Repeat *(2 dc, ch1, 2 dc) into the ch1 space, (ch3, 1 sc into the ch1 space) 8 times, ch3* a total of 6 times.
Round 13 :
Repeat *(2 dc, ch1, 2 dc) into the ch1 space, (ch3, 1 sc into the ch3 loop) 7 times, ch3* a total of 6 times.
Round 14 :
Repeat *(2 dc, ch1, 2 dc, ch1, 2 dc) into the ch1 space, (ch3, 1 sc into the ch3 loop) 6 times, ch3* a total of 6 times.
Round 15 :
Repeat *(2 dc, ch1, 2 dc) into the first ch1 space, ch3, (2 dc, ch1, 2 dc) into the next ch1 space, (ch3, 1 sc into the ch3 loop) 5 times, ch3* a total of 6 times.
Round 16 :
Repeat *(2 dc, ch1, 2 dc) into the first ch1 space, ch3, 1 sc into the ch3 loop, ch3, (2 dc, ch1, 2 dc) into the next ch1 space, (ch3, 1 sc into the next ch3 loop) 4 times, ch3* a total of 6 times.
Round 17 :
Repeat *(2 dc, ch1, 2 dc) into the ch1 space, ch3, (1 sc into the ch3 loop, ch3) 2 times, (2 dc, ch1, 2 dc) into the next ch1 space, (ch3, 1 sc into the ch3 loop) 3 times, ch3* a total of 6 times.
Round 18 :
Repeat *(2 dc, ch1, 2 dc) into the ch1 space, ch3, (1 sc into the ch3 loop, ch3) 3 times, (2 dc, ch1, 2 dc) into the next ch1 space, (ch3, 1 sc into the ch3 loop) 2 times, ch3* a total of 6 times.
Round 19 :
Repeat *(2 dc, ch1, 2 dc) into the ch1 space, ch3, (1 sc into the ch3 loop, ch3) 4 times, (2 dc, ch1, 2 dc) into the next ch1 space, ch3, 1 sc into the ch3 loop, ch3* a total of 6 times.
Round 20 :
Repeat *(2 dc, ch1, 2 dc) into the ch1 space, ch3, (1 sc into the ch3 loop, ch3) 5 times, (2 dc, ch1, 2 dc) into the next ch1 space, ch3* a total of 6 times.
Round 21 :
Repeat *(2 dc, ch1, 2 dc) into the ch1 space, ch3, (1 sc into the ch3 loop, ch3) 6 times, (2 dc, ch1, 2 dc) into the next ch1 space, ch1* a total of 6 times.
Round 22 :
Repeat *2 dc into the ch1 space, ch3, (1 sc into the ch3 loop, ch3) 7 times, 2 dc into the next ch1 space, ch1* a total of 6 times.
— 3. Spiral Mesh Body :
Info :
From this point on, you will work in a continuous spiral. Do not slip stitch to join at the end of the rounds; simply continue working into the top of the loops from the previous round.
Round 23-41 :
Work ch3 and 1 sc into every ch3 loop all the way around for 19 rounds. You should maintain a total of 54 loops.
— 4. Shaping the Top Peaks :
Info :
Using 8 stitch markers, mark the start and end of 4 sections around the top. Ensure your last loop is aligned directly above a pineapple tip. Place markers in loops 1, 13, 14, 26, 27, 40, 42, and 54. You will work in rows between these markers.
Row 1 :
ch3, 1 sc into the next ch3 loop. Repeat this 12 times. Turn your work at the marker and sl into the first loop.
Row 2 :
ch3, 1 sc into the next ch3 loop. Repeat this 11 times. Turn and sl into the first loop.
Row 3 :
ch3, 1 sc into the next ch3 loop. Repeat this 10 times. Turn and sl into the first loop.
Row 4 :
ch3, 1 sc into the next ch3 loop. Repeat this 9 times. Turn and sl into the first loop.
Row 5 :
ch3, 1 sc into the next ch3 loop. Repeat this 8 times. Turn and sl into the first loop.
Row 6 :
ch3, 1 sc into the next ch3 loop. Repeat this 7 times. Turn and sl into the first loop.
Row 7 :
ch3, 1 sc into the next ch3 loop. Repeat this 6 times. Turn and sl into the first loop.
Row 8 :
ch3, 1 sc into the next ch3 loop. Repeat this 5 times. Turn and sl into the first loop.
Row 9 :
ch3, 1 sc into the next ch3 loop. Repeat this 4 times. Turn and sl into the first loop.
Row 10 :
ch3, 1 sc into the next ch3 loop. Repeat this 3 times. Turn and sl into the first loop.
Row 11 :
ch3, 1 sc into the next ch3 loop. Repeat this 2 times. Turn and sl into the first loop.
Row 12 :
ch3, 1 sc into the ch3 loop. Fasten off and leave a long tail for assembly. Repeat Rows 1-12 for the other 3 marked sections.
— 5. Durable Handles :
Row 1 :
Attach your yarn to a top loop of one peak. ch1, then work 4 sc into the loop. Turn.
Row 2-120 :
ch1, work 4 sc across the row, then turn. Repeat this until you have 120 rows total.
Row 121 :
Align the handle with the peak on the opposite side of the bag. Working from the inside, sl through each sc of the handle and into the top loop of the bag peak to join. Fasten off and repeat for the second handle on the remaining two peaks.
— 6. Finishing the Edges :
Info :
You will now tidy up the edges by working sc around the three main openings of the bag: the central mouth and the two spaces under the handles.
Final Round :
Work 1 sc into every row-end along the sides of the handles, and work 2 sc into every mesh loop along the bag's edge. Join with a seamless sl to the first sc and weave in all remaining yarn ends.
I really hope you enjoyed making this Pineapple Bag as much as I did! There is something so rewarding about seeing those intricate lace details come together to create something both beautiful and functional. Whether you take it to the market, the beach, or just use it to store your current yarn stash, it is sure to be a conversation starter. Don't forget to play around with colors—this looks amazing in bright ombres or even a moody forest green! I can't wait to see your finished versions. Keep crafting and spreading that handmade joy! 🧶✨