About This Bunny Booties Pattern
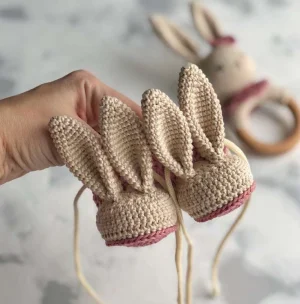
Perfect for creating a cherished family heirloom or a standout baby shower gift that everyone will coo over. They look absolutely gorgeous in neutral tones or soft pastel shades.
Ideal for those with basic crocheting experience, featuring slightly more advanced stitches and techniques to expand your skills.
Fits nicely into a free afternoon — 2 to 5 hours of focused, enjoyable crocheting.
An adorable friend to cherish, handcrafted with love to bring comfort and joy for years to come.
Perfect for creating a cherished family heirloom or a standout baby shower gift that everyone will coo over. They look absolutely gorgeous in neutral tones or soft pastel shades.
I absolute adore how quickly these work up while still looking incredibly detailed. The post stitches give the cuffs a gorgeous knit-like texture that is super stretchy and soft. Plus, sewing those little floppy ears on is pure joy—it is the exact moment the booties truly come to life!
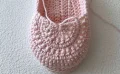
When I first sat down to design these little bunny booties, I wanted to create something that wasn't just cute, but also super practical. We all know how easily baby socks and slippers slip off those kicky little legs! That is why I added the woven drawstring tie around the ankle. It keeps them snug and secure, no matter how active your little one is.
If you want to customize these, there are so many fun directions you can go. Try using a contrasting color for the soles to make them pop, or use a fuzzy alpaca blend yarn for the ears to give them a soft, realistic texture. You could even skip the ears entirely and add tiny pom-poms or little bear ears instead! The possibilities are endless when you start playing with your yarn stash. I love seeing the creative spins our community puts on these classics.
Keep those tiny toes warm with the sweetest handmade baby slippers you will ever make. These darling booties feature soft, textured ribbing and the most adorable long bunny ears that stand up perfectly. They make a breathtaking gift for baby showers or a cozy addition to your own little one's wardrobe. You will love watching these take shape stitch by stitch.
The pattern is written for four sizes: 0-3 months, 3-6 months, 6-9 months, and 9-12 months. Stitch counts and chain starts are written in order as: 0-3m / 3-6m / 6-9m / 9-12m.
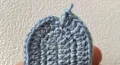
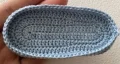
ch 19 / 22 / 25 / 28. Work 2 dc in the 4th ch from your hook. Work 1 dc in each of the next 14 / 17 / 20 / 23 sts. Work 6 dc in the very last chain stitch. Now, turn to work along the opposite side of your foundation chain. Work 1 dc in each of the next 14 / 17 / 20 / 23 sts. Work 3 dc in the final chain space. Join with a sl st to the top of your starting chain. (40 / 46 / 52 / 58)
ch 1 (this does not count as a stitch). Work 2 sc in the same stitch. Work 1 sc in the next stitch. Work 2 sc in the next stitch. Work 1 sc in each of the next 5 sts. Work 1 hdc in each of the next 2 sts. Work 1 dc in each of the next 7 / 10 / 13 / 16 sts. Work 2 dc in each of the next 6 sts. Work 1 dc in each of the next 7 / 10 / 13 / 16 sts. Work 1 hdc in each of the next 2 sts. Work 1 sc in each of the next 5 sts. Work 2 sc in the next stitch. Work 1 sc in the next stitch. Work 2 sc in the last stitch. Join with a sl st to your first sc of the round. (50 / 56 / 62 / 68)
ch 3 (counts as 1 dc). Work 1 dc in the same stitch. Repeat [1 dc in the next stitch, 2 dc in the next stitch] 2 times. Work 1 dc in each of the next 14 / 17 / 20 / 23 sts. Repeat [2 dc in the next stitch, 1 dc in the next stitch] 6 times. Work 1 dc in each of the next 14 / 17 / 20 / 23 sts. Work 2 dc in the next stitch. Repeat [1 dc in the next stitch, 2 dc in the next stitch] 2 times. Join with a sl st to the top of your starting ch 3. Do not cut your yarn. (62 / 68 / 74 / 80)
With the right side facing you, work this round by inserting your hook under the post of the dc from the previous round instead of the top loops. ch 1 (does not count as a stitch). Work 1 sc around each of the 62 / 68 / 74 / 80 double crochet posts. Join with a sl st in the first sc. (62 / 68 / 74 / 80)
ch 2 (does not count as a stitch). Work 1 dc in each of the next 62 / 68 / 74 / 80 sts. Join with a sl st in the first dc. (62 / 68 / 74 / 80)
ch 1 (does not count as a stitch). Work 1 sc in every stitch around. Join with a sl st in the first sc. Fasten off and cut your yarn after completing Round 4. (62 / 68 / 74 / 80)
If the baby has high arches or chubby feet, you can repeat the sc round (Round 3) 1 or 2 more times to create a taller sidepiece before moving on to the toe.
This section is worked back and forth in rows across the front of the bootie to shape the toe area.
With the wrong side facing you, join your yarn at the 16th / 17th stitch from the beginning of the round. ch 2, work 1 dc in the next stitch. Repeat [dc2tog] 15 / 17 times. (17 / 19)
ch 2, turn your work so the right side is facing. Work 1 dc in the next stitch. Repeat [dc2tog] 7 / 8 times. (9 / 10)
ch 2, turn your work so the wrong side is facing. Work dc7tog / dc8tog across the remaining stitches. Do not cut your yarn.
This section is worked back and forth in rows across the front of the bootie for the larger sizes.
With the wrong side facing you, join your yarn at the 18th / 19th stitch from the beginning of the round. ch 2, work 1 dc in the next stitch. Repeat [dc2tog] 19 / 21 times. (21 / 23)
ch 1, turn your work so the right side is facing. Work 1 sc in each of the next 20 / 22 sts. (20 / 22)
ch 2, turn your work so the wrong side is facing. Work 1 dc in the next stitch. Repeat [dc2tog] 9 / 10 times. (11 / 12)
ch 2, turn your work so the right side is facing. Work dc9tog / dc10tog across. Do not cut your yarn.
Continue working with the wrong side facing you. ch 2 (counts as 1 dc). Work 6 dc evenly across the horizontal stitches of the toe. Work 1 dc in each stitch along the main body of the bootie until you reach the other side of the toe. Work 5 dc in the horizontal stitches on this side of the toe. Join with a sl st to the top of your starting ch 2. (42 / 44)
ch 2. Repeat [*bpdc in the next stitch, fpdc in the next stitch*, repeat from * to * around, ending the round with a bpdc]. Join with a sl st to your starting chain. Fasten off, cut your yarn, and weave in all loose ends. (42 / 44)
Continue working with the wrong side facing you. ch 2 (counts as 1 dc), turn. Work 6 dc evenly across the horizontal stitches of the toe. Work 1 dc in each stitch along the main body of the bootie until you reach the other side of the toe. Work 7 dc in the horizontal stitches on this side of the toe. Join with a sl st to the top of your starting ch 2. (48 / 50)
ch 2. Repeat [*bpdc in the next stitch, fpdc in the next stitch*, repeat from * to * around, ending the round with a bpdc]. Join with a sl st to your starting chain. Fasten off, cut your yarn, and weave in all loose ends. (48 / 50)
Work the ears in a continuous spiral without joining at the end of each round. Use a stitch marker to track your starting stitch.
Work 6 sc inside a magic ring. (6)
Repeat [1 inc, 2 sc] 2 times. (8)
Repeat [1 inc, 3 sc] 2 times. (10)
Repeat [1 inc, 4 sc] 2 times. (12)
Repeat [1 inc, 5 sc] 2 times. (14)
Repeat [1 inc, 6 sc] 2 times. (16)
Repeat [1 inc, 7 sc] 2 times. (18)
Repeat [1 inc, 8 sc] 2 times. (20)
Work 1 sc in each of the 20 stitches around. (20)
Flatten the ear and work 9 sc through both layers to close the bottom edge. Fold this flat edge in half again and secure it with a few stitches using your tapestry needle. Fasten off, leaving a long yarn tail for sewing.
I hope you enjoy making these precious little booties as much as I do! There is nothing quite like seeing a finished pair of these tiny bunny slippers ready for a brand new baby. They are quick, incredibly satisfying to stitch, and guaranteed to bring smiles. Don't forget to share your finished projects with the community—happy crocheting! 🧶 ✨
You can use acrylic, but mercerized cotton is highly recommended because it holds its shape much better, provides superior stitch definition for the ribbing, and is breathable for tiny baby feet.
The secret is in the assembly! When sewing the ears to the cuff, stitch not only the bottom edge but also secure the lower back of the ears to the post stitches of the ribbing. This acts as a support brace.
Check your gauge first. If your stitches are too tight, try moving up half a hook size. Also, ensure you are using a sport or light DK weight yarn that matches the pattern specifications.
If the baby has chubby feet or high arches, you can easily repeat Round 3 of the sidepiece section one or two more times before beginning the toe shaping.
