🧶 Beautiful ✨ Detailed 💝 Adorable

Bunny Lovey Amigurumi Pattern

Bunny Lovey Amigurumi Pattern
4.1★Rating
6-7 HoursTime Needed
1.5KMade This
✂️

Intermediate Level

Ideal for those with basic crocheting experience, featuring slightly more advanced stitches and techniques to expand your skills.

⏱️

Weekend Treat

Takes 5-7 hours, making it an enjoyable project to finish over a couple of days.

🐰

Whimsical Buddy

Playful characters full of personality, designed to spark imagination and become cherished playtime favorites.

About This Bunny Lovey Amigurumi Pattern

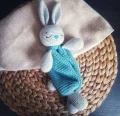
Bunny Lovey Amigurumi Pattern crochet pattern - detailed view

This lovey makes a heartwarming baby shower gift or a special addition to a toddler's bedroom. It’s designed to be easily held by tiny hands, making it a go-to for naptime cuddles and sensory play.

Why You'll Love This Bunny Lovey Amigurumi Pattern

I honestly fell in love with how the trouser legs transition into the main body—it's such a clever way to build the shape without a million separate seams. Plus, using bamboo yarn gives it a gorgeous drape that feels so high-end and soft against the skin, which is exactly what you want for a baby item.

Bunny Lovey Amigurumi Pattern step 1 Bunny Lovey Amigurumi Pattern step 2 Bunny Lovey Amigurumi Pattern step 3 Bunny Lovey Amigurumi Pattern step 4

Switch Things Up

I’ve always felt that loveys are the 'soul' of a nursery. There’s something about that transition from a solid amigurumi head into a soft, squishy body that just invites cuddles. When I first made this bunny, I was struck by how much the choice of yarn matters. I used a bamboo blend, and the way it hangs is just magical—it has this heavy, high-quality drape that you just don't get with standard acrylic.

If you’re feeling adventurous, you could definitely play with the colors. A soft sage green or a dusty rose would look stunning for the body. One little trick I discovered while working on the head: when you get to those final decrease rounds, use a wooden chopstick to really push the stuffing into the 'cheeks.' It helps define the shape before you close it up. Also, don't rush the face! The embroidery is what gives him that 'sleepy' personality. I like to spend a good twenty minutes just pinning the eyes and nose until they look perfectly peaceful. It’s those tiny details that turn a crochet project into a family heirloom.

Common Mistakes & How to Fix Them

✗ When joining the hind legs to the teal body at Row 4, make sure the legs are facing forward; otherwise, your bunny might look like it's walking backward!✗ The ears are sewn onto Round 4 of the head—if you place them too high or too low, the proportions will feel off, so use pins to check the balance first.✗ In Row 8 of the body, the connection between the two legs can be tricky; if you don't keep your tension tight at the join, you might end up with a small gap that stuffing can peek through.✗ For the nose embroidery, if you pull the teal thread too tight, it will pucker the face fabric—keep your stitches firm but gentle to maintain that smooth, rounded head shape.

Bunny Lovey Amigurumi Pattern

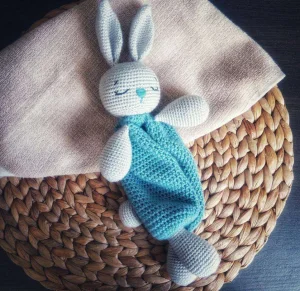
Imagine your little one drifting off to sleep with this soft, handmade bunny by their side. This lovey isn't just a toy; it's a comforting companion that combines the best of a plushie and a security blanket. You'll find the process of making those long ears and the cozy teal body so relaxing—it's the perfect project for a quiet evening when you want to create something truly special.

Intermediate 6-7 Hours

Materials Needed for Bunny Lovey Amigurumi Pattern

— Main Fabric

  • 01
    Approx. 100g of Himalaya Deluxe Bamboo yarn in soft gray (Color 124-19)
  • 02
    Approx. 100g of Himalaya Deluxe Bamboo yarn in teal blue (Color 124-24)
  • 03
    Black and teal blue embroidery floss for the facial details

— Tools Required

  • 01
    2.5 mm (B) crochet hook
  • 02
    3.0 mm crochet hook
  • 03
    Polyester fiberfill for stuffing
  • 04
    Steel sewing needle
  • 05
    Straight pins for positioning
  • 06
    Sharp scissors

Progress Tracker

0% Complete

— 1. Head :

Info :

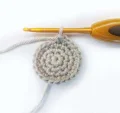
Using gray yarn and a 2.5 mm hook, work in a continuous spiral.

Round 1 :

6 sc into a magic ring (6)

Round 2 :

6 x inc (12)

Round 3 :

rep (1 sc, inc) 6 times (18)

Round 4 :

rep (2 sc, inc) 6 times (24)

Round 5 :

1 sc, rep (inc, 3 sc) 5 times, inc, 2 sc (30)

Round 6 :

rep (4 sc, inc) 6 times (36)

Round 7 :

2 sc, rep (inc, 5 sc) 5 times, inc, 3 sc (42)

Round 8 :

rep (6 sc, inc) 6 times (48)

Round 9 :

3 sc, rep (inc, 7 sc) 5 times, inc, 4 sc (54)

Round 10 :

rep (8 sc, inc) 6 times (60)

Round 11-20 :

60 sc (60)

Round 21 :

rep (8 sc, dec) 6 times (54)

Round 22 :

3 sc, rep (dec, 7 sc) 5 times, dec, 4 sc (48)

Round 23 :

rep (6 sc, dec) 6 times (42)

Round 24 :

2 sc, rep (dec, 5 sc) 5 times, dec, 3 sc (36)

Round 25 :

rep (4 sc, dec) 6 times (30)

Round 26 :

1 sc, rep (dec, 3 sc) 5 times, dec, 2 sc (24)

Info :

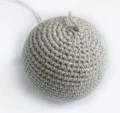
Begin stuffing the head firmly.

Round 27 :

rep (2 sc, dec) 6 times (18)

Round 28 :

rep (1 sc, dec) 6 times (12)

Round 29 :

6 x dec, sl st (6)

Info :

Finish stuffing. Use a needle to weave through the front loops of the last 6 stitches to close the hole. Pull the yarn tail out through Round 27.

— 2. Ears :

Info :

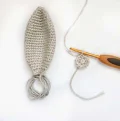
Make two using gray yarn and a 2.5 mm hook. Do not stuff.

Round 1 :

6 sc into a magic ring (6)

Round 2 :

6 x inc (12)

Round 3 :

12 sc (12)

Round 4 :

rep (1 sc, inc) 6 times (18)

Round 5 :

18 sc (18)

Round 6 :

rep (2 sc, inc) 6 times (24)

Round 7 :

24 sc (24)

Round 8 :

rep (3 sc, inc) 6 times (30)

Round 9-18 :

30 sc (30)

Round 19 :

rep (3 sc, dec) 6 times (24)

Round 20 :

24 sc (24)

Round 21 :

rep (2 sc, dec) 6 times (18)

Round 22 :

18 sc (18)

Round 23 :

rep (1 sc, dec) 6 times (12)

Round 24 :

Flatten the ear and work 6 sc through both thicknesses to close (6)

Info :

Fold the base of the ear in half again and sew across with 3 stitches using a needle. Leave a long tail for sewing.

— 3. Forelegs :

Info :

Make two using gray yarn and a 2.5 mm hook.

Round 1 :

6 sc into a magic ring (6)

Round 2 :

6 x inc (12)

Round 3 :

rep (1 sc, inc) 6 times (18)

Round 4 :

rep (2 sc, inc) 6 times (24)

Round 5 :

24 sc (24)

Round 6 :

rep (3 sc, inc) 6 times (30)

Round 7 :

30 sc (30)

Round 8 :

rep (4 sc, inc) 6 times (36)

Round 9-10 :

36 sc (36)

Round 11 :

rep (4 sc, dec) 6 times (30)

Round 12-14 :

30 sc (30)

Round 15 :

rep (3 sc, dec) 6 times (24)

Round 16-18 :

24 sc (24)

Round 19 :

rep (2 sc, dec) 6 times (18)

Round 20-22 :

18 sc (18)

Info :

Stuff the leg. Flatten the top and work 9 sc through both layers to close. Leave a long tail.

— 4. Hind Legs :

Info :

Make two using gray yarn and a 2.5 mm hook.

Round 1 :

6 sc into a magic ring (6)

Round 2 :

6 x inc (12)

Round 3 :

rep (1 sc, inc) 6 times (18)

Round 4 :

rep (2 sc, inc) 6 times (24)

Round 5 :

rep (3 sc, inc) 6 times (30)

Round 6 :

30 sc (30)

Round 7 :

rep (4 sc, inc) 6 times (36)

Round 8-10 :

36 sc (36)

Round 11 :

14 sc, dec, 1 sc, dec, 1 sc, dec, 14 sc (33)

Round 12 :

33 sc (33)

Round 13 :

12 sc, dec, 1 sc, dec, 1 sc, dec, 13 sc (30)

Round 14 :

30 sc (30)

Round 15 :

rep (3 sc, dec) 6 times (24)

Round 16-18 :

24 sc (24)

Round 19 :

rep (2 sc, dec) 6 times (18)

Round 20-22 :

18 sc (18)

Info :

Fasten off with a sl st and stuff the leg.

— 5. Tail :

Round 1 :

6 sc into a magic ring (6)

Round 2 :

6 x inc (12)

Round 3 :

rep (1 sc, inc) 6 times (18)

Round 4 :

rep (2 sc, inc) 6 times (24)

Round 5 :

rep (3 sc, inc) 6 times (30)

Round 6-9 :

30 sc (30)

Round 10 :

rep (3 sc, dec) 6 times (24)

Round 11 :

rep (2 sc, dec) 6 times (18)

Round 12 :

rep (1 sc, dec) 6 times (12)

Round 13 :

6 x dec, sl st (6)

Info :

Stuff firmly and leave a tail for sewing.

— 6. Body — Trouser Legs :

Info :

Start with teal yarn and a 2.5 mm hook. These rows are joined with a sl st.

Row 1 :

6 sc in magic ring, sl st to join (6)

Row 2 :

ch, 6 x inc, sl st (12)

Row 3 :

ch, rep (1 sc, inc) 6 times, sl st (18)

Info :

Insert a stuffed hind leg into this teal piece to join them.

Row 4 :

ch, 18 x inc (work through both the teal piece and the leg), sl st (36)

Info :

Switch to a 3.0 mm hook.

Row 5-7 :

ch, 36 hdc, sl st (36)

Info :

Fasten off for the first leg. Repeat Rows 1-7 for the second leg, but do not cut the yarn.

— 7. Body — Main Section :

Row 8 :

Connect the legs: ch, work 17 hdc on the current leg, 1 hdc at the join, 35 hdc around the first leg, 1 hdc at the second join, then 17 hdc to finish. sl st (72)

Row 9-27 :

ch, 72 hdc, sl st (72)

Row 28 :

ch, rep (6 hdc, dec) 9 times, sl st (63)

Row 29 :

ch, 63 hdc, sl st (63)

Row 30 :

ch, rep (5 hdc, dec) 9 times, sl st (54)

Row 31 :

ch, 54 hdc, sl st (54)

Row 32 :

ch, rep (4 hdc, dec) 9 times, sl st (45)

Row 33 :

ch, 45 hdc, sl st (45)

Row 34 :

ch, rep (3 hdc, dec) 9 times, sl st (36)

Row 35 :

ch, rep (2 hdc, dec) 9 times, sl st (27)

Row 36 :

ch, rep (1 hdc, dec) 9 times, sl st (18)

Row 37 :

ch, 9 x dec (using hdc), sl st (9)

Info :

Fasten off and leave a tail. Weave through the last stitches to close the neck hole.

Assembly Instructions

  • Join the head to the body at the neck opening, lining up the 18 stitches on each piece and securing them firmly with a needle.
  • Position the forelegs on either side of the body, just one row below the head join, and sew them across using 9 stitches.
  • Attach the ears to Round 4 of the head, leaving a space of about 9 stitches between them to give the bunny its classic floppy look.
  • Use teal floss to embroider a small triangular nose between Rounds 16 and 17 of the head, then add a simple vertical line for the mouth.
  • With black thread, stitch two sleepy, curved eyes on either side of the nose to complete the peaceful expression.
  • Finally, attach the tail to the back of the body, centering it so the bunny can sit comfortably.

Important Notes

  • 💡Use a smaller hook than recommended for the yarn to ensure your stitches are tight enough to keep the stuffing hidden.
  • 💡This pattern uses a spiral technique for the head and limbs, so a stitch marker is your best friend for keeping track of your rounds.
  • 💡When stuffing the limbs, leave the very top section slightly less full so they lay flat against the body when sewn.
  • 💡The body uses a joining technique for the legs—read the instructions for Row 8 carefully before you start to ensure the legs are aligned.
  • 💡For the body section, we switch to a larger 3.0 mm hook to give the fabric a softer, more blanket-like drape.

There is something so special about finishing a lovey like this. As you weave in those last few ends, you can really feel the personality of the bunny coming through. I hope this little guy brings as much joy to your home as he did to mine during the making process. Don't forget to take a photo of your finished work—I'd love to see the colors you chose! Happy crocheting, and enjoy every stitch of your new handmade friend. 🧶 ✨
You ask,

we answer.

FAQs

Can I use cotton yarn instead of bamboo?

Yes! Cotton will give the bunny a more structured, matte look, while bamboo provides a silkier feel and more drape for the body section.

What if I don't have a 3.0 mm hook for the body?

You can use the 2.5 mm hook throughout, but the body will be slightly smaller and less 'floppy' than the original design intended.

Is the tail stuffed?

Yes, the tail should be stuffed firmly to help it keep its round shape, unlike the ears which are left flat.

How do I make the eyes look even?

Use sewing pins to mark the start and end points of each eye before you start embroidering with the black thread; it helps prevent a lopsided expression!